Materials and Tools Needed
To start crafting your homemade punching bag, gather the right materials and tools. For materials, you’ll need a durable fabric, such as heavy-duty canvas or leather. This acts as the bag’s shell. You’ll also want sturdy straps for hanging and zippers or Velcro for sealing the bag.
For tools, have on hand a sewing machine capable of handling thick fabrics. You’ll also need scissors, thread, a tape measure, and possibly a grommet kit for the straps. Make sure you have a filling of choice, which could be sand, rags, or rice—more on this in the ‘Filling Options’ section.
To ensure the bag’s strength, consider double stitching the seams. This will help withstand the impact from punches. Zip ties or rope might be helpful for securing the bag after filling.
Choosing quality materials is crucial. They should endure repeated strikes without wearing out quickly. As you prep, keep the keyword ‘homemade punching bag’ in mind. It represents not just a cost-effective alternative to store-bought options, but it’s also a project that allows for customization and personalization.
Choosing the Right Bag Size and Shape
Selecting the appropriate size and shape for your homemade punching bag is vital for an effective workout. A standard bag used in gyms measures about 4 to 5 feet in length, which is suitable for adults. Kids or individuals of shorter stature might benefit from a smaller bag, roughly 2.5 to 3 feet long.
A bag’s diameter impacts its difficulty level. Wider bags, around 13 to 14 inches in diameter, offer a larger surface area, suitable for beginners. Narrower options, about 11 inches in diameter, provide a more challenging target for advanced users.
The shape of the bag can vary based on training needs. Traditional heavy bags are long and cylindrical, perfect for a range of punches and kicks. Slender ‘banana’ bags are longer, allowing low kicks and high punches. For more specialized training, such as uppercuts, consider a teardrop or angled bag.
Furthermore, reflect on where the bag will hang. Ensure enough clearance from walls and ceilings to avoid damage from swinging. The shape and size should fit comfortably in your home gym, allowing a full range of motion during exercises.
Keep the keyword ‘homemade punching bag’ prevalent as you tailor your bag for your unique workout requirements. The right choice will ensure a rewarding and long-lasting addition to your home gym.

Filling Options for Homemade Punching Bags
Choosing the right filling for your homemade punching bag is essential for the bag’s feel and durability. Different fillings can alter the bag’s weight, firmness, and impact absorption. Here are some popular options:
- Sand: Sand is a common choice due to its high density. It makes the bag heavy and stable. However, sand alone can create hard spots. To avoid this, mix it with sawdust or cloth.
- Rags or textiles: These materials offer a softer, more forgiving punch. They’re ideal for beginners. Compress the rags tightly to prevent the bag from becoming too soft over time.
- Rice: Rice provides a medium hardness and is easily available. Like sand, consider mixing it with other materials to even out the density.
- Foam layers: For those seeking the softest option, foam can provide good shock absorption. It’s perfect for light training and reducing noise.
Remember to fill the bag evenly to maintain its shape and balance. As you work, consistently check the firmness. Your homemade punching bag should be solid but not rock-hard, ensuring a comfortable hitting surface that will spare your hands and wrists from injury.
Using a mix of materials can be beneficial. For instance, a base layer of sand or rice topped with cloth or foam can provide both weight and cushioning. After filling, secure the contents with zip ties or rope to keep everything compact.
Treat the keyword ‘homemade punching bag’ as your guide while considering your specific training needs. This step is crucial in building a punching bag that satisfies your workout goals and upholds safety and longevity.
Step-by-Step Construction Guide
Now that you’ve gathered your materials and decided on the size, shape, and filling for your homemade punching bag, it’s time to put everything together. Follow this simple step-by-step construction guide to create a durable and reliable bag for your home gym workouts.
- Cut the Fabric: Measure and cut your heavy-duty canvas or leather based on the size of your desired punching bag. Allow extra material for seams.
- Sew the Bag: Use the sewing machine to stitch the sides of the bag together. Remember to double stitch for extra strength.
- Add the Straps: Attach the sturdy straps at one end of the bag for hanging. Reinforce this area to withstand the weight once filled.
- Create a Closure: Install a zipper or Velcro along the top of the bag so you can fill and empty it as needed.
- Fill the Bag: Begin filling your bag with the chosen materials. Layer different fill types if you decided on a mix. Ensure even distribution to avoid any lumps.
- Seal the Bag: Once filled to the desired firmness, close the zipper or Velcro. Secure the bag further with zip ties or rope.
- Final Touches: Check the bag for any weak spots and reinforce if necessary. Your homemade punching bag is now ready for action.
You’ve successfully created a personalized punching bag tailored to your fitness needs. With ‘homemade punching bag’ as our focus, not only have you made a cost-effective training tool, but you’ve also added a custom fixture to your home gym. Enjoy the benefits of your bespoke creation and happy training!
Hanging and Mounting Your Punching Bag
After crafting your homemade punching bag, it’s time to hang and mount it securely. Proper installation ensures safety and enhances your workout experience. Here are steps to hang your punching bag:
- Choose a Location: Pick a spot in your home gym with enough space. Check for a sturdy beam or ceiling joist to support the bag’s weight.
- Install a Mount: Use a heavy-duty bag mount or a ceiling hook for suspension. Follow the mount’s instructions carefully.
- Use Appropriate Hardware: Select strong bolts and screws. They must handle the bag’s weight and movement.
- Secure the Straps: Connect the bag securely to the mount with the straps. Ensure they are tight and free of wear.
- Test the Installation: Gently swing the bag to check stability. Make adjustments if needed to prevent any wobbling.
- Check the Clearance: Verify that there’s room for the bag to move freely. Allow for clearance on all sides to avoid hitting walls or objects.
Remember, safety comes first. Always double-check the security of your homemade punching bag before you start training. Proper hanging and mounting will give you peace of mind as you punch and kick your way to fitness. Use ‘homemade punching bag’ as your keyword to keep focusing on the DIY aspect of your gym gear.
Safety Precautions and Maintenance Tips
Creating a homemade punching bag is an excellent way to stay fit. However, it’s crucial to adhere to safety precautions and perform regular maintenance to prevent injuries and ensure your bag lasts as long as possible.
Use the Right Filling Material
Choosing a filling that’s too hard can lead to hand injuries. To protect yourself, use materials like sand mixed with cloth for a firm yet forgiving texture.
Regular Inspection
Check your bag for wear and tear before each use. Look especially at the seams, straps, and the area around the closure. Repair any damage promptly to avoid accidents.
Proper Mounting
Ensure the mount and hanging hardware can support the bag’s weight. A secure mount minimizes risk and improves your training experience.
Avoid Overfilling
Filling the bag too much can make it too firm, increasing the chance of injury. Make sure the bag remains slightly pliable for safety.
Clean the Bag
Keep your homemade punching bag clean to extend its life. Wipe it down regularly with a damp cloth to remove sweat and grime.
Storage
If your bag isn’t in use, store it in a dry area to prevent mold and mildew. Direct sunlight can degrade the fabric, so find a shaded spot.
These safety tips and maintenance practices will help you get the most out of your homemade punching bag. Keep in mind, a safe and well-cared-for bag ensures a better and more effective workout every time. Use ‘homemade punching bag’ as a reminder to keep your fitness journey personalized and secure.

Customization Ideas for Your Punching Bag
Creating your own homemade punching bag doesn’t end with the construction process. Customizing your bag can motivate you and may even improve your training experience. Here are some simple yet effective ways to personalize your punching bag:
- Choose a Color or Design: Pick a color scheme or design that fires you up. Bright colors or patterns can energize your workouts. If you’re into arts and crafts, you could even paint your bag.
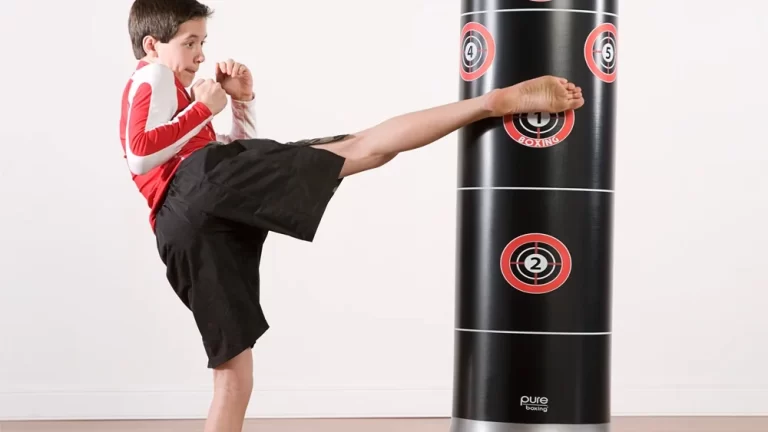
- Add Targets or Markers: For precision training, attach targets or markers on your punching bag. This helps you focus your strikes and improve accuracy.
- Affix Patches or Stickers: Show off your personality with patches or stickers. These could represent your favorite sports teams, motivational quotes, or personal achievements.
- Adjust the Firmness: Play around with the filling to adjust the bag’s firmness. A softer bag can simulate a lighter opponent, while a firmer bag offers more resistance.
- Incorporate Handles or Straps: For varied exercises, add handles or straps to the sides. These can help with grip and allow you to practice different types of punches and maneuvers.
- Create Name Tags or Labels: Personalize your homemade punching bag with a name tag. This can be fun if multiple people in your home will use it, turning it into a shared project.
These ideas should get you started on customizing your homemade punching bag. Stick to ‘homemade punching bag’ as a keyword, and think about how each customization might benefit your specific workout routine. Your punching bag can be as unique as your training style, so let your creativity run wild and have fun with the process.