Engaging Toddler: Benefits of Punching Bag Activities for Toddlers

Benefits of Punching Bag Activities for Toddlers

Introducing a toddler punching bag into playtime offers many benefits. For little ones, it’s not just about having fun. Here are key advantages of including punching bag activities in your toddler’s routine:


  • Physical Development: Engaging with a punching bag helps toddlers improve their gross motor skills. It boosts their strength, coordination, and balance.
  • Energy Release: Toddlers have lots of energy. Hitting a punching bag provides a healthy outlet for them to express themselves and burn off some steam.
  • Stress Relief: Even toddlers experience stress. Punching a bag can be a great way for them to relieve frustration and regulate emotions.
  • Confidence Building: When a toddler learns how to hit a punching bag properly, it can foster a sense of accomplishment and boost their self-esteem.
  • Enhanced Focus: Punching bag sessions can help increase concentration. Toddlers learn to focus on a target and improve their attention span.
  • Social Skills: Sharing a punching bag with siblings or friends teaches toddlers about taking turns and cooperating.
  • Fun Exercise: A punching bag activity can be a more exciting form of exercise, keeping toddlers engaged and happy while they’re moving.

With these significant benefits, punching bag activities can support a toddler’s overall development and provide a versatile addition to playtime. Let’s ensure that we choose the right equipment and establish a safe environment to maximize these advantages for our little ones.

Selecting the Right Punching Bag for Your Toddler

Choosing the best toddler punching bag takes careful consideration. Here’s what to keep in mind:

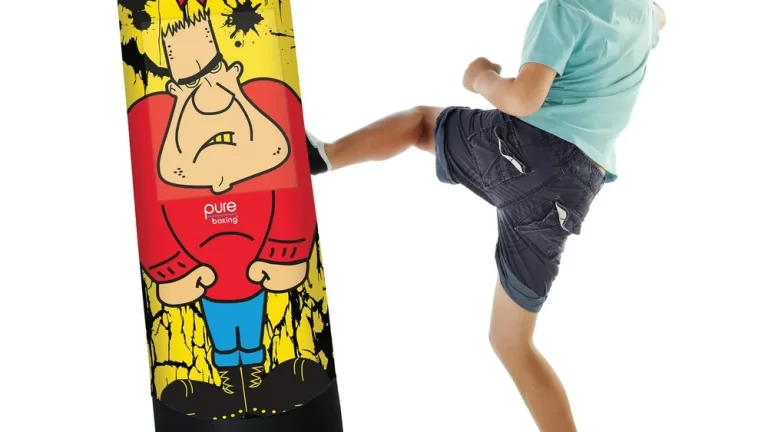
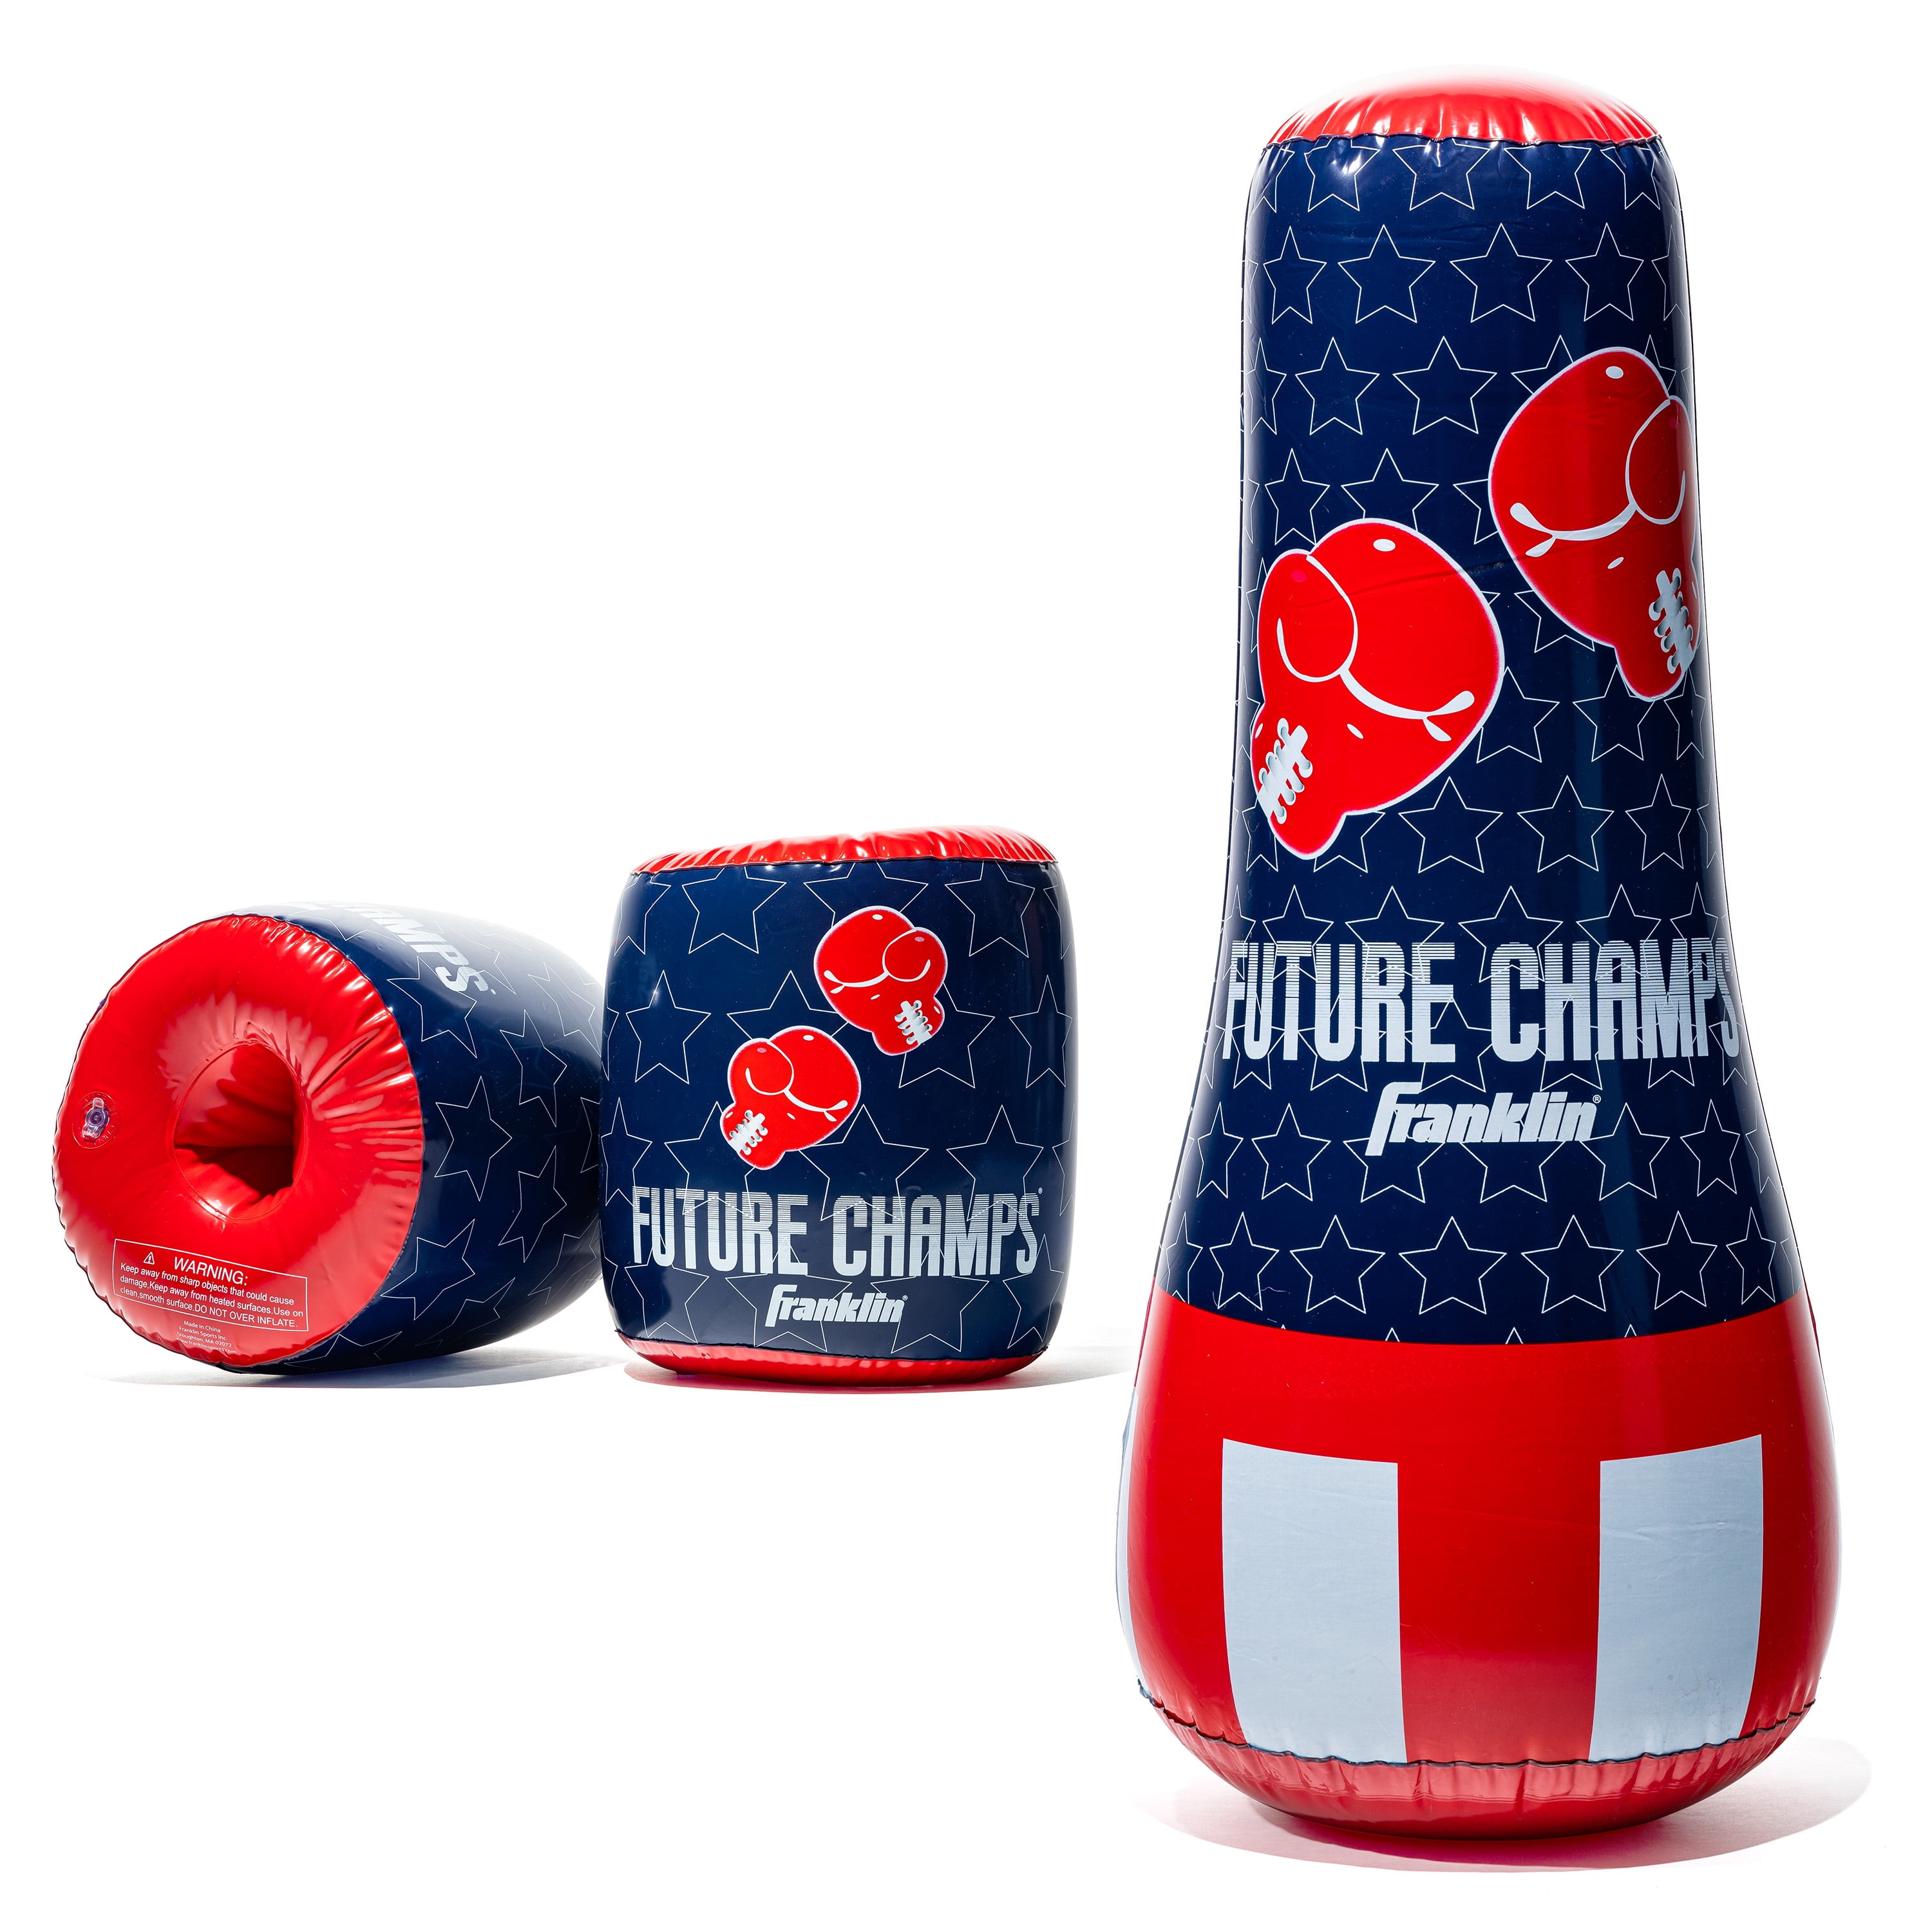
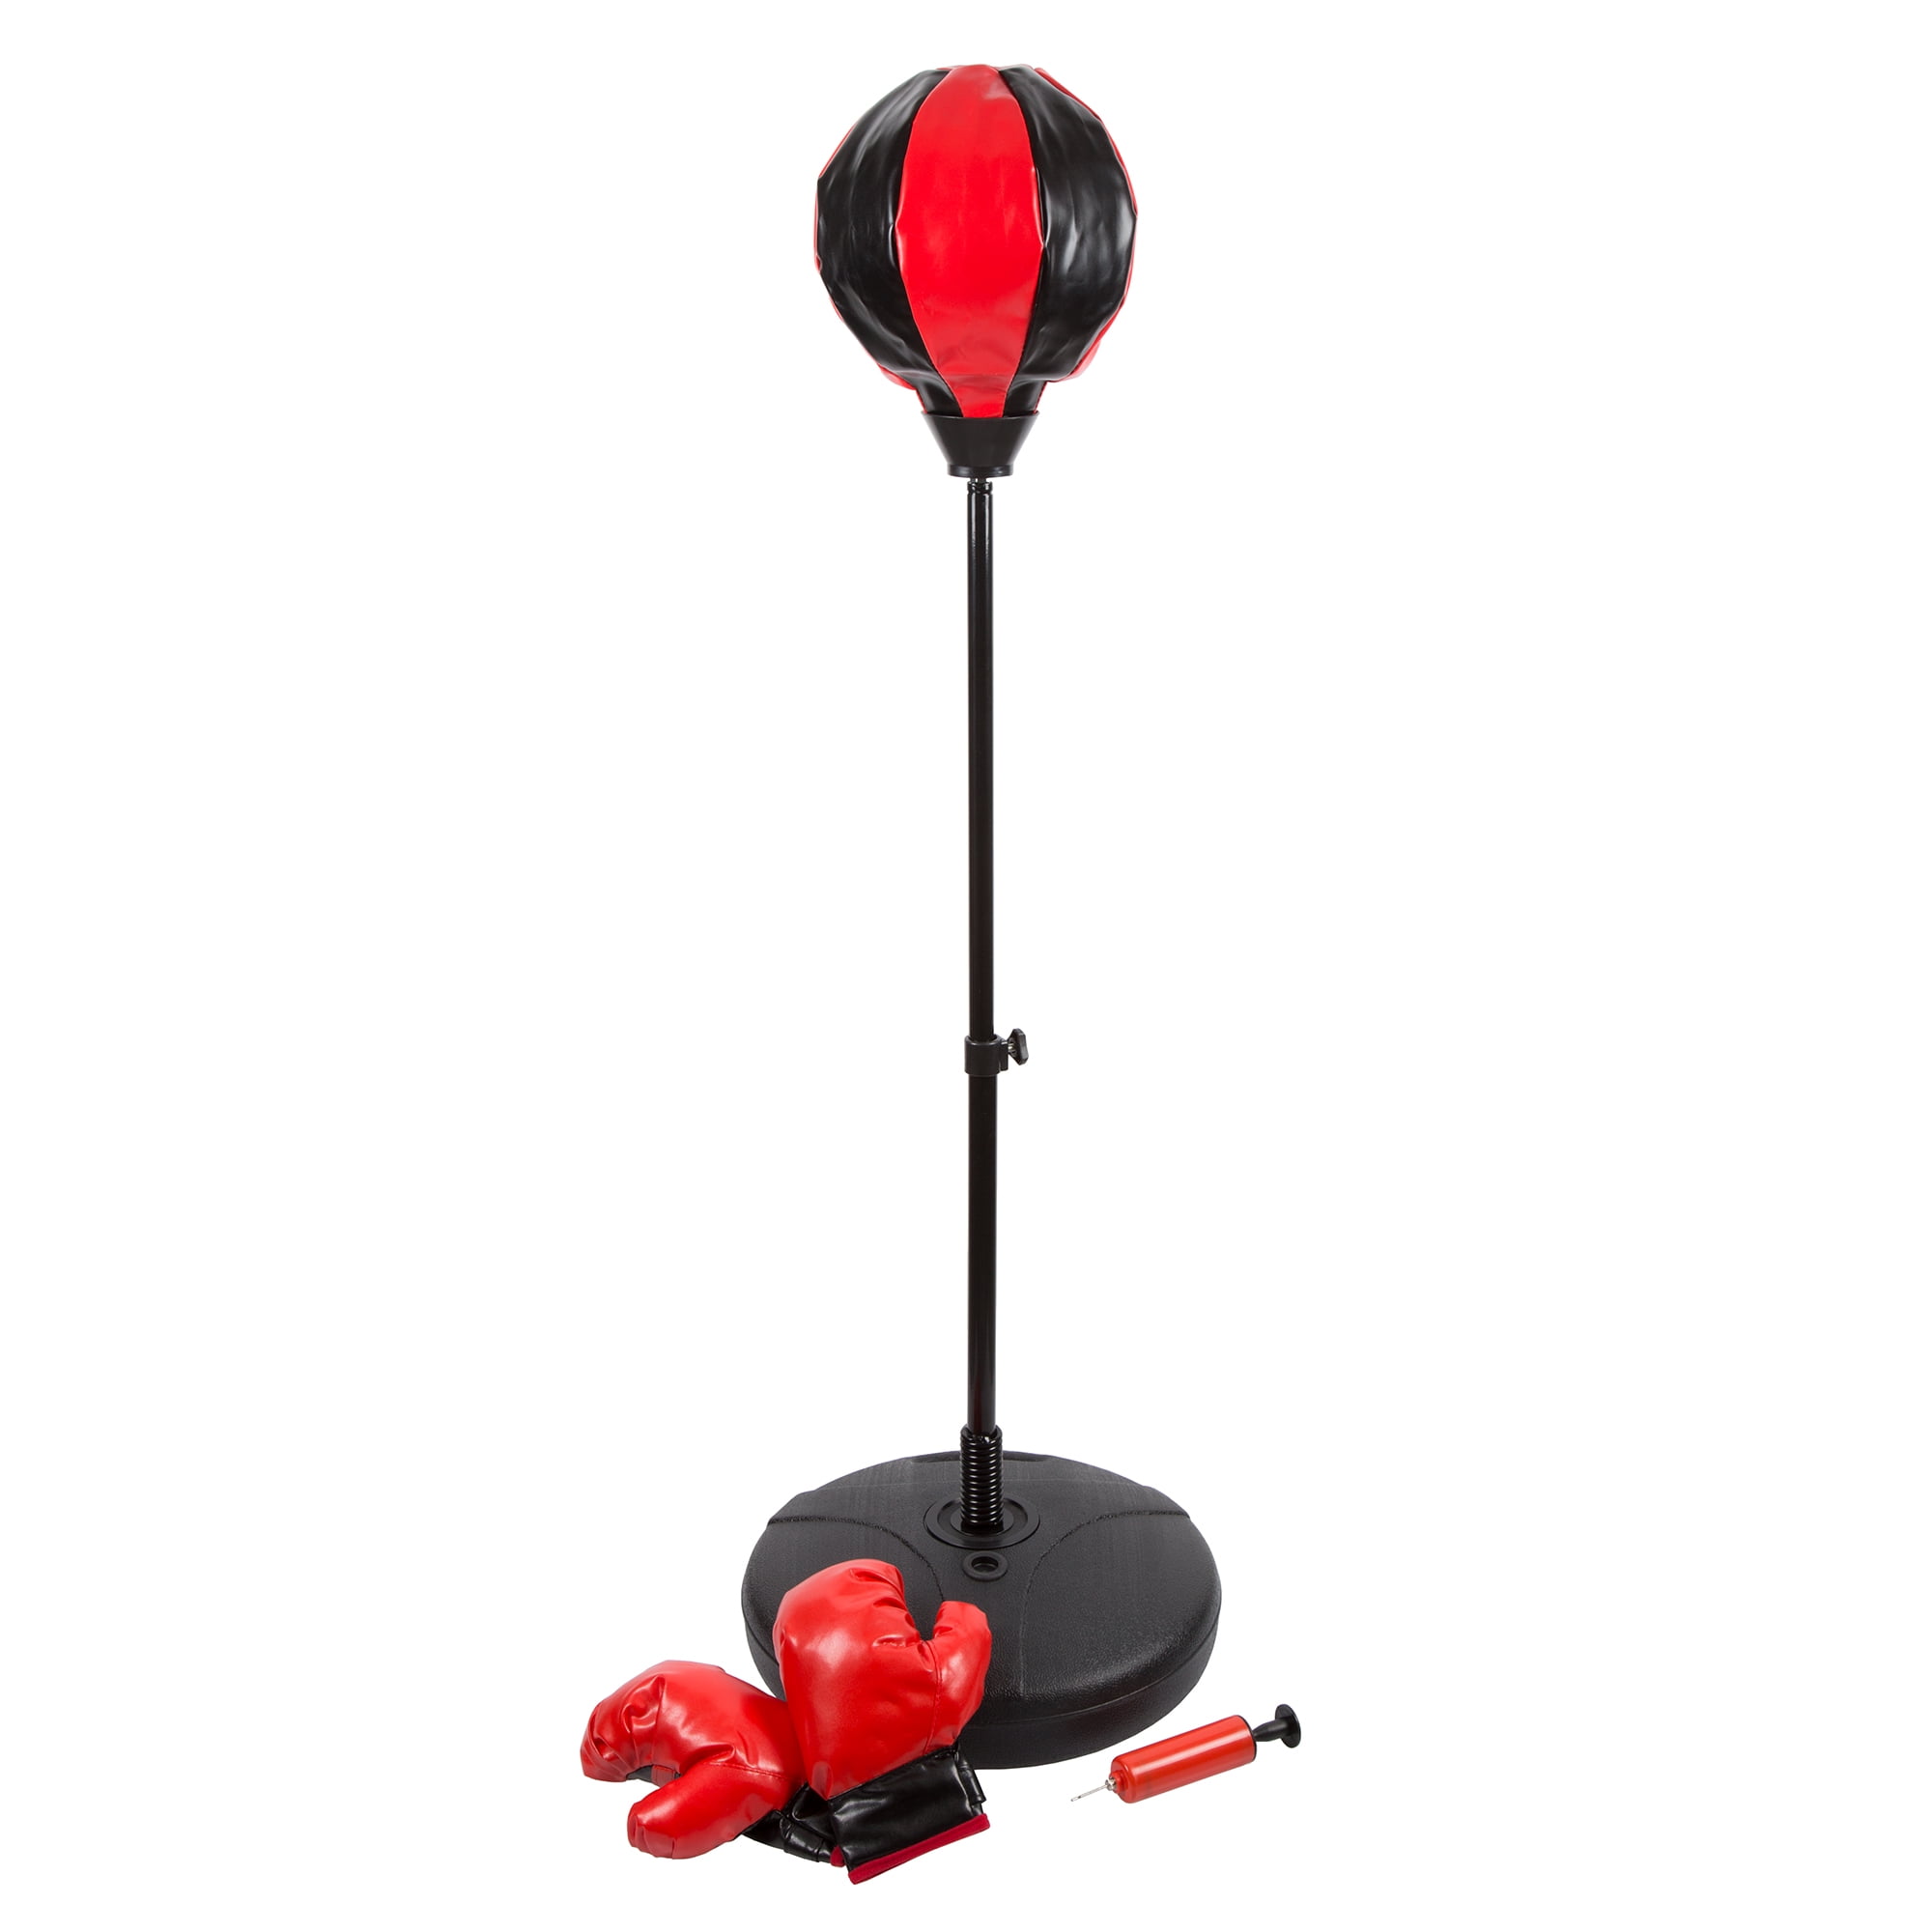
  • Size: Pick a bag that suits your toddler’s height and reach. It should be low enough for them to hit comfortably without having to reach up too high.
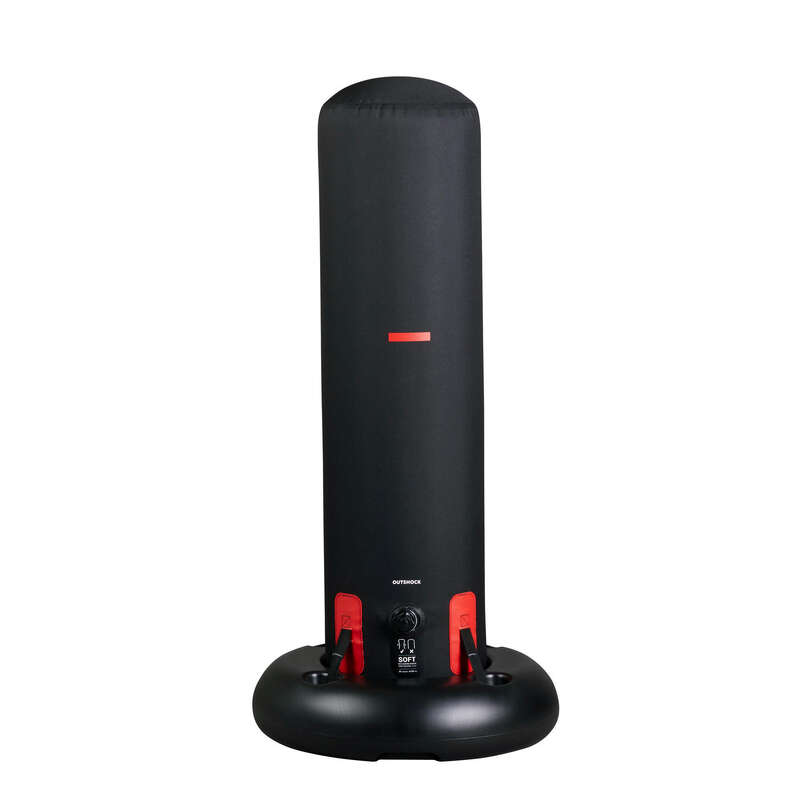
  • Weight: Go for a lighter bag that is easy for your toddler to push and punch without tipping over. A heavy bag could be dangerous and discourage them from playing.
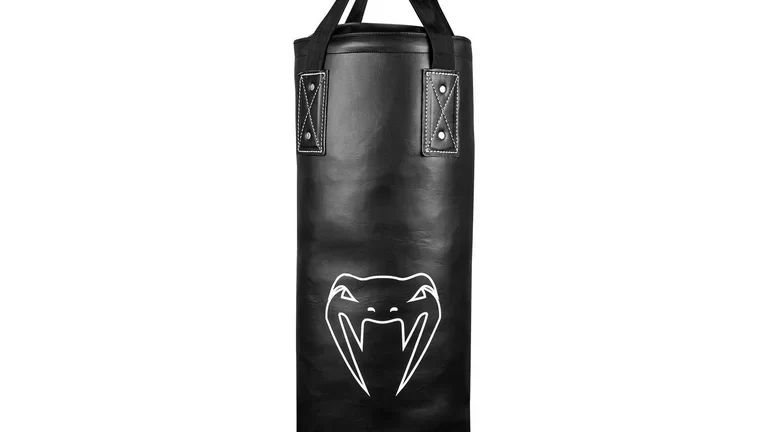
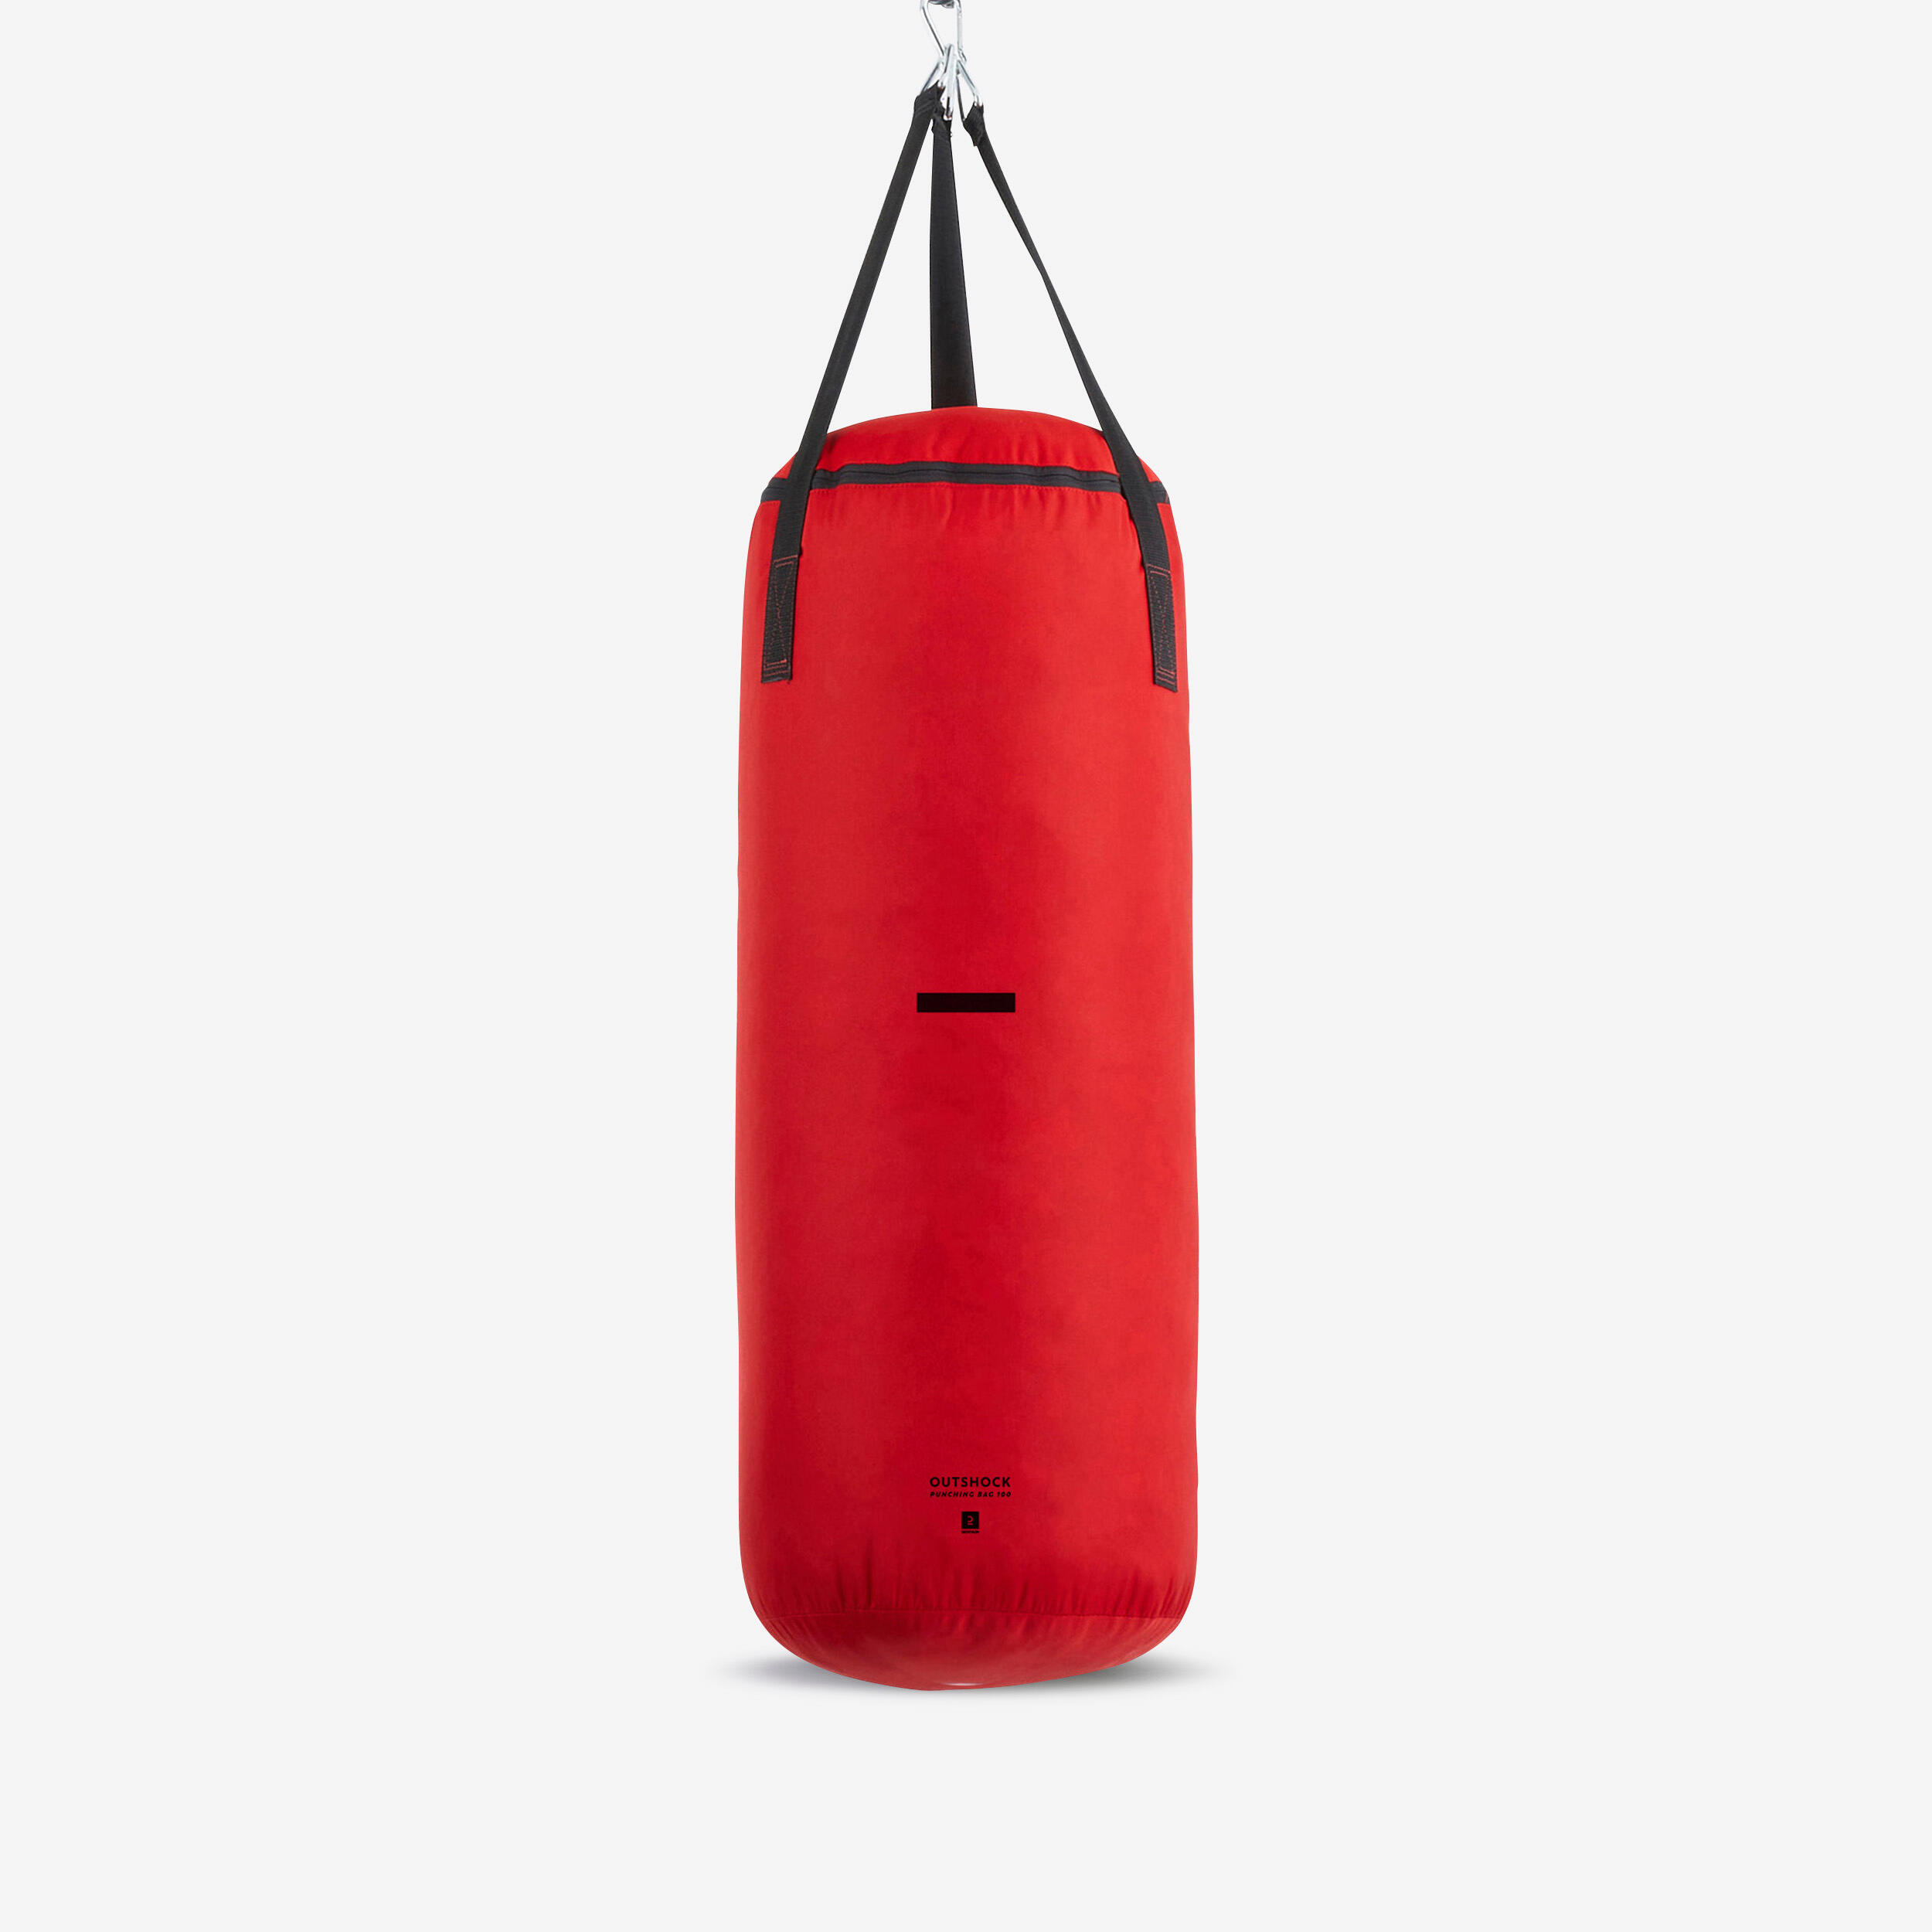
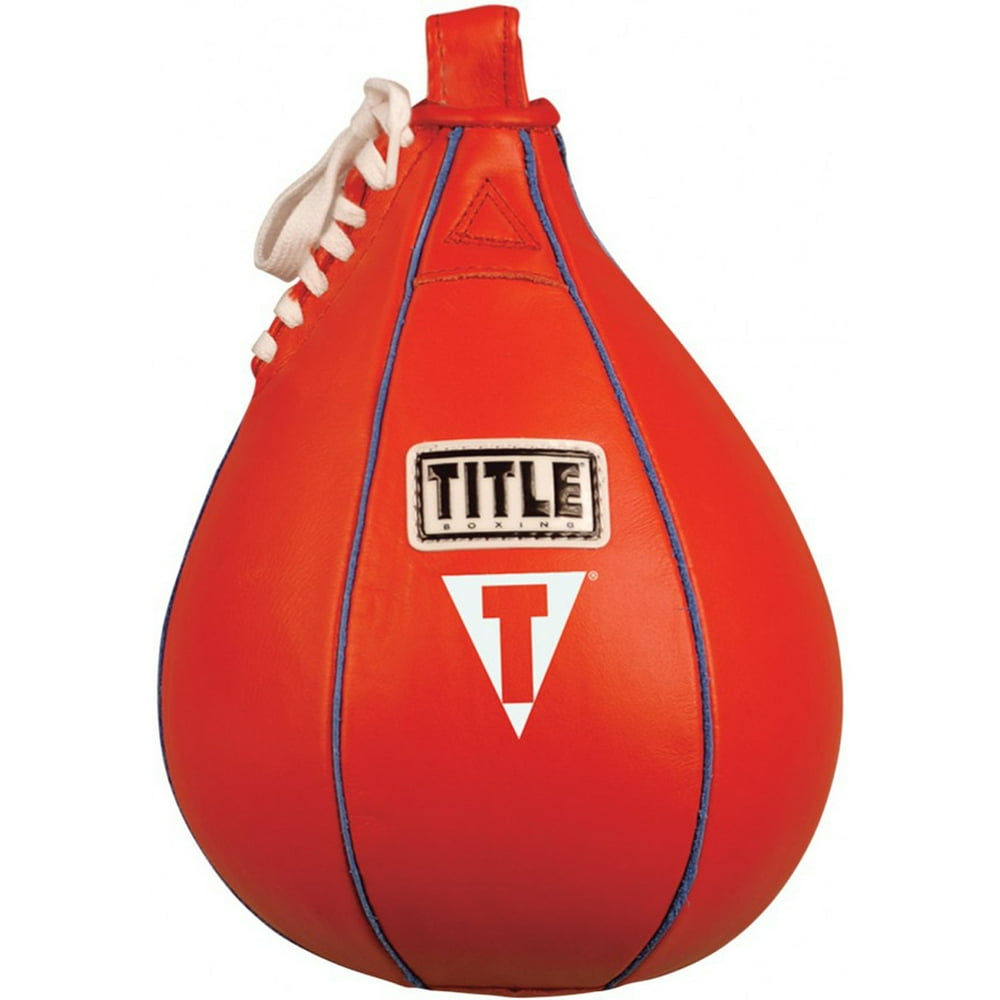
  • Material: Look for a punching bag made from durable, high-quality materials. It should withstand repeated use and be easy to clean.
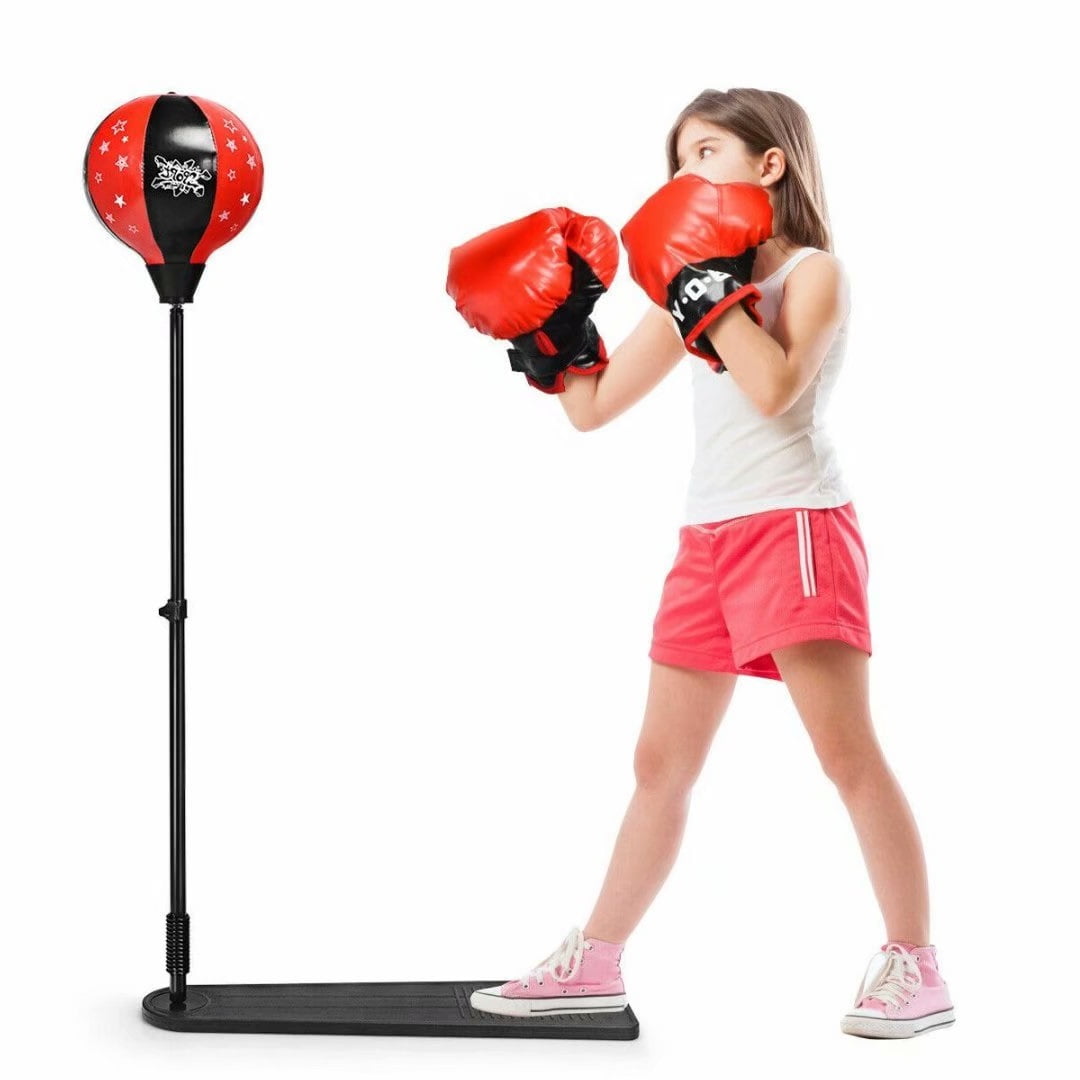
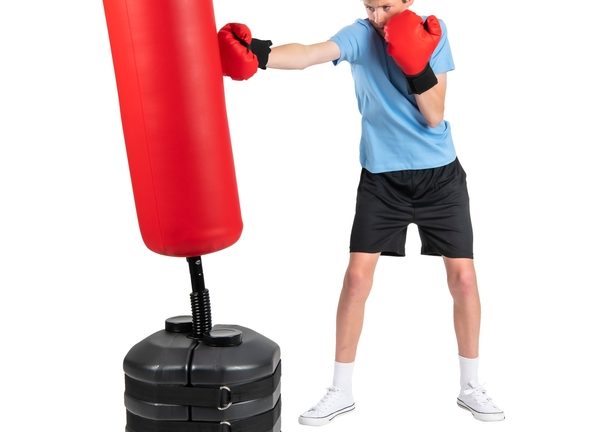
  • Stability: Ensure the bag has a stable base. It shouldn’t tip over easily, to avoid injury.
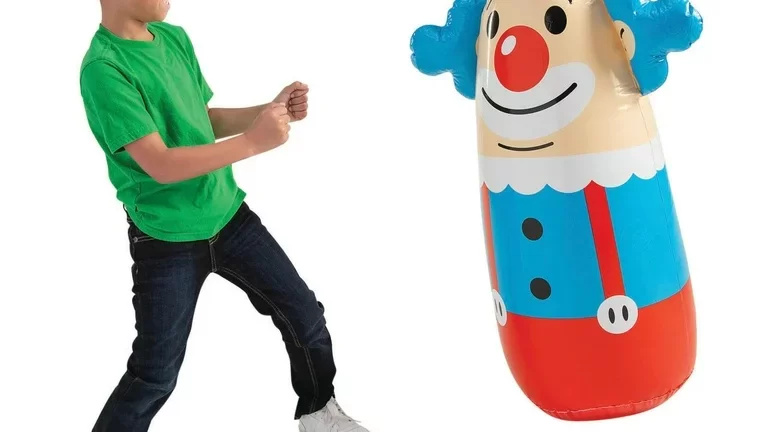
  • Design: Bright colors and fun shapes can make the punching bag more appealing to your toddler. Choose a design that excites them and makes them want to play.
  • Safety Features: Safety is key. Select a bag with no sharp edges or hard parts. Soft, well-padded bags are ideal to prevent any bumps or bruises.

After making your decision, test the punching bag with your toddler to see if it’s the right fit. They should be able to hit the bag with ease and enjoy the activity. Adjust your choice as needed until you find the perfect match for your toddler’s fun and development.

toddler punching bag

Safety Tips for Toddler Punching Bag Play

When introducing toddler punching bag activities, safety must be our top priority. It’s vital to create a secure environment where toddlers can enjoy punching bag play without risk. Here are crucial tips to ensure your little one’s safety:

  • Supervision is Key: Always watch your toddler during punching bag play. Don’t leave them unattended even for a moment.
  • Clear the Area: Make sure the space around the punching bag is clear. Remove any sharp objects or hard toys that may cause injury.
  • Soft Flooring: Place mats or soft flooring beneath the punching bag. This helps cushion any falls and prevents bumps.
  • Explain the Rules: Guide your toddler on how to use the punching bag safely. Teach them not to swing or hang on the bag.
  • Proper Equipment: Dress your toddler in appropriate gear. This includes tight-fitting clothes without strings or loops.
  • Hand Protection: Consider lightweight gloves or hand wraps for extra protection. Ensure they fit your toddler’s hands comfortably.
  • Regular Checks: Inspect the punching bag and surrounding area before play. Look for any potential hazards or signs of wear and tear.

By following these safety tips, you can help your toddler have a fun and safe experience with their punching bag activities. Remember, prevention is better than cure, so always be proactive about safety.

Creative Punching Bag Games for Toddlers

Introducing toddlers to creative punching bag games can enhance their playtime. Let’s explore some imaginative activities.

  • Color Punch: Assign different colors to various parts of the toddler punching bag. Call out a color and have your toddler punch that area. This game boosts color recognition skills.
  • Number Hit: Write numbers on the punching bag. Shout out a number and encourage your toddler to hit the corresponding number. This supports their number learning.
  • Animal Sounds: Attach pictures of animals to the bag. When your toddler punches the image, make the sound of that animal. It’s a fun way to learn animal sounds.
  • Balloon Punch: Tape balloons around the punching bag. Challenge your toddler to pop them with a punch. It’s exciting and helps develop their hand-eye coordination.
  • Freeze Punch: Play music while your toddler hits the bag. When the music stops, they freeze. This game teaches them to listen and react quickly.
  • Follow the Leader: Take turns punching the bag in different ways. Have your toddler mimic your movements. This improves their ability to follow instructions.
  • Punch by Height: Place marks at different heights on the bag. Call out ‘high’ or ‘low’, and have your toddler punch accordingly. This enhances their spatial awareness.

By making punching bag play a game, toddlers remain engaged and learn new skills while having a blast. When creating these games, ensure they are appropriate for your toddler’s age and abilities. Keep the fun going, and watch as they punch their way to development and joy!

Incorporating Learning Into Punching Bag Activities

Transforming a toddler punching bag session into a learning experience is simple and impactful. Let’s look at ways to make this happen.

  • Alphabet Strike: Label sections of the bag with different letters of the alphabet. As you call out a letter, your toddler strikes that letter, blending physical activity with letter recognition.
  • Shape Smash: Use the bag to reinforce shape knowledge. Stick shapes onto the bag, and ask your toddler to hit a specific shape, like ‘punch the circle’ or ‘hit the square’.
  • Count and Punch: Turn counting into an active game. Have your toddler punch the bag a certain number of times as they count out loud, improving both their counting skills and rhythm.
  • Word Association: Write simple words on the bag and read them out during play. Each punch becomes an opportunity for your toddler to connect sounds and words.
  • Directional Drill: Encourage understanding of directions. Instruct your toddler to punch high, low, left, or right, enhancing their comprehension of spatial concepts.

Each game not only makes learning fun but also keeps the toddler punching bag activity fresh and interesting. Monitor your child’s progress and adapt the difficulty as they grow. Patience and positive reinforcement will help instill a love for learning during these formative years.

toddler punching bag


Tips for Encouraging Proper Technique

When it comes to toddlers and punching bags, proper technique is essential for safety and development. Here’s how to encourage the right form:

  • Demonstrate First: Show your toddler how to punch. Use slow, exaggerated moves to highlight form.
  • Use Verbal Cues: Give simple instructions like “hit with your hand flat” or “keep your arm straight”.
  • Hand Placement: Help place their hands correctly on the bag each time. Gentle guidance reinforces proper technique.
  • Practice Makes Perfect: Encourage regular, short sessions. Repetition helps them remember the right way to punch.
  • Positive Support: Praise good form to boost their confidence. Say things like “Great punch!” or “You’re doing it right!”.
  • Correct Gently: If your toddler makes a mistake, correct them with patience. Kindly show them the right way.
  • Lead by Example: Punch the bag the way you want them to. Children often learn best by copying adults.
  • Fun Reminders: Use playful phrases or songs to remind them of the right technique. Make learning enjoyable.

By keeping instructions short and straightforward, your toddler will more easily grasp and recall how to engage with their toddler punching bag safely and effectively. Always prioritize fun and safety over perfection, as toddlers are still developing their motor skills. With time and practice, proper technique will become second nature to your little one.

Maintaining Toddler Interest in Punching Bag Fun

Keeping toddlers engaged with a punching bag can be a playful yet challenging task. To maintain their interest, it is crucial to keep the activities varied and aligned with their ever-changing preferences and developmental stages. Here are some tips to keep the punching bag fun alive:

  • Introduce New Games: Regularly change the games you play with the punching bag. New games prevent boredom and stimulate your toddler’s curiosity.
  • Setting Achievable Goals: Create simple goals for your toddler to achieve during their punching bag playtime. It might be hitting the bag a certain number of times or punching specific areas.
  • Rewards and Praises: When your toddler reaches a goal, rewards such as a sticker or a high five can be highly motivating. Also, verbal praise will encourage them to keep trying.
  • Involve Their Interests: If your toddler has a favorite character or theme, incorporate it into the punching bag design or the games you play. This familiar element can excite and engage them.
  • Variety in Routine: Avoid doing the same exercises every time. Mix up your routines with the punching bag to keep your toddler guessing what’s next.
  • Participate with Them: Toddlers love mimicking adults. Join in the fun by punching the bag together, making it a bonding experience.

Remember, the key to keeping toddler punching bag activities interesting is to focus on fun and variety. These activities should always feel like a game, not a chore. This approach will help sustain your toddler’s interest and make punching bag playtime a much-anticipated part of their day.

toddler punching bag

Best Practices for Post-Activity Cool Down and Discussion

After playtime with the toddler punching bag, settling down is just as important as the activity itself. Here’s how to effectively cool down and reflect on the session:

  • Stretching Exercises: Encourage gentle stretches to relax muscles. Simple arm and leg movements are great for toddlers.
  • Deep Breathing: Teach your toddler to take slow, deep breaths. This calms the body after energetic play.
  • Hydration: Offer water to help your toddler stay hydrated. Drinking after exercise is key.
  • Review the Fun: Talk about what they enjoyed. This reinforces positive feelings about the punching bag activities.
  • Ask for Feedback: Get your toddler’s thoughts. Did they like punching high or low? They’ll feel heard and valued.
  • Goals Recap: Discuss any goals set before the activity. Celebrate achievements, no matter how small.
  • Plan Next Time: Look ahead and ask your toddler what game they want to try next. This keeps them excited for future punching bag play.

By incorporating these cool down practices, you ensure a well-rounded experience that aids physical recovery and promotes cognitive reflection. Keep sessions short and conversations light, focusing more on enjoyment than critique. This routine will help your toddler develop a healthy approach to exercise and learning new skills.

Punching Bag Workouts for Full-Body Fitness: Essential Equipment

Benefits of Punching Bag Workouts

Engaging in punching bag workouts offers a multitude of benefits for both the body and mind. First and foremost, one of the standout advantages is the improvement in cardiovascular health. By moving constantly and throwing punches, you elevate your heart rate, which helps to strengthen the heart and lungs over time. Regular sessions can lower blood pressure and improve overall endurance.


Punching bag workouts are also exceptional for developing full-body strength. They work not just the arms and shoulders, but also the core, legs, and back muscles. The resistance of the heavy bag forces your muscles to engage intensively, leading to increased muscle tone and power.

Moreover, these workouts can be a powerful tool for stress relief. Hitting a bag allows you to release frustration and tension in a physical, yet controlled and safe environment. The focus required can also help to clear your mind, acting as a form of meditation and leaving you feeling mentally refreshed.

In terms of calorie burn, punching bag drills are highly effective. They are high-energy routines that can help you burn a substantial number of calories in a short period – aiding in weight management and fat loss.

Lastly, punching bag exercises enhance coordination and balance. As you learn to move your feet and position your body for different punches, you’ll improve your body’s ability to coordinate movements, which is beneficial in sports and everyday activities alike.

With so many compelling reasons to incorporate punching bag workouts into your fitness regimen, it’s no wonder they’re a popular choice for individuals looking to boost their physical and mental health.

Essential Equipment for Punching Bag Training

For success in punching bag workouts, having the right equipment is crucial. This equipment helps ensure safety and effectiveness of your training. Let’s look at what you’ll need:

Punching Bag

A high-quality heavy bag is the centerpiece of your setup. It should be durable and the right weight for your size and strength level.

Gloves and Hand Wraps

Protect your hands and wrists with boxing gloves and hand wraps. They cushion the impact and help prevent injuries.

Mounting Gear

You’ll need a secure way to hang your bag. This could be a ceiling mount or a free-standing frame depending on your space.

Timer

Structured workouts require a timer. Use it to track your rounds and rest periods for interval training.

Athletic Shoes

Good footwear supports your feet during movement. Choose athletic shoes with grip and stability.

Appropriate Apparel

Wear comfortable, breathable clothing that allows unrestricted movement for punching and footwork.

Gathering these essential items will set the foundation for effective punching bag workouts. Remember to invest in quality gear and replace it when it shows signs of wear to maintain safety and performance.

punching bag workouts

Basic Punching Techniques for Beginners

For those new to punching bag workouts, mastering basic punches is crucial. Start with these fundamental techniques:

The Jab

The jab is the simplest yet one of the most critical punches. Stand with your feet shoulder-width apart. If you’re right-handed, your left foot should be forward. Extend your lead hand swiftly towards the bag while keeping your rear hand ready to defend. Snap the punch quickly and retract to guard your face.

The Cross

The cross comes from your dominant side. After the jab, turn your back foot and pivot your body as you throw a powerful punch straight across towards the bag. Remember to keep your other hand up, guarding your face.

The Hook

For the hook, pivot your lead foot as you turn your body sideways. Bend your elbow at a right angle and swing your lead fist in a horizontal arc towards the bag. This punch targets the side of the bag and can be quite powerful.

The Uppercut

The uppercut is useful for targeting the lower part of the bag or an opponent’s chin. Lower your knees slightly and, using your legs, drive your rear hand upwards in a curved motion, aiming slightly forward.

Practice these punches regularly to build speed, accuracy, and confidence. They serve as the building blocks for more complex combinations you’ll learn as you advance in your punching bag workouts.

Advanced Punching Combos and Drills

Once you have mastered the basic punches, it’s time to level up. Advanced punching bag workouts often include complex combos that sharpen your technique and boost your overall fitness. These combinations and drills demand coordination, speed, and precision, offering a challenge that keeps your sessions dynamic and engaging.

Start with Two-Punch Combos

Begin with simple pairings of the fundamental punches. A jab followed by a cross, for instance, is a classic combo that helps you practice transitioning smoothly between punches. As you grow more confident, add a hook or an uppercut to the mix, creating three-punch sequences.

Build Up to Multi-Punch Sequences

Challenge yourself further with longer sequences that incorporate various punches in rapid succession. These could be combinations like jab-cross-hook-uppercut. Multi-punch sequences improve your muscle memory and boost your cardiovascular endurance.

Integrate Defense Moves

Don’t forget to include defensive techniques in your combos. Slip a punch by moving your head and upper body to the side after a sequence. This trains you to stay alert and ready to react.

Use Drills to Enhance Speed and Power

Incorporate drills into your routine to work on speed and power. For example, perform a rapid series of jabs for 20 seconds, then immediately switch to power hooks for another 20. This variation helps develop both fast-twitch muscle fibers and explosive strength.

Practice Footwork with Your Combos

Good footwork is essential for effective combos. Move around the bag as you execute your punches. This will improve your agility and simulate a more realistic fighting scenario.

Remember, the key to mastering advanced combos and drills is consistent practice. Keep pushing your limits, and you’ll see significant improvements in your punching bag workouts.

punching bag workouts

Incorporating Kicks and Footwork

Expanding your punching bag workouts to include kicks will enhance the benefits further. Kicks add a new dimension to your training, targeting different muscle groups and honing your balance and coordination. Below are some pointers to get started with incorporating kicks and footwork into your routine:

Starting with Basic Kicks

Begin with straightforward kicks like front kicks, where you lift your knee and snap your foot out directly in front of you. Practice side kicks as well, where you strike the bag with the edge of your foot while keeping your body turned sideways. Start slow to perfect your form before adding speed and power.

Adding Roundhouse Kicks

Once you’re comfortable with basic kicks, try roundhouse kicks. These involve a whipping motion, where your leg comes around in a circular path to hit the target. Balance and pivoting on your support foot are key to executing this kick accurately.

Incorporating Footwork

Effective footwork helps you move smoothly around the bag, creating angles for kicks and punches. Work on drills that have you stepping forward, backward, and side-to-side as you attack and defend. Light, bouncy movements are important to maintain agility.

Drills to Improve Timing

Timing drills assist in integrating kicks with punches. Start with a jab-cross combo, then quickly follow with a front kick. Alternate between hands and feet to find a rhythm that works for you. Drills should mimic real-world scenarios, keeping you light on your feet and ready to strike.

Focus on Balance and Posture

Good balance is essential for strong kicks. Practice your kicks slowly, focusing on maintaining an upright posture. This reduces the risk of injury and increases the power behind your kicks. Keep your core engaged and ensure your supporting leg is firm and stable.

Incorporate these elements into your punching bag workouts and witness a noticeable improvement in your full-body fitness. With a combination of punches, kicks, and dynamic footwork, you’ll build a more versatile skill set that benefits your overall health and athletic abilities.

High-Intensity Bag Workouts for Cardio

High-intensity workouts with a punching bag can skyrocket your cardio fitness. These sessions are short, fast-paced, and incredibly effective. Here’s what you need to know to get your heart racing:

Short, Explosive Rounds

Engage in one to three minute rounds with little rest in between. Focus on high-speed punching combinations to keep the intensity up.

Interval Training

Alternate between bursts of full-throttle punching and brief periods of lower intensity. This approach, known as interval training, maximizes calorie burn and boosts cardiovascular endurance.

Consistent Movement

Keep your body moving at all times. Bob and weave around the bag as you punch, enhancing your agility while sustaining your heart rate.

Add Jump Roping

Incorporate jump roping into your routine. Jump rope for a minute between rounds at the bag to maintain a high heart rate and enhance footwork.

Track Your Progress

Use a heart rate monitor to stay within your target cardio zone. Push yourself to maintain or exceed your previous session’s intensity.

By including these elements, punching bag workouts become a vigorous tool for improving cardiovascular health. Consistent practice will lead to better stamina, quicker recovery times, and a more efficient heart and lung system.

Strength Training with Heavy Bag Exercises

Heavy bag exercises are great for building muscle strength. These workouts, when done correctly, can provide resistance similar to lifting weights, but with added benefits. Here are some tips for strength training using a punching bag:

Master Proper Technique

Before focusing on strength, ensure your punching technique is correct. Power comes from the right form, not just force.

Work on Power Punches

Enhance your powerful punches, like the cross and the uppercut. These punches engage your entire body, particularly your core and upper body muscles.

Use Heavier Gloves

Add weight to your workouts by using heavier gloves. This increases the resistance on your arms for better strength gains.

Include Punching Drills

Perform drills that require multiple punches in quick succession. This builds endurance and muscular strength.

Slow-Motion Punches

Throwing punches in slow motion increases tension in your muscles, mimicking strength training exercises.

Utilize Bag Weight

Lean against the bag to engage your core and back muscles. Try pushing the bag with your body to work on strength.

Combine with Bodyweight Exercises

Mix in squats, lunges, or push-ups between rounds. This variation targets muscle groups across your body.

Consistency is Key

Regularly include these exercises in your punching bag workouts. Consistency leads to muscle growth and increased strength over time.

By integrating these elements into your punching bag routine, you will not only develop cardiovascular endurance but also build muscle strength, offering a comprehensive full-body workout. Remember, proper form and regular practice are crucial for effective strength training with heavy bag exercises.

punching bag workouts

Cool Down and Recovery After Punching Bag Sessions

Ending your punching bag workout with a cool-down is vital for recovery. Here’s what to do:

Slow Down Gradually

Reduce your intensity towards the end of your session. Shift from rapid punches to slower, lighter jabs.

Stretch Out Muscles

Focus on stretching your arms, shoulders, legs, and back. Hold each stretch for at least 20 seconds.

Hydrate Well

Drink water to replace fluids lost during your workout. This helps in preventing dehydration.

Use Cold Compress

Apply a cold pack to any sore areas. This can reduce swelling and soothe muscles.

Refuel with Protein

Eat a meal with good protein to help muscle repair. This is best done within 45 minutes post-workout.

Rest Adequately

Give your body time to recover before the next workout. Aim for a good night’s sleep.

By following these steps, you ensure your body recovers well and you’re ready for your next punching bag workout.


How to Punch a Punching Bag? Your Punching Bag Technique

The Basics of Punching Bag Workouts

Knowing how to punch a punching bag involves more than just throwing your fists. It’s pivotal to start with understanding the essential elements of punching bag workouts. How to punch a punching bag? Below is a breakdown of the foundational aspects you should master before you move on to more advanced techniques.


Proper Stand and Align: Before you hit the bag, stand with your feet shoulder-width apart. Align your body so one foot is slightly forward. This will give you the stability you need.

Hand Wraps and Gloves: Invest in good quality hand wraps and boxing gloves. They protect your hands and wrists from injuries. Make sure they fit well.

Warm Up Thoroughly: Never start without warming up. Spend at least 10 minutes on dynamic stretching and light cardio. This prepares your muscles and reduces injury risk.

Basic Punch Technique: Learn the basic punch types: jab, cross, hook, and uppercut. Practice these punches slowly at first. Focus on form over power.

Breathing: Your breath should sync with your punches. Exhale sharply with each punch. This helps maintain rhythm and prevents you from getting winded quickly.

Punching Bag Position: Ensure the bag hangs securely and at the right height. The middle of the bag should align with your chest. This will make your workout more effective.

Pacing Yourself: Don’t go all out from the start. Begin with shorter rounds and gradually increase as you build stamina.

All of these components are vital in learning how to punch a punching bag effectively. They set a solid foundation for your workout regimen, allowing you to gradually increase the complexity of your routines while minimizing the risk of injury.

how to punch a punching bag

Essential Gear for Effective Punching

To ensure an effective punching bag workout, you need the right equipment. Quality gear not only improves your performance but also keeps you safe from injuries. Here’s a list of essential gear for efficient and safe punching:

  • Boxing Gloves: Select gloves that provide ample padding and wrist support. Pick the right size for a snug fit.
  • Hand Wraps: Use hand wraps to further protect your wrists and knuckles. Learn to wrap your hands properly.
  • Punching Bag: Choose a durable punching bag suitable for your weight and skill level. Check its quality and how it hangs.
  • Weighted Vest: Enhance your workout’s intensity with a weighted vest. It adds extra resistance, boosting endurance.
  • Jump Rope: Incorporate a jump rope for footwork and cardio. It’s perfect for warm-ups.
  • Timer: Keep track of your rounds and intervals. Use a timer to maintain structured workouts.
  • Padded Flooring: Protect your feet with padded flooring or a mat, especially if you’re training barefoot or with boxing shoes.
  • Boxing Shoes: Consider getting boxing shoes for better grip and mobility on the floor. They offer more stability than regular sneakers.

Each piece of equipment plays a critical role in your punching bag workout routine. When you invest in good quality gear and use it correctly, you’ll see a tremendous impact on your performance and best learn how to punch a punching bag effectively.

Stance and Footwork Fundamentals

A strong stance and solid footwork are key in learning how to punch a punching bag. Your stance provides the foundation for your punches. Footwork determines how well you can move and react. Here are essential tips for mastering both.

Adopt the Correct Stance: Start with your legs shoulder-width apart. Place one foot slightly ahead. Bend your knees a bit. This stance ensures balance and readiness to punch.

Balance is Crucial: Always maintain your weight centered. Too much weight on your heels or toes can throw you off balance.

Stay on the Balls of Your Feet: Lightly rest on the balls of your feet for rapid movement. This way, you can easily pivot and shift directions.

Pivot on Your Toes: When you punch, pivot on your toes. This motion adds power to your punches and helps protect your knees.

Keep Feet Active: Never let your feet stay still for too long. Stay mobile to maintain defense and prepare for your next move.

Practice Lateral Movement: Move side to side, not just forward and back. This increases your ability to dodge and create angles.

Improve Footwork with Drills: Use drills like ladder drills or shadowboxing to enhance your footwork skills.

Consistency is Key: Train regularly on your footwork. The more you practice, the more it becomes second nature.

Correct stance and footwork are foundational in punching bag workouts. They support your ability to execute punches properly, move with speed, and maintain endurance. Keep working on these fundamentals to see improvements in how you punch a punching bag.

how to punch a punching bag

Variety of Punches and Combinations

To master how to punch a punching bag, diversifying your strikes is key. Different punches and combinations enhance your agility, power, and coordination. Here’s how to add variety to your routine:

Work on the Jab: The jab is a quick, straight punch. Use it to gauge distance and set up combinations.

Perfect the Cross: After the jab, the cross is your strong, straight punch from the back hand. It’s powerful.

Hook it Right: The hook is a semi-circular punch aimed at the side of the adversary’s head or body.

Uppercut Essentials: The uppercut is an upward strike from a lower level. It targets the chin or torso.

Mix It Up: Combine these punches in sequences. Start with simple pairs, then build to longer chains.

Balance Combinations: Ensure your combinations include varied moves. Mix head and body punches to confuse the bag.

Simulate Real Situations: Imagine facing an opponent. Vary your rhythm and intensity as if in a real fight.

Practice Makes Perfect: Repeat combinations regularly. Commit them to muscle memory for fluid execution.

Challenging yourself with a variety of punches and combinations is vital. It helps you react better during sparring or real fights. Always focus on form before power to punch a punching bag with technical precision.

Common Mistakes to Avoid

When learning how to punch a punching bag, it’s easy to fall into some common traps. To help you steer clear and improve your workouts, here are mistakes to avoid:

Punching with Just Arms: Focus on engaging your whole body, not just the arms. Power comes from the core and legs.

Neglecting Footwork: Good punches need good footwork. Don’t be static; keep moving to build agility and strength.

Forgetting to Breathe: Always breathe out with punches. Holding your breath will tire you out faster.

Overextending Arms: Don’t lock your elbows. This risks injury and reduces the power of your punches.

Incorrect Bag Height: Make sure the bag is at chest level. Too high or too low affects your form.

Too Much Power, Too Soon: Start slow and focus on technique. Increase power as you gain skill.

Ignoring Defense: Even on a bag, imagine a real fight. Work on blocks and dodges as part of your routine.

Skipping Warm-up: Warm-up to prevent injury. It primes your muscles for the workout ahead.

Lack of Variety: Don’t repeat the same combos. Mix it up to work different muscles and improve coordination.

By avoiding these mistakes, you can punch a punching bag more effectively and see better results. Remember, mastering the technique takes time, so be patient and consistent with your practice.

Incorporating Defense and Movement

While perfecting how to punch a punching bag, don’t overlook defense and movement. These skills are vital in a real fight. Here’s how you can incorporate them into your punching bag routine:

Mimic Dodging: Act as if the bag can hit back. Duck, weave, and slip to dodge imaginary punches.

Block Practice: Push against the bag with your gloves. Pretend to block hits from an opponent.

Use Footwork: Don’t stand still. Move around the bag, using the footwork you’ve mastered.

Counterpunch Drills: Throw a punch, then quickly move or block. Train for quick responses.

Stay Alert: Keep your head up and eyes on the bag. Stay ready to react, just like in a bout.

Rhythm Changes: Vary your hitting tempo. Speed up and slow down to simulate different fight paces.

Integrate Movement: Regularly change your position. This builds your ability to attack from all angles.

Shadowboxing: Before or after bag work, practice moves in the air. It helps you remember defensive actions.

Defense and movement are as important as strong punches. Work on these to improve how you punch a punching bag effectively. Remember, in a real bout, movement is defense.

how to punch a punching bag

Punching Bag Drills for Improved Technique

To learn how to punch a punching bag with improved technique, you should integrate specific drills into your training. These drills are designed to enhance your precision, power, speed, and agility.

Start with Shadowboxing: Begin each session with shadowboxing. This warms up your muscles and helps you focus on form.

Speed Drills: Perform quick, fast punches to work on your speed. A timer can help you keep pace.

Power Drills: Practice punching with full force to build power. Ensure your form stays correct.

Combo Drills: Chain different punches together. This improves your ability to throw fluid combinations.

Accuracy Drills: Aim for specific spots on the bag. Consistent targeting polishes your accuracy.

Endurance Rounds: Do longer rounds without losing form. This boosts your stamina over time.

Footwork Drills: Add footwork into your punching drills. Move around to gain agility and balance.

Defense Integration: Mix in defensive moves. Duck, weave, and block as part of your drill.

Consistent practice with these drills will significantly improve how you punch a punching bag. Remember, the quality of your training is just as important as the quantity. Concentrate on each punch and movement to make every drill count.

Measuring Progress and Setting Goals

To truly master how to punch a punching bag, tracking your progress is essential. How to punch a punching bag? Setting clear goals and measuring performance can motivate you and bring structure to your workouts. Here are steps to help you stay on track:

Establish Clear Objectives: Know what you want to achieve. It could be improving speed, power, or technique.

Keep a Training Log: Record your workouts. Note down the drills, number of rounds, and any improvements.

Set Realistic Milestones: Break your ultimate goal into smaller, achievable targets. This keeps you focused.

Review Regularly: Look over your log weekly. See what works and where you need to focus more.

Use Video Feedback: Film yourself training. Watch for form and areas to improve.

Set Time Frames: Have deadlines for your goals. This pushes you to work consistently.

Get Routine Assessments: Consider having a coach review your technique periodically.

Celebrate Achievements: When you hit a milestone, acknowledge it. It boosts your morale.

By measuring progress and setting goals, you enhance your ability to punch a punching bag proficiently. Remember, improvement is a continuous journey, not a destination. Keep pushing your limits and adjusting your goals as you get better at your craft.


Choosing Your Muay Thai Punching Bag: Comfort and safety

The Importance of the Right Muay Thai Bag

Choosing the right muay thai punching bag is crucial for your training regime. A proper bag enhances your workout, improving technique and power. Here are key reasons why selecting the right bag matters:


  • The proper weight of the bag ensures resistance reflects an opponent’s feel. This aspect aids in developing the correct force during strikes.
  • Durability affects how long the bag will last. High-quality materials stand up to rigorous training sessions.
  • The right size allows for a variety of moves. Practicing kicks, punches, and elbow strikes requires different bag dimensions.
  • Comfort and safety are vital. The wrong bag can lead to injuries or strain, hindering your progress.

Remember to incorporate the right muay thai punching bag into your training for optimal results. It should be tough, reliable, and the right fit for your martial arts goals. Keep these points in mind as we delve into types and factors to consider in the following sections.

muay thai punching bag

Types of Muay Thai Punching Bags

Selecting the right type of muay thai punching bag is key to effective training. Different styles cater to varied techniques and skill levels. Here are common types you’ll encounter:

  • Heavy Bags: These are staple equipment in muay thai. They are large, heavy, and designed to absorb high-impact strikes. Heavy bags help build strength and power.
  • Freestanding Bags: These have a base usually filled with water or sand. They are good for smaller spaces and can be moved easily.
  • Banana Bags: Long and slim, they hang from the ceiling. Banana bags allow you to practice low kicks and knee strikes effectively.
  • Teardrop Bags: Shaped like a teardrop, these bags help train for uppercuts and knee strikes.
  • Speed Bags: Smaller and lighter, speed bags improve hand-eye coordination and reflexes.
  • Double-end Bags: These are attached by elastic cords to the floor and ceiling. They bounce back when hit, improving timing and precision.

Each type offers unique benefits to your muay thai training routine. Analyze your goals and choose a bag that complements your current level and style of fighting.

Factors to Consider When Purchasing

When buying a muay thai punching bag, keep several factors in mind for the best training experience:

  • Your Training Level: Beginners might start with a lighter, more forgiving bag. Experienced fighters often prefer heavier bags for more resistance.
  • Frequency of Use: Consider how often you will train. Regular, intense sessions require a sturdier bag that withstands frequent use.
  • Space Availability: Ensure your training area can accommodate the bag. Heavier bags might need more stable mounting solutions.
  • Budget: Bags vary in price. Set a budget, but don’t compromise on quality. Investing a bit more often means longer-lasting equipment.
  • Fighting Style: Your muay thai style influences bag choice. If low kicks are a focus, consider a longer banana bag. For punch and elbow strikes, a heavy or teardrop bag might be better.

Make sure these factors guide your decision on which muay thai punching bag to purchase for a rewarding and effective training.

Size and Weight of the Bag

When choosing a muay thai punching bag, size and weight play pivotal roles. For realistic training that mimics fighting an opponent, your bag should have a suitable weight. Here are the points to consider:

  • Bag Size: The size determines the range of techniques you can practice. Taller bags allow for low kicks and knee strikes, crucial in Muay Thai.
  • Bag Weight: Heavier bags, usually around 100 pounds or more, provide the resistance needed for power training. They stay more stable during high-impact strikes.
  • Skill Level and Weight: If you’re a beginner, a lighter bag may be safer as it swings more, which teaches you to adjust your stance. Advanced fighters often prefer heavier bags for enhanced resistance.
  • Space Constraints: Your space can limit the bag’s size and weight. Ensure you have enough room for the bag to swing without causing damage.
  • Personal Height and Reach: Choose a bag that complements your height and reach. This way, you can train without limitations.

Remember that the right muay thai punching bag should feel similar to striking an actual opponent. Consider these factors to find the bag that elevates your Muay Thai practice.

muay thai punching bag

Material and Durability

When picking a muay thai punching bag, material and durability are key. These factors determine how long your bag will last under constant strikes. Consider the following:

  • Outer Material: Look for high-quality leather or synthetic options. Leather offers a classic feel and durability. Synthetics are often more affordable and resist wear and tear.
  • Interior Filling: A bag’s filling impacts its feel and longevity. Denser materials like sand provide a firm, heavy feel but may settle over time. Softer fillings like fabric or foam can absorb shocks better, reducing hand and leg strain.
  • Stitching Quality: Check the seams and stitching. Sturdy stitching prevents tearing and increases the lifespan of the bag.
  • Reinforcements: Extra layers or reinforced areas help withstand repeated strikes. Look for bags with reinforced straps and stress points.
  • Warranty and Brand Reputation: Brands with a strong reputation often offer warranties. A warranty is a sign of the manufacturer’s confidence in their product’s durability.

The right material and durable design ensure that your muay thai punching bag stands up to your training demands. It allows you to train effectively, knowing that your equipment is built to last.

Filling Options for Muay Thai Bags

When selecting a muay thai punching bag, the type of filling is critical. Different fillings can change the bag’s feel and impact your training. Here are the filling options you should know about:

  • Traditional Sand: Sand gives weight and resistance, making the bag less likely to swing wildly. It suits power training but can settle over time, creating hard spots.
  • Fabric Scraps: A softer, more forgiving option, fabric scraps can provide even weight distribution. This filling absorbs energy from strikes, which is easier on your limbs during long sessions.
  • Sawdust or Rice Husk: These organic materials are sometimes used but can break down faster than other fillings. They offer a balance between firmness and shock absorption.
  • Foam Layering: Some bags come with foam that surrounds a core of another material. This provides a consistent feel and can help with shock absorption.
  • Air or Water Bladders: Freestanding bags might use these. They are adjustable for desired resistance but may not simulate the feel of a traditional heavy bag as closely.

Consider the hardness, resistance, and shock absorption you need when picking a filling. Try to balance it with the durability and maintenance each option requires. The right choice helps mimic the experience of striking an actual opponent while protecting your body during training.

Attachment and Installation

Proper attachment and installation are essential for the safety and effectiveness of your muay thai punching bag. Here are key considerations:

  • Sturdy Mounting: Ensure the mounting surface for your heavy bag is solid. It must support the bag’s weight plus the force of your strikes.
  • Appropriate Height: The top of the bag should be at least at your head height to allow for high strikes. Adjustments are often needed to fit your individual height.
  • Secure Fastening: Use high-quality chains and swivels for hanging bags. This reduces wear and tear and prevents the bag from detaching.
  • Shock Absorption: Consider adding a spring or shock absorber to reduce the impact on the mount and increase the bag’s life. This is especially important for heavier bags.
  • Freestanding Bag Placement: For freestanding muay thai punching bags, place them on a level floor. Ensure they don’t move uncontrollably during use.
  • Professional Help: If you’re unsure about the installation process, it’s best to seek help from a professional. Proper setup avoids accidents and ensures optimal training conditions.

Before beginning your Muay Thai workouts, double-check that everything is secure and properly installed. Safe training is as important as the training itself.

muay thai punching bag

Maintaining Your Muay Thai Punching Bag

Maintaining your muay thai punching bag is vital for its longevity and performance. Regular care ensures the bag remains safe and functional. Here’s how you can keep your bag in top shape:

  • Clean Regularly: Wipe down the bag with a damp cloth to remove sweat and dust. For leather bags, use a cleaner designed for leather.
  • Inspect Often: Check for tears or weaknesses. Catching issues early prevents further damage.
  • Rotate the Bag: Turn the bag occasionally to prevent uneven wear and compaction of filling.
  • Keep it Dry: Protect your bag from moisture. A wet bag can develop mold or deteriorate faster.
  • Avoid Sharp Objects: Train without jewelry or sharp accessories that could cut the bag.
  • Proper Storage: If not used for a while, store the bag in a cool, dry space. Avoid direct sunlight.
  • Refill as Needed: For bags with fillable options, add new materials if the bag feels less resistant.
  • Check Mounting Hardware: Ensure chains and mounts are secure to avoid accidents.

By following these tips, your muay thai punching bag will stay in good condition, ready for every training session.

Popular Muay Thai Punching Bag Brands

When it comes to enhancing your Muay Thai training with the right equipment, the brand of your muay thai punching bag can make a noticeable difference. Here are some of the most reputable brands that are favored by both amateur practitioners and professional fighters alike:

  • Fairtex: Known for their premium quality, Fairtex bags are durable and designed specifically for Muay Thai. They offer a range of bags suitable for all skill levels.
  • Twins Special: Twins Special is another top brand that professionals use. Their bags are famous for excellent craftsmanship and longevity.
  • TITLE Boxing: While not exclusive to Muay Thai, TITLE offers robust heavy bags that cater to various martial arts, including Muay Thai.
  • Ringside: Ringside punching bags are known for their versatility and quality, making them a solid choice for Muay Thai practitioners.
  • Outslayer: Specializing in heavy bags, Outslayer is known for their high-quality materials and build, ensuring a long-lasting training bag.

These brands have established themselves in the martial arts community for their commitment to quality, durability, and performance. When selecting your muay thai punching bag, considering these brands can lead to a satisfactory investment in your training regimen. Ensure you also keep in mind the previously discussed factors such as size, weight, material, and filling options to purchase a bag that perfectly suits your needs.


How to Choose the Perfect Inflatable Punching Bag

Types of Inflatable Punching Bags

Inflatable punching bags come in various types to suit different needs. Freestanding bags are popular for home use. They stand upright on their own and are easy to move. Hanging bags, while less common, can be suspended from the ceiling. They offer a different type of resistance and movement. Kids’ punching bags are smaller and often feature brighter colors and designs. They’re great for introducing children to sports and exercise.


For adults, you’ll find fitness bags designed for a workout session. These bags often have targets or zones for precision training. Some models offer reflex bags with a spring-loaded base. They bounce back quickly, training the user’s reflexes and agility.

When choosing an inflatable punching bag, think about your goals. Are you focusing on cardio, strength, or technique? Your purpose will guide your choice. Some may prefer a simple bag for light exercise. Others might look for specialized bags with sensors or trackers. These track hits and measure force, adding a technological edge to training.

Remember to check for user reviews and ratings. These can help you gauge the quality and suitability of a bag. Look for bags with good reviews, especially in terms of durability and stability. Durability is key to ensure that your inflatable punching bag can withstand frequent use.

 Inflatable Punching Bag

Benefits of Using an Inflatable Punching Bag

Inflatable punching bags offer several benefits for users of all ages and skill levels. Here are some key advantages to consider when looking into the suitability of an inflatable punching bag for your training or leisure needs.

  • Space Efficiency: These bags take up little space. You can easily store them when not in use, making them ideal for small homes or apartments.
  • Safety: They are generally safer than traditional heavy bags. This makes them a great choice for kids or beginners. The soft exterior reduces the risk of injury.
  • Portability: You can move them around with ease. Take them outdoors or to different rooms, depending on where you wish to train.
  • Versatility: Many inflatable punching bags feature adjustable heights and can be used for various workouts. They can enhance both cardio and strength training.
  • Cost-effective: They tend to be more affordable than traditional bags. This makes them a practical option for people who are budget-conscious.
  • Low Impact Exercise: They offer an excellent way to get a low-impact workout. This helps in reducing stress on the joints, vital for recovery or light fitness routines.
  • Fun Factor: With a variety of designs and shapes, they can make workouts more enjoyable. Kids, in particular, may find colorful bags appealing.

Remember to align the benefits with your personal fitness goals when choosing an inflatable punching bag. Whether you’re aiming to improve agility, build muscle, or just have some fun, make sure your selection fits your needs.

Considerations Before Purchasing

When in the market for an inflatable punching bag, there are several considerations to keep in mind. Prioritize these key factors to make an informed decision:

  • Purpose: Define what you want to achieve with your punching bag. Goals vary from cardio fitness to strength training.
  • User: Consider who will be using the bag. Kids’ bags differ from those meant for adult training.
  • Space: Ensure you have ample room for setup and storage. Remember, space efficiency is a notable benefit.
  • Budget: Match the cost of the bag with your budget. Inflatable varieties often present a more affordable choice.
  • Quality: Look for durable materials that can endure regular use. High-quality bags last longer.
  • Reviews: Research user reviews. These insights are critical to understanding the bag’s performance.
  • Safety: Choose a bag with a design that minimizes injury risks, especially if children are using it.

Each point ensures that the inflatable punching bag you select will align with your personal requirements, providing satisfaction and meeting your fitness objectives.

 Inflatable Punching Bag

Size and Space Requirements

When choosing your inflatable punching bag, size and space are critical factors to consider. Firstly, evaluate the space where you plan to use and store your bag. It must fit comfortably, allowing for movement around it during workouts. Next, look at the height and width of the punching bag. Adults may require a larger size for a more effective training session, whereas children could use a smaller bag.

Your living situation can also influence the size of the punching bag. Those in apartments or with limited space might opt for smaller, more compact models. Remember, one of the key benefits of an inflatable punching bag is its space efficiency; you can deflate it and tuck it away easily when not needed.

Finally, reflect on your training intensity and style. If you’re incorporating high kicks and wide punches, ensure your inflatable punching bag has enough surface area to accommodate these movements. Measure your available space and compare it to the dimensions of potential bags to make the right choice.

Material and Durability

When selecting an inflatable punching bag, the material and its durability are paramount. Consider the fabric’s quality that forms the bag’s exterior. Bags made from thick PVC or vinyl tend to last longer. They resist punctures and can survive rigorous use. Look for double-layered materials for extra strength.

Check the bag’s seams. Reinforced seams prevent air leaks and extend the bag’s life. Quality stitching or heat-sealed edges indicate a well-made bag. Some bags have a textured surface. This adds grip and can withstand repeated strikes without showing wear.

The inner bladder holds the air. It should be durable and have a reliable valve. This ensures that the bag stays inflated during your workouts. A bag that deflates easily can be frustrating and disrupt your training.

Manufacturers may offer a warranty or guarantee. This shows confidence in the product’s durability. A longer warranty period is often a sign of a better quality bag.

Remember to balance durability with your budget. A high-quality material may cost more, but it can be a wise investment. It means you won’t have to replace the bag often. Consider how frequently you will use the bag. For daily, intense workouts, investing in a higher-quality material is beneficial.

Weight and Stability Features

When you’re selecting an inflatable punching bag, weight and stability are crucial to a good workout experience. Look for bags with a weighted base. The base should be heavy enough to keep the bag upright. Most bags use water or sand to provide that weight.

Consider stability when making your choice. A stable bag will return to its upright position after each hit. This is important for rhythm during your training. Check if the base has a grip or non-slip surface. This prevents the bag from sliding across the floor during use.

For enhanced stability, some bags come with suction cups at the bottom. These cups can secure the bag to the floor. Not all floors work with suction cups, so consider your workout area.

For taller or heavier users, a larger base might be necessary. The extra size provides more weight distribution. It improves the bag’s ability to stand firm against powerful strikes.

Finally, assess the bag’s overall design. A narrow top with a wide bottom offers greater stability. It ensures the bag bounces back naturally when hit. Finding the right balance between weight and stability will contribute to effective training sessions with your inflatable punching bag.

Ease of Use and Maintenance

An inflatable punching bag should be easy to use and maintain for lasting value. Here’s what to consider:

  • Setup Ease: Look for a bag that inflates quickly. A fast set up means more time for training.
  • Inflation Method: Check if the bag comes with a pump. If not, you may need to buy one.
  • Deflation and Storage: Choose a bag that deflates easily. This makes it simple to store away.
  • Surface Cleaning: Opt for bags with a surface you can wipe clean. Regular cleaning keeps the bag hygienic.
  • Air Retention: A good bag holds air well. Poor air retention requires frequent re-inflation.
  • Maintenance Check: Regularly check for leaks or wear. Early detection prevents larger issues.
  • Repair Kits: Some bags include repair patches. These are handy for fixing small punctures.

Proper care will extend the life of your inflatable punching bag. Always follow the manufacturer’s guidelines for the best results. Easy maintenance boosts the convenience of going for an inflatable model.

 Inflatable Punching Bag

Additional Features and Accessories

When shopping for an inflatable punching bag, additional features and accessories can enhance your training experience. Beyond the basic design, here’s what to look out for:

  • Pressure Gauge: Some bags include a pressure gauge. It helps maintain the right air level for optimum performance. Check if the bag you’re considering has this handy tool.
  • Carry Bag: A carry bag makes it easier to transport or store your inflatable bag. It protects the bag from dirt and damage when not in use.
  • Electric Pump: While not always included, an electric pump inflates the bag faster than a manual one. This saves time and effort before your workout.
  • Anchoring System: To keep your bag in place, some come with anchoring options. Look for hooks or straps that can secure your bag, especially if you’re training outdoors.
  • Targets or Markings: For precision training, some bags have target zones. These can guide your punches and kicks, improving your aim and technique.
  • App Connectivity: Advanced bags may offer connectivity to apps. This tracks your performance and provides feedback on your sessions. If you love tech, this could be a game-changer.
  • Adjustable Straps: Some bags have straps that adjust the bag’s height. This is great for shared use, as different users can modify it to their size.

Considering these additional features and accessories can greatly boost the functionality and enjoyment of your inflatable punching bag. Match these extras to your fitness goals and preferences for a tailored workout experience.

Where to Buy Inflatable Punching Bags

Finding the right place to buy an inflatable punching bag is key to getting a good deal and a quality product. Here are some options:

  • Online Retailers: Websites like Amazon, eBay, and Walmart offer a broad selection. They have user reviews to help guide your choice.
  • Sporting Goods Stores: Physical stores such as Dick’s Sporting Goods or Academy often stock these bags. You can see the product before buying.
  • Specialty Martial Arts Stores: These stores provide expert advice. They may have high-quality bags for serious training.
  • Manufacturer’s Website: Buying direct can save money. Check if they have online discounts or exclusive products.
  • Second-hand Marketplaces: Sites like Craigslist or Facebook Marketplace may have used bags for less.
  • Gym or Dojo: Some training centers sell equipment. They might offer member discounts.

Before you buy, compare prices and reviews. Check delivery options and return policies as well. Find a seller that offers a warranty or guarantee for added peace of mind.

In summary, many places sell inflatable punching bags. Choose a reputable seller with good customer service. Ensure they have a return policy in case there are issues. By doing so, you’ll find the perfect inflatable punching bag to meet your training needs.


Small Punching Bag Essentials for Home Workouts

Benefits of Incorporating a Small Punching Bag in Home Workouts

Adding a small punching bag to your home gym can provide several benefits that enhance your fitness routine. Firstly, it offers a dynamic workout that engages multiple muscle groups. Punching requires the coordination of your arms, shoulders, core, and legs, making it a full-body exercise. This type of workout can improve your overall muscle tone and increase your strength.


Secondly, using a small punching bag is excellent for cardio. It boosts your heart rate, helping to burn calories and fat more effectively than some other forms of low-intensity exercise. The high-energy movements involved in a punching bag workout can lead to better cardiovascular health and increased stamina.

Another advantage is the stress relief it offers. Hitting a punching bag can be a powerful way to release tension and reduce stress. This kind of physical activity stimulates the production of endorphins, the body’s natural mood elevators, providing you with a sense of well-being after your workout.

Moreover, the convenience of having a small punching bag at home means you can fit workouts into your schedule more easily. There’s no need to travel to a gym, and you can train at any time, making it more likely for you to stick to your fitness goals.

Lastly, practicing with a small punching bag can improve your coordination and reflexes. It requires timing and precision, which, over time, can enhance your motor skills and reaction times. This can be beneficial not only in athletic pursuits but also in daily life as it improves your overall agility.

In short, adding a small punching bag to your home workout regimen is a versatile way to improve fitness, relieve stress, and enhance your physical and mental well-being. It’s an investment in your health that offers a range of valuable benefits.

Small Punching Bag

Choosing the Right Small Punching Bag

Choosing the right small punching bag involves several factors that will affect your workout experience. In making this decision, the bag’s size and weight are critical considerations, as they need to match your physical capabilities and the space available in your home. Additionally, the type of small punching bag you select can influence the variety and intensity of your exercises.

Considerations for Size and Weight

When picking out a small punching bag, first assess the space where you will hang or place the bag. It should allow you to move freely around it, without bumping into furniture or walls. The bag’s size should complement your height and reach – not too large to overpower your space, nor too small to limit your movement range.

Next, consider the weight of the bag. A heavier bag is more suitable for those looking to build power and strength, as it will absorb harder punches without swinging excessively. On the other hand, a lighter bag will swing more with each hit, which can improve your timing and coordination, making it a better choice for speed training and cardiovascular workouts.

Types of Small Punching Bags

There are various types of small punching bags, each offering unique benefits. For example, free-standing bags are ideal for those with limited hanging options and can be moved easily. Hanging heavy bags, despite their name, can come in smaller sizes suitable for tight spaces.

Speed bags are smaller, lighter, and designed to improve hand-eye coordination and rhythm. On the other end of the spectrum, there are also ‘slip bags’ and ‘double-end bags’ that are tethered at both ends, offering a different kind of movement that challenges your precision and timing.

Selecting the proper small punching bag will ensure an effective and enjoyable workout experience. Make sure to weigh all factors and consider the type of training you wish to focus on before making your purchase.

Setting Up Your Small Punching Bag

Whether you opt for a free-standing bag or a hanging model, setting up your small punching bag properly is essential to ensure a safe and effective workout environment. Proper installation maximizes your space and provides the necessary stability for your exercise routine. Here are some easy to follow tips and safety precautions to keep in mind.

Installation Tips for Home Use

Begin by selecting a location in your home that offers enough space. You’ll need adequate room to move around the bag without obstruction. Ensure the area is well-lit and has a flat, stable floor to prevent trips and falls. If you’re installing a hanging bag, locate a ceiling joist or beam that can support the weight. Use a heavy-duty hanger and quality hardware that’s designed for hanging punching bags. For free-standing bags, ensure the base is filled with the appropriate material, such as sand or water, to keep it anchored during use.

Always double-check all connections and mounts before each workout. Regularly inspect your setup for any signs of wear and tear to prevent accidents. Correct installation is not only critical for safety but also for the longevity of your small punching bag.

Safety Precautions

When using a small punching bag, safety should always be your priority. Start each session by warming up to prepare your muscles and joints. Wear appropriate gloves and hand wraps to protect your hands and wrists from injury. Keep your workout area clear of any clutter or loose items to prevent tripping hazards.

Maintain a safe distance from walls and other objects to avoid accidental injury while punching. Furthermore, be mindful of your punching force; overexertion can lead to both bag damage and personal injury. By following these safety guidelines, you’ll create a home workout environment that’s both effective and secure, allowing you to focus on your fitness journey with peace of mind.

Small Punching Bag

Effective Exercises with a Small Punching Bag

Incorporating a small punching bag into your workouts introduces a variety of exercises to enhance fitness. To get the most out of your punching bag, it is essential to learn some effective exercises.

Basic Punching Techniques

For newcomers, mastering basic punching techniques is vital. Start with the fundamental punches:

  1. Jab: A quick, straight punch thrown with your lead hand.
  2. Cross: A powerful straight punch delivered with your rear hand.
  3. Hook: A semi-circular punch aimed at the side of the opponent’s head or body.
  4. Uppercut: A vertical rising punch targeting the opponent’s chin or torso.

Perfecting these punches helps in building a strong foundation. Practice in short bursts, maintaining your focus on form and breathing. Make sure to stand correctly, with your feet shoulder-width apart and knees slightly bent for the best balance and power.

High-Intensity Interval Training (HIIT) with a Punching Bag

HIIT workouts with a small punching bag can skyrocket your heart rate, burning more calories in less time. Here’s how you can incorporate it:

  • Warm-up: Start with a 5-minute light cardio to get your blood flowing.
  • Workout: Alternate between 30 seconds of intense punching and 30 seconds of rest. Repeat for 15 minutes.
  • Cool-down: End with a 5-minute stretch to prevent muscle soreness.

This workout blends cardio with strength training, maximizing the effects of your exercise routine. Always listen to your body and rest if needed to prevent overtraining or injury. With consistent practice, you’ll notice improved endurance and power.

Incorporating Strength Training and Cardio

Strength training and cardio are two core elements of a well-rounded fitness regimen. When you mix these with a small punching bag workout, you get a powerful combination that burns fat and builds muscle simultaneously. This blend can dramatically improve your overall fitness and health.

Combining Bodyweight Exercises with Punching Workouts

Incorporate bodyweight exercises like squats, push-ups, and lunges into your punching bag routine. For example, perform a set of push-ups, then move straight to a round of punching for an interval of high intensity. This approach keeps your heart rate up while targeting different muscle groups.

Alternate between strength moves and fast-paced bag work. The contrast of exerting force against your own bodyweight and then against the bag offers a varied stimulus. This can lead to better muscular endurance and strength gains.

Keep transitions quick to maintain intensity. Seamless switching from one exercise to the punching bag keeps the cardio aspect strong. Fast transitions help enhance agility and coordination, too.

Creating a Balanced Workout Routine

A balanced workout routine should include a mix of exercises that build strength, endurance, and flexibility. Begin with a warm-up that includes dynamic stretches and light cardio moves.

Include a variety of punches and kicks in your routine to engage different muscles and keep the training interesting. For every intense round with the bag, follow up with a strength exercise. This way, your body stays challenged in multiple ways.

Finish with a cool-down that includes static stretching. This helps relax your muscles and improve flexibility after the high-energy small punching bag and bodyweight workout. Regular stretching can reduce the risk of injury and aid in recovery.

Remember to listen to your body and adjust the intensity of your workouts as needed. Consistency and proper form are key to achieving the best results with a combination of strength training and cardio using a small punching bag.

Accessories and Equipment to Enhance Your Training

To maximize the benefits of your small punching bag workouts, the right accessories and equipment are essential. Gear up with the appropriate items to ensure safety, comfort, and effectiveness during your sessions.

Gloves and Hand Wraps

Investing in quality gloves is crucial for protecting your hands from impact injuries. Choose gloves with sufficient padding to absorb the shock from punches. Look for a snug fit that allows for flexibility and easy wrist movement. Hand wraps are equally important. They support your wrists and stabilize the joints. Learn to wrap your hands properly for additional protection. Always wear gloves and hand wraps during your workout to prevent scrapes and bruises.

Additional Gear for Punching Bag Workouts

Besides gloves and hand wraps, consider adding more gear to your setup. A skipping rope complements punching bag exercises by enhancing cardio and rhythm. For leg training, ankle weights can increase the difficulty of your workout. A mirror can be helpful for monitoring your form and technique. Lastly, a timer or an app can keep you on track with your HIIT sessions. Choose gear that matches your workout goals and improves your overall exercise experience.

Small Punching Bag

Maintenance and Care for Your Small Punching Bag

To keep your small punching bag in top shape, regular maintenance and proper care are crucial. Neglect can result in wear and tear that decreases its lifespan and affects your workout quality. Stick to a care routine to get the most out of your equipment.

Cleaning and Storage Tips

Clean your punching bag with a damp cloth to remove dust and sweat after each use. Avoid harsh chemicals that can damage the material. Store the bag in a cool, dry place away from direct sunlight to prevent fading and deterioration. If you have a hanging bag, unhook it and lay it flat every few months to maintain its shape.

For free-standing models, empty the base of water or sand if you plan to not use it for a while. This prevents the growth of mold or unpleasant odors. Always check for loose parts or signs of damage and address them promptly to ensure safety.

Longevity and Durability of Punching Bags

The durability of a small punching bag depends on the quality of its materials and construction. Invest in a bag made from high-grade, tough materials designed for frequent use. High-quality bags often have reinforced stitching and durable hanging straps or bases.

Follow the manufacturer’s weight and usage guidelines to avoid overstraining the bag. Use the bag for intended exercises and avoid practices that may cause unnecessary stress. With proper use and maintenance, a good small punching bag can remain a reliable part of your home gym for many years.


DIY Punching Bag Guide for Home Gyms: Step-by-Step Guide

Choosing the Right Materials for Your Punching Bag

Choosing the right materials is crucial for a durable and reliable diy punching bag. Begin with a tough outer shell. You can use heavy-duty canvas, leather, or vinyl for long-lasting use. These materials withstand repeated strikes and can survive the wear and tear of workout routines.


For the inner lining, opt for a strong fabric like ripstop nylon. It helps keep the shape of the bag and prevents tears. The stitching is also important. Use heavy-duty nylon or polyester thread. Make sure to double-stitch for added strength.

Next, consider the filler material. It defines the bag’s weight and stiffness. Common options include sand, sawdust, old clothes, or rubber mulch. Each material offers a different feel; for instance, sand makes the bag heavier and more solid, while old clothes allow for a softer impact.

Lastly, you need a secure closure system. Heavy-duty zippers or velcro strips are popular choices. They allow you to refill or adjust the filling easily. Ensure the closure is robust enough to prevent spillage during use.

Remember, the quality of materials directly influences the bag’s performance and safety. Invest in high-grade materials for the best outcome. As you gather your materials, keep the keywords “diy punching bag” in mind to guide your choices and ensure your homemade punching bag stands up to rigorous training sessions.

diy punching bag

Step-by-Step Guide to Making Your Own Punching Bag

Gather your selected materials including the outer shell, inner lining, and filler. Opt for tough fabrics like leather or canvas, and remember the durable ripstop nylon for the lining. Start by cutting the materials to size. Your bag should be about four feet long for adults.

Next, sew the cut pieces of the outer shell. Use the heavy-duty thread and double-stitch strongly. Ensure this stitching will hold up against frequent use. Attach the zipper or velcro for your closure system at the top.

Now, prepare the inner lining. Insert it into the shell. This liner will support the bag’s shape and prevent wear. For filling, choose the material that suits your training style. Old clothes for a softer impact or sand for a more solid feel are good options. Begin to carefully fill the bag. Pack the filling tightly to avoid settling and inconsistencies.

After filling, seal the bag with your secure closure system. Check for any loose areas and reinforce them if necessary. Lastly, give your diy punching bag a thorough inspection. Look for potential tears or weak points and mend them before use.

Follow these steps, and you will have a sturdy, reliable diy punching bag ready for your home gym workouts.

Filling Options for DIY Punching Bags

When making a diy punching bag, filling choice is key to tailor your training. Different fillers change the bag’s weight and resistance. For beginners, old clothes or fabric pieces are ideal. They create a softer bag that cushions punches, sparing hands and wrists during practice.

Choose sand or fine gravel for a denser bag. This suits advanced training. It enhances the bag’s stability, making it better for power punches. But, ensure to wrap the sand in plastic bags to prevent leaks and maintain consistent texture.

Rubber mulch is also a popular option. It’s less dense than sand but offers more resistance than clothes. It’s good for varied training, adding weight without being too hard on impact. Always pack the fillers tight to keep the bag’s shape.

Some may mix materials. For example, using clothes at the top and sand at the bottom. This combo provides a balanced experience. The top is softer for punches, while the bottom offers resistance for kicks.

In all cases, avoid sharp or hard items as fillers. They can damage the bag and cause injury. With these options, you can customize your diy punching bag for home workouts that fit your style.

Mounting Your Homemade Punching Bag Safely

Once you have created your diy punching bag, ensuring its safe mounting is critical. A well-mounted bag provides stability and safety during workouts. To start, find a solid support beam in your home gym. This beam must hold the bag’s weight plus the force of your punches and kicks.

Next, choose a heavy-duty chain or durable strap for hanging. It must be strong enough to handle the dynamic load of your workouts. Attach a swivel to the chain or strap. This reduces stress on the mount and allows for smooth movement.

Install a sturdy ceiling mount or wall bracket designed for heavy bags. Make sure it is compatible with your home’s structure. Secure it with the right hardware. Use bolts, not screws, for a more robust hold.

Hang the bag at an appropriate height. The middle of the bag should align with your chest level. This positioning is optimal for most punching techniques.

Finally, test the setup before use. Give the bag a few solid strikes. Check for any swaying or loosening of the mount. If the setup is safe and stable, you are ready for a full workout.

By following these steps, you ensure your homemade punching bag is mounted safely for effective training sessions at home.

DIY Punching Bag

Tips for Maintenance and Longevity of Your Punching Bag

Taking care of your diy punching bag extends its life and ensures safety during workouts. Here are key maintenance tips to keep your bag in prime condition.

Regularly inspect the bag’s surface for signs of wear or damage. Look for tears, punctures, or loose stitching. Repair any issues right away to prevent them from worsening.

Keep the bag’s exterior clean. Wipe it down with a damp cloth to remove dirt and sweat. This prevents the buildup of grime that can degrade the material over time.

Check the filling every few months. Settling can occur, and you may need to add more filling to keep the bag firm. Make sure it remains evenly distributed to maintain the bag’s shape and balance.

Ensure the closure system is secure. Whether you’re using zippers or velcro, it should close tightly. This stops the filler from spilling during use.

Rotate the bag periodically. This even out the wear and tear from your punches and kicks. It helps to stop the formation of soft spots.

Avoid excessive exposure to sunlight or moisture. UV rays can weaken the fabric, while dampness can cause mold and mildew.

By applying these tips, you boost the durability of your diy punching bag. Caring for it properly means you’ll have a reliable training accessory for many workout sessions to come.

Customizing Your Punching Bag to Fit Your Training Needs

When tailoring a diy punching bag, consider your fitness goals. A bag’s filling can change its weight and feel, so selecting the right combination is crucial. For speed and technique work, a lighter bag with a softer fill, like fabric or foam, reacts quickly to strikes. This helps improve your reflexes and punching speed while reducing the risk of injury.

For power training, opt for heavier materials like sand or gravel. These add mass and resistance, perfect for building strength in punches and kicks. If you mix different materials, you can achieve layers of resistance. For example, a layer of sand at the bottom for stability combined with cloths above for a softer impact area.

The bag’s size and shape also affect how it moves and reacts to your punches. Some boxers prefer a longer, thinner bag that sways more, while others choose a shorter, wider one for less movement. Think about the types of punches and kicks in your routine, and customize the shape to suit.

Adjust the bag’s height for targeted training. If you focus on high kicks or uppercuts, the bag should hang with the striking area at an appropriate level. Lower it for low kicks or body punches to achieve the right training angle.

Feel free to add personalized touches to your punching bag. Some people sew on patches or paint the exterior to make it their own. Just be sure these additions don’t compromise the bag’s integrity or your safety during workouts.

By considering these aspects, you build a diy punching bag that meets your specific training requirements. Your custom bag becomes a key tool in your home gym, helping you hone your skills effectively.

DIY Punching Bag


Essential Accessories for Your Home Gym Punching Bag

A well-equipped diy punching bag needs more than just robust materials. Essential accessories can enhance your training experience. The right gear ensures safety, comfort, and progress in your workouts.

Firstly, invest in quality gloves. They protect your hands and wrists from impact. Look for gloves with proper padding and wrist support. This minimizes the chance of injury.

Wraps are the next vital accessory. They add an extra layer of protection under your gloves. Wraps secure your wrists and help absorb sweat. This keeps the gloves clean and prolongs their life.

A sturdy set of hand and ankle weights can improve your strength. Use them during shadow boxing or bag work to add resistance. They are great for building muscle and endurance.

To sharpen your precision, get focus mitts. They help with targeting and can also engage a partner in your training. This can make your workouts more dynamic and social.

A round timer is also a must-have. It keeps your training sessions structured with set rounds and rest periods. This maintains intensity and discipline in your practice.

Lastly, don’t forget a gym mat. It provides a stable surface and protects your floor from wear. Plus, it cushions your feet during movement around the bag.

These accessories will complement your diy punching bag. They make your home gym professional-grade and help you reach your fitness goals.

Avoiding Common Mistakes When Crafting a DIY Punching Bag

Creating your own diy punching bag can be a fulfilling project. Yet, it’s easy to make mistakes that affect the bag’s quality and safety. Here are common pitfalls to avoid for a successful build:

  • Not Using Durable Materials: Your bag needs to withstand tough workouts. Choose strong fabrics and tough threads to ensure it lasts.
  • Poor Stitching Technique: Weak seams will tear under stress. Double-stitch using heavy-duty thread to reinforce the bag.
  • Incorrect Filler Material: Use appropriate fillers like sand or old clothes. Avoid sharp objects that could puncture the bag.
  • Uneven Filling Distribution: Fill the bag evenly to maintain balance. An imbalanced bag can throw off your training.
  • Neglecting a Strong Closure System: A weak closure will spill filler. Ensure your closure is sturdy, like a heavy-duty zipper or velcro.
  • Forgetting to Test the Bag: Always check the bag before use. Look for weak points and fix them to prevent injuries.
  • Improper Mounting: Secure the bag to a solid beam and use strong chains or straps. Poor mounting leads to instability and accidents.

By sidestepping these errors, your homemade punching bag will be a safe and durable addition to your home gym.


Maximizing Your Workout: Heavy Punching Bag Drills

The Benefits of Heavy Bag Training

Engaging in heavy bag training offers a multitude of advantages. It not only serves as a remarkable cardiovascular workout, enhancing your heart health but also significantly boosts your strength. Here are three key benefits you’ll gain from incorporating heavy punching bag exercises into your fitness routine:


  • Full-body Workout: Using a heavy punching bag involves your arms, shoulders, chest, back, and legs. This makes it an effective full-body workout that improves overall muscle tone.
  • Stress Relief: Striking a heavy punching bag can act as a powerful stress reliever. The physical exertion helps release endorphins, the body’s natural mood elevators, reducing stress and improving mental clarity.
  • Improved Boxing Technique: For those training in boxing or other martial arts, heavy bag workouts sharpen skills. You can hone your punches, timing, and footwork while building a solid foundation for more advanced techniques.

In summary, training with a heavy punching bag can elevate your fitness, reduce your stress levels, and refine your combat skills, all while providing a dynamic and engaging workout experience.

heavy punching bag

Choosing the Right Heavy Bag for Your Training Needs

Selecting the right heavy punching bag is crucial for your training success. Here’s how to find one that suits your needs:

  • Weight: Determine the bag’s weight. It should be about half your body weight for optimal resistance.
  • Material: Look for durable materials like leather or synthetic leather. These withstand repeated use and last longer.
  • Filling: Check the filling type. Bags can be filled with different materials, like sand or fabric, affecting feel and impact.
  • Size: Consider the bag size. A taller and heavier bag is better for power punches, while a smaller one helps improve speed and technique.
  • Mounting: Decide on the mounting style. Free-standing bags are versatile, while hanging bags may offer more resistance.
  • Brand and Price: Research brands and compare prices. High-quality bags might cost more but offer better training experience.
  • Feedback: Read reviews and seek recommendations. Experiences from other users can guide you to a reliable choice.

By considering these factors, you can choose a heavy punching bag that enhances your workout and matches your fitness goals.

Fundamental Heavy Punching Bag Techniques

Mastering the basics is vital when you start heavy punching bag training. Here’s a checklist to ensure you’re covering the fundamental techniques:

  • Stance: Begin with your feet shoulder-width apart. Keep your knees slightly bent for balance.
  • Fist Formation: Position your hands correctly. Close them tightly, but not too tense, to avoid injury.
  • Punch Variety: Practice different punches. Start with jabs, crosses, hooks, and uppercuts.
  • Footwork: Move around the bag. Good footwork is crucial for an effective workout.
  • Breath Control: Breathe out with each punch. Proper breathing aids power and rhythm.
  • Consistent Impact: Hit the bag at the same spot. This improves accuracy and technique.
  • Defense: Don’t forget to practice blocking and slipping while hitting the bag.

Executing these basic techniques will not only improve your heavy bag workout but also lay a solid foundation for more advanced training. As you improve, aiming to increase speed and precision can lead to more intense and rewarding sessions.

heavy punching bag

Developing Power: Key Drills for Enhancing Punch Strength

To improve punch strength with a heavy punching bag, focus on specific drills. Here are key exercises:

  • Power Jabs – Throw a jab with all your might, focusing on speed and snap.
  • Cross Punches – Rotate your body and extend your back hand with force.
  • Upper Body Twists – Use your torso to power through your hooks and crosses.
  • Lower Body Drills – Engage your legs by squatting and punching. This builds lower body strength.
  • Weighted Punches – Use light hand weights to increase resistance when punching.
  • Interval Training – Alternate between fast, high-intensity punches and slower, controlled movements.
  • Push-ups – Strengthen your chest, shoulders, and arms with push-ups between rounds.

By including these drills in your routine, you’ll see an increase in punch strength. Remember to be consistent and practice good form to avoid injury and maximize the benefits.

Boosting Stamina and Endurance with High-Intensity Bag Workouts

Building stamina and endurance is crucial for any fitness regimen, and the heavy punching bag is an excellent tool to achieve that. High-intensity bag workouts push your cardiovascular system, leading to improved endurance over time. Here are effective ways to enhance stamina using a heavy punching bag:

  • Short Burst Drills: Work the bag in short, intense rounds. This simulates the high-energy demands of real fights.
  • Active Rest: During breaks, keep moving. Jog in place or shadow box to maintain your heart rate.
  • Circuit Training: Combine bag work with other exercises like burpees or jumping jacks for a full workout.
  • Long Rounds: Gradually increase your workout duration. Aim for rounds lasting more than three minutes.
  • Consistency Is Key: Stick to a regular workout schedule. It helps your body adapt and build endurance.
  • Variety: Switch up your routines. Different punches, speeds, and movements prevent plateaus.

By following these techniques, you’ll efficiently boost both your stamina and endurance for an overall fitter you. Always remember to keep hydrated, and never skimp on warm-up and cool-down sessions to prevent injury and ensure optimal performance.

Honing Your Combinations: Advanced Heavy Bag Drill Strategies

Honing your skills with a heavy punching bag requires practice and dedication. When you’ve mastered the basics, it’s time to focus on combinations. Advanced drills help refine your technique and improve your fight strategy. Here are strategies to master complex combinations:

  • Pair Punches and Footwork: Combine punch sequences with foot movements. This trains you to be agile in the ring.
  • Vary Your Combinations: Mix up punches to keep your routine dynamic. Add jabs, hooks, and uppercuts in different orders.
  • Practice Timing: Hit the bag at different rhythms. This improves your ability to strike effectively.
  • Use Intervals: Set a timer for high-intensity bursts of combinations, followed by a brief rest. This enhances both technique and endurance.
  • Simulate Opponents: Visualize an opponent’s movements. React with defensive and offensive combinations.
  • Add Speed: Once comfortable with a combo, increase your speed. This tests your agility and sharpens reflexes.

To see the best results from these advanced drills, consistency is crucial. Practice regularly, and push yourself to polish each combination. With time, you’ll notice your punches becoming more powerful, precise, and effective.


Incorporating Movement and Defense into Heavy Bag Routines

Incorporating movement and defense is crucial for a well-rounded heavy bag routine. Here are some tips:

  • Stay Light on Your Feet: Move around the bag. This keeps you agile and simulates a real fight.
  • Incorporate Head Movement: Duck and weave regularly. This builds reflexes and helps avoid punches.
  • Use Angles: Strike the bag from various angles. This mimics fighting an actual opponent.
  • Include Blocks: Pretend to block incoming hits. This practice toughens your defense skills.
  • Add Counter Strikes: Hit after a block or weave. It sharpens your ability to counterattack.
  • Practice Retreats: Take steps back or to the side after attacking. This trains you in strategic movement.

By using these strategies, you’ll add a new dimension to your heavy punching bag workouts. They can prep you for actual combat and greatly enhance your fitness.

heavy punching bag

Tracking Progress and Setting Goals for Your Heavy Bag Training

To make the most out of your heavy punching bag routine, tracking your progress and setting goals is key. Doing this keeps you motivated and ensures consistent improvement. Here’s how to stay on track and push your limits:

  • Set Clear Objectives: Before starting, identify what you want to achieve. It could be enhancing punch power, increasing stamina, or perfecting technique.
  • Keep a Training Log: Record your workouts. Note down the punches, combinations, and rounds you do. Add details on intensity and duration.
  • Review Regularly: Look back at your log weekly. This helps you see your growth and areas needing work.
  • Measure Performance: Use a timer or an app to track your speed and number of punches. Try to beat your personal bests.
  • Gradual Increases: Set the goal to slowly amp up your workout intensity. Add more time to your rounds or include additional sets.
  • Celebrate Milestones: Reward yourself when you hit goals. It could be a new set of gloves or a day off.
  • Adjust as Needed: If goals seem too tough or too easy, change them. Stay realistic but challenging.

By implementing these strategies into your heavy punching bag routine, you’ll be able to effectively track your progress and meet your fitness goals. This added structure will not only enhance your physical capabilities but also provide a rewarding and enriching experience over time.

Essential Safety Tips for Heavy Bag Workouts

When engaging with a heavy punching bag, safety should always come first. Here are essential tips to keep in mind:

  • Wrap Your Hands: Before starting, wrap your hands properly. This supports your wrists, knuckles, and prevents injuries.
  • Use Quality Gloves: Invest in a good pair of gloves that provide enough padding. This protects your hands when you hit the bag hard.
  • Start Slow: If you’re new to this workout, begin slowly. Gradually increase the force and duration of your punches as you build strength.
  • Maintain Proper Form: Keep your punches tight and controlled. Poor form can lead to muscle strain or injury.
  • Check the Bag’s Condition: Regularly inspect your heavy punching bag. Look for signs of wear and tear that could cause the bag to tear or swing unpredictably.
  • Secure the Mounting: Make sure the bag or its stand is secure. A loose bag can swing excessively and cause injury.
  • Rest When Needed: Don’t push through pain. If you feel sore or fatigued, take a break. Overtraining can lead to injuries.
  • Stay Hydrated: Drink plenty of water before and after your workout. Dehydration can lead to decreased performance and dizziness.
  • Cool Down: End your session with stretching or a light jog. This helps your muscles recover and prevents stiffness.

By following these tips, you’ll ensure that your heavy bag workouts are not only effective but also safe, keeping injuries at bay and allowing you to benefit fully from your training. Remember, safety precautions are the backbone of any sustainable workout regimen.


Punching Bag for Sale Selection Guide for Buyers

The Different Types of Punching Bags

When you’re searching for a punching bag for sale, you’ll come across various types. Each type serves a different purpose and comes with its unique set of benefits.

Freestanding Punching Bags: Ideal for those who need a portable option. They have a base filled with water or sand to keep them stable.

Hanging Heavy Bags: Traditional and widely used, these bags hang from the ceiling and are excellent for strength training.

Speed Bags: Small, air-filled bags that rebound quickly when hit. They help improve hand-eye coordination and speed.

Double-end Bags: These bags attach to both the floor and ceiling, allowing them to move more dynamically. They are good for practicing accuracy and reflexes.

Banana Bags: Long, slim bags that allow for low kicks and are mostly used in Muay Thai or kickboxing.

Wall-mounted Bags: Great for those with limited space, these bags attach directly to the wall and are used primarily for punching accuracy rather than power shots.

Each type of bag caters to different training needs and skills. Decide what your primary goals are, and choose a bag that aligns with those goals. Whether it’s improving punching power, speed, or accuracy, there’s a punching bag for sale that’s perfect for your workouts.

punching bag for sale


Factors to Consider When Buying a Punching Bag

When looking for a punching bag for sale, certain factors should guide your purchase. Here’s what to keep in mind to find the ideal punching bag that meets your needs.

Purpose and Training Goals: Clearly define why you need a punching bag. Different bags suit various training regimes, such as strength, speed, or technique.

Quality and Durability: Look for high-quality materials that can withstand repeated use. Durable punching bags allow for extensive, rigorous training without quick wear and tear.

Size and Weight: Ensure the punching bag’s size and weight are appropriate for your strength and skill level. Too heavy or large could lead to injury, while too light might not provide the resistance needed.

Budget: Determine your budget beforehand. Remember, investing in a slightly pricier, higher-quality bag can save money in the long run due to its longevity.

Space and Location: Consider the space where the bag will be placed. Ensure it can accommodate a freestanding or a hanging heavy bag, if that’s your choice.

Flexibility and Movement: Decide if you require a bag that offers more swing and movement, such as a double-end bag, for advanced training techniques.

By weighing these factors against your personal requirements, you will make an informed decision when selecting a punching bag for sale, ensuring you get the best value and functionality for your training.

Understanding the Materials Used in Punching Bags

When hunting for a punching bag for sale, material quality matters greatly. The right material affects the bag’s durability, feel, and suitability for different training needs. Here’s a rundown of common materials used in punching bags:

Leather: Often considered top-tier, leather punching bags are durable and offer a premium feel. They are, however, on the pricier side.

Synthetic Leather: A more affordable alternative to genuine leather. These bags are still quite durable and offer good resistance but may wear quicker than leather.

Vinyl: Vinyl bags are budget-friendly and resist wear and tear well, making them a solid option for casual training.

Canvas: The most economical choice, canvas bags are good for beginners. They are less durable and may not withstand intense workouts over time.

Foam: Some bags feature a foam liner that provides a more forgiving surface. This is gentler on the hands and wrists during training.

Filled vs. Unfilled: Punching bags can come pre-filled or unfilled. Filled bags are ready to use, while unfilled ones allow for a customized fill material, like sand, water, or fabric, to adjust firmness and weight.

Knowing the materials helps ensure you find a punching bag for sale that matches your needs and expectations. Select a material that aligns with your training intensity and how often you’ll use the bag.

punching bag for sale

Sizing and Weight: Choosing the Right Bag for Your Needs

When picking out a punching bag for sale, sizing and weight play pivotal roles. It’s crucial to match these elements to your physical capabilities and training requirements. Here’s how you can make the right choice:

Factor in Your Size and Ability: Your height and body strength should guide your decision. A bag that’s too heavy may harm your joints, while a too light bag won’t build muscle effectively.

Consider the Type of Training: Heavier bags are better for strength and endurance training. Lighter bags are ideal for speed and technique work.

Child and Adult Bags Vary: Punching bags designed for children are lighter and smaller. Adult bags offer more weigh and size options to suit different training levels.

Check the Recommended Weight: Manufacturers often suggest bag weights based on user weight. For example, if you weigh 160 pounds, a 60-pound bag might be a good start.

Remember, the right punching bag for your training enhances your workouts and prevents injury. Pay attention to these tips and choose a bag that will serve you well in the long term.

Mounting Systems and Installation

Choosing the right mounting system for your punching bag is essential for safety and functionality. Your decision will depend on the type of punching bag for sale that you’ve selected and the space where you plan to install it. Here are the options and considerations for mounting systems and installation:

Free-Standing Bag Base: If you’ve chosen a freestanding punching bag, installation is straightforward. Simply fill the base with sand or water for stability, and you’re ready to train.

Ceiling Mount: Hanging heavy bags require a secure ceiling mount. Ensure the ceiling can support the bag’s weight, and use heavy-duty chains and a swivel hook.

Wall Mount: Wall-mounted systems are perfect for wall bags or if you can’t hang a bag from the ceiling. Confirm that your wall is structurally sound to handle the impact.

Bag Stand: No drilling? No problem. A stand-alone bag stand can hold heavy bags without permanent fixtures. Make sure it’s robust enough to handle the bag’s sway.

Double-end Bag Anchors: For double-end bags, you’ll need both ceiling and floor anchors. Adjust the tension of the cords for optimal bag movement.

Successfully installing your punching bag involves reading the manufacturer’s instructions, having the right tools, and the consideration of safety every step of the way. If in doubt, it might be worth enlisting the help of a professional to ensure everything is set up correctly to avoid any mishaps during your training sessions.

Maintenance and Care for Your Punching Bag

To ensure your punching bag lasts long, proper maintenance and care are needed. Regular upkeep can prevent wear and tear and maintain the bag’s integrity. Here are steps to keep your punching bag in top condition:

Clean Regularly: Wipe down your bag with a damp cloth after each session. Use mild soap for thorough cleaning, but avoid harsh chemicals.

Inspect for Damage: Check your bag often for any tears or signs of wear. Early detection of issues can help prevent further damage.

Rotate Often: If you have a hanging heavy bag, rotate it to ensure even wear. This balances out the impact areas over time.

Keep Dry: Avoid letting your bag get wet. Moisture can damage materials like leather or canvas. Store it in a dry place away from direct sunlight.

Tighten Fittings: For freestanding bags, make sure the base is always tight. For hanging bags, check the chains and mountings to prevent accidents.

By following these simple steps, you’ll extend the life of your punching bag for sale. This means more training and better value from your investment.

punching bag for sale

Where to Buy Punching Bags: Retail and Online Options

When shopping for a punching bag for sale, you have two primary options: retail stores and online shops.

Retail Stores: Local sporting goods stores typically stock a variety of punching bags. Here, you can see the bags in person. You can touch them to gauge the materials and build quality. Staff can offer advice and answer questions. But, retail might have a limited selection and higher prices.

Online Shops: An extensive range of punching bags is available online. You can browse numerous brands and models. Reviews and ratings guide your choice. Prices may be lower compared to retail. Remember to check shipping fees, return policies, and customer support.

Whether you choose to go to a store or shop online, remember our guide. Find a bag that meets your training goals and budget. Ask questions and look for deals. With care, you will find the ideal punching bag for sale to start or enhance your workouts.

Top-rated Punching Bags on the Market

Choosing the right punching bag could be challenging. Let’s look at some top-rated punching bags currently available. These options combine quality, durability, and customer satisfaction.

Everlast Heavy Bag: Known for its toughness, the Everlast Heavy Bag is great for building strength. It is a hanging bag that comes in various weights to suit different skill levels.

Century Wavemaster: This freestanding bag offers easy setup and portability. It’s adjustable, making it a fit for all training heights.

Ringside Leather Heavy Bag: A professional-grade leather option, it’s perfect for those serious about boxing training. Its durability is worth the investment.

Outslayer Filled Punching Bag: With a reputation for exceptional quality, this bag caters to all skill levels. It is a heavy bag designed to take a beating.

Title Boxing Gyro Balanced Speed Bag: For improving reflexes and speed, this speed bag’s balanced design allows consistent rebounding.

RDX Punching Bag: This bag is a solid choice for those looking for quality synthetic leather. It’s well-made and suitable for a range of training activities.

When shopping for a punching bag for sale, it’s important to balance needs with cost. By choosing one of these highly-rated options, you ensure a rewarding training experience. Regular use and proper care will enhance your fitness goals and help you get the most out of your purchase.


Wall Punching Bag Essentials for Home Training

Benefits of Having a Wall Punching Bag at Home

Adding a wall punching bag to your home gym can bring multiple benefits. First, it’s a massive time saver. You can train whenever you want without the need to commute. This convenience means you’ll likely stick to your workout routine better. Secondly, it offers a rapid way to relieve stress. After a long day, a quick session with your wall punching bag can release tension.

Training at home with a wall punching bag can also be cost-effective in the long run. You save on gym memberships or travel costs. Plus, wall punching bags are designed for small spaces, so they hardly take up room. This is ideal for apartments or homes with limited space.

Privacy is another significant benefit. Some people feel self-conscious working out in public. With a wall punching bag at home, you can train in peace and focus on your technique. You can also play your music and create a personalized workout environment.

Lastly, a wall punching bag allows for versatile workouts. It’s not just for punching; you can also practise kicks, elbows, and other martial arts moves. This versatility makes it a well-rounded tool for improving overall fitness and physical conditioning.

By integrating a wall punching bag into your home, you can enjoy these benefits while enhancing your training and physical health. It’s a convenient, private, and versatile piece of equipment that caters to a wide range of fitness goals.

Wall Punching Bag

Choosing the Right Wall Punching Bag

Choosing the right wall punching bag is crucial for your home training needs. Here are key points to consider:

Size and Weight

Consider the size and weight of the bag. Make sure it fits your space and suits your strength level.

Material Quality

Look for durable materials that can withstand repeated strikes. Leather or synthetic leather are common choices.

Type of Filling

The filling impacts the bag’s feel and resistance. Common types include sand, foam, or fabric.

Mounting System

Check the mounting system. It should be secure and handle the bag’s weight without damage.

Brand and Price

Research brands for quality and customer feedback. Balance your budget with the bag’s quality and features.

By focusing on these factors, you’ll find a wall punching bag that meets your home training needs. Ensure it’s a perfect fit for your training intensity and the physical space available at your home. With the right choice, you can maximize the benefits of having a wall punching bag, as discussed previously in the blog.

Wall Punching Bag

How to Install a Wall Punching Bag

Installing a wall punching bag at home might seem daunting, but it can be straightforward with the right steps. Here’s a simple guide to getting your wall punching bag up and ready for training sessions:

Choose the Ideal Location

Your first step is finding the best spot in your home. Look for a sturdy wall, ideally concrete or brick, that can support the bag’s weight. Ensure there’s enough room around the bag to move freely during workouts.

Gather Your Tools

Before starting, collect all necessary tools. You’ll need a drill, wrench, stud finder, and possibly a hammer. Screws, wall anchors, and the mounting bracket should come with your bag.

Secure the Mounting Bracket

Use the stud finder to locate the studs in your wall. Mark the spots where you’ll attach the mounting bracket. Drill holes and then secure the bracket with screws and wall anchors, ensuring it’s tight and stable.

Hang the Bag

With the bracket in place, hang the wall punching bag. Have someone help you lift it if needed. Once hung, the bag should not touch the floor or the wall. Adjust it to the correct height for your training.

Test the Setup

Give the bag a few light punches to test its stability. If it wobbles or makes noise, check the mounting bracket and tighten any loose parts.

Installing a wall punching bag is vital to ensure safe and effective home workouts. Take your time to get it right and enjoy the convenience and benefits it brings to your training.

Wall Punching Bag

Training Routines with a Wall Punching Bag

Developing effective training routines is essential to make the most out of your wall punching bag. Here are focused drills and exercises that can enhance your skills and build strength.

Beginners’ Workout

Start with the basics. Throw a set of jab and cross punches, aiming for consistency in form. Practice for three-minute rounds with one-minute rest in between.

Power Drills

For strength, perform power punches. Rotate with hooks and uppercuts. Do this for two minutes, then rest for thirty seconds.

Speed and Agility

Improve speed and agility with quick jabs and footwork drills. Aim for rapid strikes, moving around the bag. Try one-minute rounds of high-intensity punches.

Endurance Rounds

Build your stamina with longer rounds. Start with five minutes of mixed punches at a steady pace. Gradually increase the time as your endurance improves.

Combination Sets

Mix punches, kicks, elbows, and knees for a varied workout. Create a sequence, such as jab-cross-hook-kick, and repeat. This will also help enhance your coordination.

Ensure you are incorporating the wall punching bag into your workouts regularly. This will help you see improvement and maintain momentum in your home training program.

Safety Tips When Using a Wall Punching Bag

Safety should always come first when training with a wall punching bag at home. Here are key safety tips to ensure you get the most from your sessions without injury:

Use Proper Gear

Always wear the right protective gear. This includes hand wraps and gloves to protect your hands and wrist. Check that your gear is in good condition before starting.

Start with a Warm-Up

Jumping into heavy bag work without a warm-up can lead to injury. Take at least 5-10 minutes to stretch and warm up your muscles. Focus on your arms, shoulders, and legs.

Maintain Correct Posture

Good form is crucial. Stand with your feet shoulder-width apart. Balance your weight and stay light on your feet. Keep your hands up and elbows in.

Punch Correctly

Aim your punches at the bag’s middle area, not the edges. Throw punches from your stance without overreaching. Twist your hips to engage your core, but do not lock your elbows or wrists.

Don’t Overdo It

Know your limits. If you feel pain, stop immediately. Rest between rounds to prevent muscle fatigue. Pay attention to how your body feels during workouts.

Inspect Your Equipment

Regularly check the wall punching bag and mounting for wear and tear. Ensure the bracket is secure and there’s no loose hardware. Tighten screws and replace worn parts as needed.

Keep Surroundings Clear

Make sure the area around the punching bag is free from any obstructions. You need space to move safely without tripping or bumping into objects.

By following these safety tips, you can enjoy your home workout while minimizing the risk of injury. A wall punching bag is a valuable addition to your training, but only if used correctly and safely.

Wall Punching Bag

Maintenance and Care for Your Wall Punching Bag

To keep your wall punching bag in top shape, maintenance is key. Here’s a straightforward guide to caring for your bag:

Regular Cleaning

Wipe the surface with a damp cloth after each use. For leather bags, use a suitable cleaner. This stops sweat and dirt from damaging the material.

Checking for Wear and Tear

Inspect your bag often for cuts or tears. Repair minor damages quickly to avoid them getting worse. Look out for weakened seams or areas that seem overly soft.

Proper Usage

Hit the bag correctly to prevent premature wear. Avoid rings, watches, or anything sharp during training. These can cut or otherwise damage your wall punching bag.

Avoiding Overexposure

Keep the bag away from direct sunlight or damp areas. UV rays can degrade materials, and moisture can lead to mold.

Rotation for Even Wear

Rotate your bag periodically to ensure even wear. This keeps any one side from wearing out too quickly.

Tightening Mounts

Check the mounting system every few months. Tighten any loose screws and ensure the bracket is secure. A stable mount keeps the bag safe for use.

Replacing when Needed

Finally, recognize when it’s time for a new bag. If repairs are frequent or the bag sags, it may be time to replace it.

By adhering to these maintenance and care tips, your wall punching bag will remain a durable and reliable piece of your home gym equipment. Stay consistent in your care routine, and you’ll ensure a safer, more effective workout with your wall punching bag.

Accessories to Enhance Your Wall Punching Bag Workouts

To get the most out of your wall punching bag workouts, consider these helpful accessories:

Quality Training Gloves

Invest in a sturdy pair of gloves. They will protect your hands and improve your grip.

Hand Wraps

Use hand wraps for extra wrist support. They help prevent injuries during intense workouts.

Weighted Vests

A weighted vest adds resistance to your training. It can boost strength and endurance.

Timer or App

Keep track of your rounds with a timer or app. This ensures disciplined training sessions.

Agility Ladder

An agility ladder enhances footwork. It’s great for warm-ups and improves coordination.

Resistance Bands

Resistance bands can add variety to your workouts. Use them for strength and flexibility training.

With the right accessories, you can level up your wall punching bag workouts. They bring variety and challenge to your routines, helping you achieve better results.

Wall Punching Bag

Wall Punching Bag vs. Traditional Heavy Bag: What’s the Difference?

When selecting the right bags for home training, many wonder about the wall punching bags vs. the traditional heavy bags. Each type offers unique benefits.

Space Requirements

A wall punching bags takes up less space. It mounts to the wall, saving floor area. Heavy bags hang from the ceiling or a stand and need more room.

Installation

Installing a wall punching bags involves mounting it to a wall. Heavy bags may need a ceiling mount or a standalone support.

Impact on the Body

Wall bags offer a solid, less swinging hit. Traditional heavy bags move when struck, which impacts how you train your reflexes.

Types of Training

A wall bag is ideal for punch and kick precision. Heavy bags are better for training power and movement with the bag’s sway.

Portability

Wall punching bags are not portable. Once installed, they stay put. Heavy bags can be moved, taken down or transported if they are not ceiling-mounted.

Cost

Wall bags often cost less and have fewer installation requirements. Heavy bags might need additional mounting hardware or stands.

In summary, choose a wall punching bags if you have limited space and favor precision training. Opt for a traditional heavy bag if you can allocate more space and want to work on movement and power. Both options enhance your fitness and contribute to effective home workouts. Keep space, installation, training type, portability, and cost in mind when making your selection.


Back To Top
+