What Do You Fill a Punching Bag with? A Step-by-Step Guide

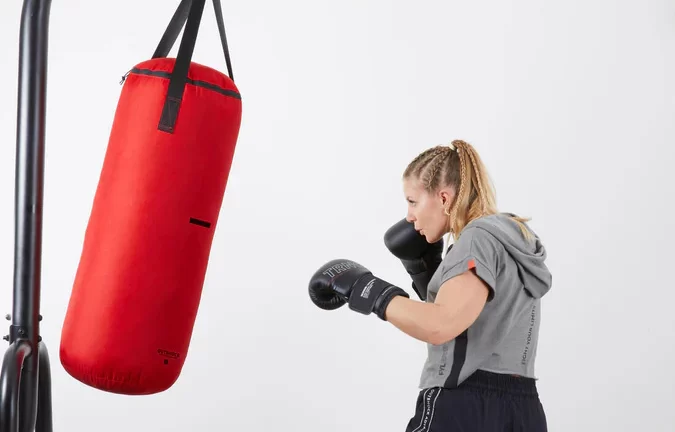
Introduction to Punching Bag Fillers

Before we delve into the nitty-gritty of how to fill a punching bag, it’s important to understand what do you fill a punching bag with. The right filler can significantly affect your bag’s weight, texture, and resistance. Common fillers include sand, fabric scraps, sawdust, rice hulls, and rubber mulch. Each of these materials has unique properties that cater to different training requirements and preferences.


Choosing the correct filler is crucial not only for the feel of your punches but also for the longevity of the bag. A well-filled bag provides the resistance necessary for strengthening muscles without causing harm to your hands or wrists. In the following sections, we’ll compare traditional and alternative fillers, and discuss their respective benefits to help you make an informed decision on the best filling material for your needs.

What Do You Fill a Punching Bag with

Evaluating Different Types of Fillers

When choosing what do you fill a punching bag with, it’s essential to consider the advantages and drawbacks of different fillers. The right choice will depend on your personal preferences, type of training, and the physical feedback you require. Let’s dive into the common options.

Traditional Sand Filling

Sand is a traditional favorite for filling punching bags. Its readily available and inexpensive, making it an appealing choice. Sand provides a firm, dense texture that’s ideal for heavy punches and kicks. It offers significant resistance, excellent for building muscle and improving power. But, sand can settle at the bottom, causing hardness, which can be tough on the hands and wrists. To avoid settling, ensure thorough packing and consider combining it with other materials.

Alternative: Using Clothes or Fabric

Clothes or fabric scraps offer a great alternative to sand. They’re soft and flexible, ensuring an even consistency across the bag. This type of filler absorbs impacts well, reducing the risk of injury. Fabric fills are perfect for those who prefer less resistance and lighter training sessions. Plus, it’s a great way to recycle unwanted textiles. Keep in mind, to achieve the desired weight, you may need a lot of fabric.

The Advantages of Sawdust or Rice Hulls

For those seeking an eco-friendly and cost-effective option, sawdust and rice hulls are excellent choices. They’re lightweight, creating a bag that’s easier on the joints, suitable for beginners or those with hand sensitivity. These materials provide a variable resistance, which can mimic the unpredictability of a real opponent. However, they may not offer enough resistance for advanced fighters or those looking to build significant power.

What Do You Fill a Punching Bag with

How to Prepare Your Punching Bag for Filling

Before you start filling your punching bag, proper preparation is key to ensure a smooth process and a well-filled training tool. Here are the steps to get your punching bag ready for its new fillers.

  1. Empty the Bag: If your punching bag is not brand new, make sure to empty it of any old materials. Check for wear and tear that might affect filling.
  2. Clean the Bag: Wipe down the inside and outside with a damp cloth. Let it dry fully before adding any new fillers.
  3. Gather Your Fillers: Decide on what do you fill a punching bag with. Get enough material to reach your desired weight and consistency.
  4. Get the Right Tools: Have a funnel or a makeshift tube on hand. This will help you pour fillers into the bag without spilling.
  5. Set Up Your Workspace: Choose an area that’s clean and spacious. A bit of mess is expected, so an outdoor space might be best.
  6. Inspect the Closure: Ensure the zipper or laces at the top of the bag are in good condition. They will need to hold the fillers securely once you are done.
  7. Plan for Weight and Balance: Consider how heavy you want the bag. Think about how you will layer materials to maintain an even weight distribution.

Preparing your punching bag carefully will save you time during the filling process and help maintain the quality of your bag in the long term.

Step-by-Step Guide to Filling the Bag

After preparing your punching bag, it’s time to fill it. This step-by-step guide walks you through the process of adding fillers, ensuring that your bag meets your specific training needs.

Step 1: Gathering Materials

Begin by collecting the fillers you’ve chosen. You’ll need a sufficient amount to reach the desired weight. A funnel or tube can help direct the materials into the bag. For a mixed filler approach, gather each component. For example, if combining sand and fabric, have both ready in separate containers.

Step 2: Layering the Fillers

Start filling the bag with the heaviest materials at the bottom. This often means a base layer of sand or rubber mulch. Above this, add lighter materials like fabric or foam for cushioning. Layering prevents settling and maintains a consistent feel all over.

Step 3: Packing the Fillers

Pack the fillers tightly to avoid empty spaces. Use a stick or your hands to press down after each layer. Make sure each layer is compact before adding the next one. This ensures that your punching bag remains firm and resilient over time.

Step 4: Sealing the Bag

Once the bag is filled, close the top securely. If your bag uses a zipper, zip it tightly. For laces, tie a sturdy knot. You want to ensure that no filler escapes during use. Check the closure after sealing to make sure it’s secure.

By following these steps, you can achieve a well-filled punching bag tailored to your training regimen. Remember to distribute the weight evenly to maintain balance and prevent injury during workouts. Fill your bag methodically to enjoy a safe and beneficial boxing experience.

What Do You Fill a Punching Bag with

Maintaining the Quality of Your Filled Punching Bag

Keeping your filled punching bag in good shape is important. This will ensure it lasts longer and provides consistent feedback during training. Here are some tips to maintain the quality of your punching bag.

Check for Settling Fillers Regularly

Over time, fillers like sand can settle at the bottom. This causes uneven density and hardness. Check the bag often and shake it up if needed to redistribute the fillers. This keeps the resistance even throughout the bag.

Inspect for Wear and Tears

Regularly inspect your bag for any damage. Look for tears or stitching coming undone. Early detection of wear can prevent further damage. Repair any issues promptly to maintain the bag’s integrity.

Keep Your Bag Dry

Moisture is the enemy of punching bags, especially those filled with fabric or foam. Keep your bag in a dry area to prevent mold and unpleasant odors. If it gets wet, dry it out completely before using it again.

Rotate the Bag during Use

Rotating the bag during workouts spreads the impact across various areas. This prevents overuse in one spot which can lead to quicker deterioration.

By following these maintenance steps, you ensure that what do you fill a punching bag with remains effective for your fitness goals. Proper care will help in avoiding common filling issues and prolong the life of your punching bag.

What Do You Fill a Punching Bag with

Tips for Adjusting Bag Weight and Density

To adjust your punching bag to the perfect weight and density, follow these tips:

Choose the Right Mix of Materials

Start by picking a mix of heavy and light fillers. Heavy fillers, like sand or rubber mulch, add weight to the bottom for stability. Light fillers, like fabric scraps or foam, provide cushioning. Balance these materials for the feel you want.

Consider the Bag’s Purpose

Think about how you’ll use the bag. For power training, aim for a heavier bag. For speed and technique, lighter is better. Tailor the bag’s weight to your training goals.

Test and Adjust Accordingly

After filling, test the bag’s weight and feel. Punch and kick it to see how it responds. Add or remove filler materials as needed to find the right balance.

Use Smaller Bags for Fine Tuning

If you need slight adjustments, use smaller bags of sand or other materials. Place them inside the main bag. This makes it easier to change the bag’s weight without a complete refill.

By following these tips, you’ll ensure that what do you fill a punching bag with aligns with your fitness needs and training intensity. Keep experimenting with different fillers and amounts until you get the desired weight and resistance. Always aim for a density that feels right for your level of experience and fitness goals.

Safety Considerations When Filling a Punching Bag

Filling a punching bag requires careful attention to safety. As you decide what do you fill a punching bag with, use these safety tips to prevent accidents and injuries.

Wear Protective Gear

Always wear gloves when handling materials like sand or rubber mulch. These can have rough edges that scratch or irritate your skin. If you’re using tools, protect your eyes with safety goggles.

Ensure a Stable Filling Surface

Make sure the surface you’re filling the bag on is stable and flat. A wobbly table can cause spills or accidents. If needed, get someone to help stabilize the bag as you fill it.

Lift with Your Legs, Not Your Back

When moving a partially filled bag, always lift with your legs. Bending and lifting with your back can cause strain or injury. Remember, a filled punching bag is heavy.

Avoid Overfilling

Do not overstuff your bag. Overfilling can cause the bag to burst during training. This can result in spilled materials and potential injury.

Keep Children and Pets Away

Small children and pets should be kept away from the filling area. They could choke on small materials or get injured by heavy bags.

Work in a Ventilated Area

Work in a well-ventilated space, especially when dealing with materials like sawdust or rice hulls. These can create dust that irritates your lungs.

By following these safety tips, you ensure a safe environment as you determine what do you fill a punching bag with. Take the proper precautions to keep both you and your training equipment in top condition.

What Do You Fill a Punching Bag with

Troubleshooting Common Filling Issues

When you’ve followed the previous steps and filled your punching bag, you might still face some problems. Below are common issues and how you can fix them.

Uneven Weight Distribution

If your bag feels lopsided, it’s likely due to uneven weight distribution. To fix this:

  • Open the bag and shift the fillers.
  • Add more material where needed to balance the weight.
  • Make sure to pack each layer firmly to prevent shifting.

Bag is Too Hard or Too Soft

The firmness of your bag is crucial for effective training. If it’s too hard or too soft:

  • For a softer bag, remove some of the heavy fillers like sand.
  • To increase firmness, add more of the dense materials.
  • Experiment with different filler ratios until you reach the desired resistance.

Material Settling at the Bottom

Over time, materials like sand may settle at the bottom. This hardens the lower area of the bag. To resolve this, do the following:

  • Empty the bag and properly mix the fillers.
  • Consider adding a layer of foam at the bottom to prevent settling.
  • Regularly shake the bag to redistribute the fillers.

Filler Leakage

If fillers are escaping from your bag, it’s likely a closure issue. To mend this:

  • Check the zipper or laces and repair any damage.
  • If using a patch, ensure it’s sealed tightly.
  • Double-check for any holes or tears in the bag’s body and patch them promptly.

By understanding these filling issues and knowing how to address them, you can keep your punching bag in top condition. Most problems can be fixed by adjusting what do you fill a punching bag with and how you do it. With these tips, your bag will remain a reliable partner in your training routine.


Essential Guide to Choosing Punching Bag Gloves

The Importance of Proper Punching Bag Gloves

Choosing the right punching bag gloves is crucial for both safety and performance. These gloves protect your hands and wrists during training or sparring sessions. They absorb the shock from hitting the bag. This helps prevent injuries to your knuckles, wrists, and fingers. Quality gloves also help in maintaining proper technique. They provide the necessary support for your hands. Proper gloves can also enhance your punching power. They allow for a tighter fist and more focused impact. Avoiding injuries means you can train consistently and make progress. Remember, the better the gloves, the better the protection. Invest in a good pair of punching bag gloves to protect your hands and improve your training.

punching bag gloves


Different Types of Punching Bag Gloves

Selecting the right type of punching bag gloves is essential. The type you choose should match your training level and boxing style. Here’s a brief overview of the different types available:

  • Bag Gloves: These are lightweight and designed for hitting heavy bags. They have less padding than other gloves.
  • Training Gloves: These are versatile. They can be used for hitting bags or sparring. They generally have more padding.
  • Sparring Gloves: These have extra padding to protect both you and your sparring partner. They are heavier.
  • Professional Fight Gloves: These are for professional bouts. They are regulated by weight and have minimal padding.
  • Cardio Gloves: These are for fitness classes and not for heavy bag work. They are light with minimal protection.

Choose according to your activity. For heavy bag work, bag gloves or training gloves could be your best choice. For sparring, go for sparring gloves to ensure safety. Remember, the right choice helps prevent injury and improves your performance.

Materials and Construction: What to Look For

When shopping for punching bag gloves, the materials and how they are constructed are key. You want gloves that will endure the constant impact without wearing out quickly. Here’s what you should consider:

  • Leather vs. Synthetic: High-quality leather gloves offer durability and comfort but can be pricey. Synthetic gloves are less expensive but might not last as long.
  • Stitching: Check the stitching on the gloves for strength and durability. Double stitching usually means a longer-lasting glove.
  • Padding: Good gloves have dense, shock-absorbing foam that protects your hands. Make sure the padding is even and consistent.
  • Lining: A moisture-wicking lining helps keep your hands dry and gloves odor-free.
  • Ventilation: Gloves with mesh panels or perforations allow your hands to breathe, reducing sweat buildup.
  • Cuff Design: Look for a secure wrist closure, such as a hook and loop, to provide support and help prevent injuries.

Select gloves that combine these elements with a proven track record. Gloves that skimp on materials or craftsmanship can lead to discomfort or, worst, injury. Always put quality over cost when it comes to your hands and safety. Remember to feel the material, check the craftsmanship, and consider how it fits your specific training needs when selecting your punching bag gloves.

punching bag gloves

How to Determine the Right Size and Fit

Finding the right size for your punching bag gloves is just as crucial as selecting the type. Here’s how to make sure they fit properly:

  • Measure Your Hand: Use a fabric tape measure to find the circumference of your hand, just below the knuckles. Make sure to measure your dominant hand, as it can be slightly larger.
  • Check Size Charts: Most glove brands offer size charts. Match your hand measurement to find your size. Remember, sizes can vary between brands.
  • Try Them On: If possible, try on different sizes to ensure a snug fit. Gloves should be tight but not cut off circulation.
  • Leave Some Room: Your fingers should reach the top of the gloves without pressing against them. Leaving a little room will avoid your fingers from cramping.
  • Check Wrist Support: The gloves should fasten securely around your wrist. They should not slip when you punch.

Proper fit is key for comfort and preventing injuries. Gloves that are too tight can restrict blood flow. Gloves that are too loose can lead to improper technique. Always prioritize fit when choosing punching bag gloves to protect your hands and enhance your training.

Key Features of Quality Punching Bag Gloves

To ensure you’re getting the best punching bag gloves, look for these key features:

  • Adequate Padding: High-quality gloves feature dense padding that absorbs shock and protects your hands.
  • Proper Fit: Gloves should fit snugly without cutting off circulation. They should also provide ample wrist support.
  • Durable Material: Look for leather or high-grade synthetic materials that can withstand repeated use.
  • Strong Stitching: Reinforced stitching enhances the durability and longevity of the gloves.
  • Ventilation: Gloves with good ventilation prevent sweat build-up and keep hands cooler during workouts.
  • Wrist Support: A supportive wrist closure, like a hook and loop, is important for stability and injury prevention.

Quality punching bag gloves are an investment in your safety and performance. They provide the protection and support needed for effective training. Make sure the gloves you select include these features to get the most out of your practice. Look for gloves that balance comfort, durability, and functionality. Always remember, proper gear is a crucial component of your training success.

punching bag gloves

Caring for Your Punching Bag Gloves

Proper care for your punching bag gloves is vital. This care extends the gloves’ life and keeps them in good condition. Below are essential care tips:

  • Clean Regularly: Wipe down your gloves with a damp cloth after each use. This removes sweat and dirt.
  • Air Dry Thoroughly: Never leave your gloves in your gym bag. Instead, let them air dry to avoid odor and bacteria.
  • Avoid Direct Sunlight: Direct sunlight can wear out the materials. Store gloves in a cool, dry place.
  • Use Leather Conditioner: If you own leather gloves, use a suitable leather conditioner. This keeps them soft and prevents cracking.
  • Check for Wear and Tear: Inspect your gloves regularly. Look for tears or changes in padding.
  • Don’t Share Gloves: Sharing can spread germs. It’s best to have your own pair.
  • Disinfect When Needed: Use disinfectant wipes occasionally. Focus on the lining and outer surface.

These steps will ensure your punching bag gloves remain comfortable, hygienic, and functional. Always remember, good practices in caring for your gear will greatly benefit your training in the long haul.

punching bag gloves

Common Mistakes to Avoid When Selecting Gloves

When choosing the right punching bag gloves, it’s easy to make errors. Here are some common mistakes to steer clear of:

  • Ignoring the Importance of Fit: Don’t just buy based on brand or style. Ensure the gloves fit snugly without restricting blood flow or movement.
  • Skimping on Quality: It might be tempting to go for cheaper options. But lower quality gloves can wear out faster and offer less protection. You get what you pay for.
  • Overlooking Material and Construction: Don’t ignore the glove’s material and how it’s put together. It affects both the glove’s durability and your comfort.
  • Neglecting Proper Care: Failing to clean and store your gloves properly shortens their life span. Follow the care instructions for the best results.
  • Forgetting Testing Gloves: Always try on gloves if possible. This helps you find the best fit and feel for your training needs.

Remember, right gloves can make or break your training routine. Avoid these pitfalls to ensure maximum protection and longevity for your punching bag gloves.

punching bag gloves

Where to Buy Punching Bag Gloves and What to Expect Price-wise

When you’re in the market for punching bag gloves, knowing where to buy and how much to spend is crucial. Here are some tips to guide you through the purchasing process:

  • Sporting Goods Stores: These stores often have a range of gloves. Expect to see different brands and price points.
  • Online Marketplaces: Websites like Amazon offer a wide selection. They often have customer reviews that can help you decide.
  • Specialty Boxing Shops: These focus on boxing gear and could provide expert advice. They might be pricier though.
  • Direct from Manufacturer: Buying from the maker’s site often ensures authenticity. Watch for online discounts or deals.

The price for punching bag gloves varies greatly. Basic synthetic gloves might cost as little as $20. Mid-range gloves often run between $40 and $100. High-end, leather gloves can exceed $100, depending on the brand and quality. Remember, investing more upfront can save you money in the long run with enhanced durability and better hand protection. Balance your budget with the consideration of quality and don’t skimp on your safety for the sake of saving a few dollars.

Always take your time to compare quality, prices, and reviews. That way, you’ll find the best gloves for your training and budget.


Punching Bag Stand Essentials for Home Gyms

Types of Punching Bag Stands

Choosing the right punching bag stand is vital for your home gym setup. There are several types to consider, each catering to different needs and spaces.


Free-Standing Stands: These are popular for their ease of installation and portability. They normally have a base filled with water or sand to keep the stand stable. Free-standing stands are suitable for light to moderate workouts.

Wall-Mounted Stands: These stands attach directly to the wall and save floor space, making them ideal for smaller areas. Ensure your wall can bear the weight before installation. They’re great for intense workouts but require a sturdy wall for mounting.

Ceiling Mounts: Ceiling mounts provide a stable option for heavy bags, allowing full 360-degree movement. They’re perfect for heavy-duty training but need a strong ceiling support beam for installation.

Stationary Bag Stands: These stands are permanent fixtures in your home gym. They’re extremely stable and can hold heavy punching bags for vigorous workouts. They take up more space and typically don’t move once set up.

Multi-Station Stands: These are the most versatile stands. They often come with additional features like pull-up bars or dip stations. They’re excellent for a full-body workout but require more space and investment.

Adjustable Stands: For those who have varying height users or bags, adjustable stands can accommodate different sizes. They allow for flexibility but may have stability trade-offs with significant height adjustments.

Before you make your purchase, think about the type of workouts you’ll be doing, the space you have available, and who will use the punching bag stand. This will help you select the most suitable type for your home gym.

punching bag stand

Key Features to Consider Before Buying

When scouting for a punching bag stand for your home gym, prioritize features that cater to your workout needs and safety. Assess these key features before committing to a purchase:

  • Stability: The stand must remain firm during use. Check the base design and what fills it, whether sand or water.
  • Durability: Materials matter. Steel stands withstand wear and tear better than most.
  • Weight Capacity: Your stand must support the weight of your punching bag, especially for heavy bag workouts.
  • Adjustability: If multiple people use it or you have different bags, look for stands that adjust in height.
  • Size and Footprint: Consider the stand’s dimensions. Ensure it fits comfortably in your gym space.
  • Ease of Assembly: Look for stands that offer simple set-up instructions with minimal tools required.
  • Versatility: Some stands come with additional workout stations. Decide if you want these extras.
  • Brand Reputation: Trustworthy brands often mean quality products. Read reviews and seek recommendations.
  • Warranty and Customer Support: Good after-sales support can be invaluable if issues arise.

Make a checklist of these features when comparing different punching bag stand models to ensure that the one you choose aligns with your workout regimen and space constraints.

punching bag stand

The Benefits of a Heavy Bag Stand at Home

Including a heavy bag stand in your home gym offers several advantages. Here are the top benefits:

Convenience: With a punching bag stand at home, you can train whenever you want. No more scheduling conflicts or waiting for equipment at the gym.

Privacy: Work out in the comfort and privacy of your own space. You can focus on your technique without distractions.

Customization: Tailor your workout environment to suit your preferences. Hang your choice of punching bag and adjust the stand to your liking.

Cost-Effectiveness: Investing in a home setup saves money in the long run. You avoid ongoing gym fees and travel expenses.

Consistency: Having a punching bag stand at home makes routine training easier to maintain. Consistent practice is key to improving in any martial art or fitness program.

Space Utilization: Stands come in various designs that maximize space. Even in small areas, you can fit a stand that supports your fitness goals.

Remember to consider these benefits when choosing a punching bag stand for your home. It’s a step towards a dedicated and effective workout regime.

Assembly and Installation Tips

Proper assembly and installation are crucial for the safety and functionality of your punching bag stand. Follow these tips to ensure a successful setup:

  • Read the Manual: Always start by reading the manufacturer’s instructions carefully. This avoids common assembly mistakes.
  • Gather Your Tools: Most stands require basic tools like a wrench and screwdriver. Have these ready beforehand.
  • Ask for Help: Some steps may need an extra pair of hands. Don’t hesitate to ask someone to assist you.
  • Check All Parts: Before starting, check you have all necessary pieces. Missing parts can delay your setup.
  • Take Your Time: Rushing can lead to errors. Allocate enough time to assemble the stand properly.
  • Secure Fasteners: Ensure all screws and bolts are tight. Loose fasteners can be a safety hazard.
  • Stabilize the Base: If your stand has a fillable base, use sand for better stability than water.
  • Verify Stability: After assembly, test the stand’s stability without the bag. Adjust if needed before hanging the bag.
  • Protect Your Floors: Use a mat or padding under the stand to prevent floor damage and reduce noise.

Correct assembly and installation set the stage for a safe and effective workout. By following these tips and carefully considering the points raised, your punching bag stand should be ready for use in your home gym. Keep in mind the importance of double-checking the stability and durability of the stand once assembled, ensuring it can handle the intended workout intensity.

punching bag stand

Space Requirements and Placement

Choosing the right placement for your punching bag stand is as crucial as selecting the stand itself. To get started, here are some considerations for setting up your space efficiently:

  • Measure Your Space: Assess the area where you plan to install the stand. Make sure there’s enough room to move around the bag.
  • Clearance for Swinging: Ensure there is ample clearance for the bag to swing without hitting walls or other objects. This is vital for a safe workout.
  • Floor Surface: The type of flooring can affect the stability of the stand. Flat, even surfaces are best. Use mats or padding for extra stability.
  • Avoid High Traffic Areas: Place the stand in a low-traffic spot to prevent disturbances or accidents during your workout.
  • Nearby Windows: Keep the stand away from glass or windows to minimize the risk of damage or injury.
  • Room Height: Check the ceiling height is sufficient, especially if you’re considering a ceiling mount option.
  • Accessibility: Make sure that the stand is easily accessible for regular use, encouraging consistent training.

Proper placement not only maximizes the usability of the punching bag stand but also ensures safety during your workouts. Allocate space wisely, maintain a safe perimeter, and you’ll have a functional addition to your home gym. Remember to review these points when you set up your punching bag stand to get the most out of your investment.

punching bag stand

Maintenance and Safety Guidelines

Maintaining and using your punching bag stand safely is crucial for your home gym. Here are important tips to follow:

  • Regular Inspections: Check the stand regularly for any signs of wear or damage. Look for rust, cracks, or loose bolts that could compromise safety.
  • Immediate Repairs: If you notice any damage, fix it right away. Delaying repairs can lead to accidents or further damage.
  • Clean Equipment: Wipe down your stand often to prevent dirt build-up. Use mild soap and water for cleaning.
  • Follow Weight Limits: Always adhere to the manufacturer’s recommended weight capacity. Overloading the stand can cause it to topple.
  • Use Properly: Never hang on or swing from the stand. It’s designed for holding punching bags only.
  • Stable Positioning: Make sure the stand is on a level and stable surface at all times. Reposition if you notice any wobbling.
  • Child Safety: Keep children away from the stand when not in use. Store it in a safe place if necessary.
  • Safety Gear: Wear appropriate protective gear like gloves and wrist wraps when training. This helps prevent injuries.
  • Emergency Plan: Have a first aid kit nearby and know how to use it. Accidents can happen, so be prepared.

Regular maintenance and following these safety guidelines help ensure a long lifespan for your punching bag stand and a safe environment in your home gym.

Top Punching Bag Stand Brands and Models

Choosing the right brand is key when buying a punching bag stand. Top brands often provide quality, durability, and customer trust. Here’s a list of some well-known punching bag stand brands and their popular models:

  • Everlast: A leader in boxing equipment, Everlast offers models like the ‘Heavy Bag Stand’ that are known for their strength and resilience.
  • Century: The ‘Century Cornerman’ is oversized but adjustable, making it an excellent choice for stability and space management.
  • Titan: Titan’s ‘Dual Station Boxing Stand’ caters to those who need a multi-use setup with space for a speed bag.
  • Ringside: Known for professional gear, Ringside’s ‘Prime Free-Standing Station’ is a solid choice for serious athletes.
  • Outslayer: Outslayer stands, such as their ‘Heavy Duty Punching Bag Stand,’ are praised for high weight capacities and sturdiness.
  • BalanceFrom: ‘BalanceFrom Heavy Bag Stand’ is an affordable option that accommodates various bag sizes and user needs.

These brands have models that meet different criteria, from space-saving to multi-functional designs. When you select a model, match it with your checklist of features needed for your workouts. Look for strong reviews, and consider after-sales service and warranties. Remember, investing in a reputable brand can lead to a safer and more satisfying fitness experience at home. Keep these names in mind as you shop for the right punching bag stand for your home gym.

punching bag stand

Enhancing Your Workout with the Right Accessories

Finding the right accessories can take your workout to the next level. When you have a punching bag stand, certain add-ons become essential for a varied and effective training session.

  • Quality Boxing Gloves: Protect your hands with well-cushioned gloves. Ensure a snug, comfortable fit.
  • Hand Wraps: Support your wrists and hands. They add an extra layer of protection under gloves.
  • Weighted Vest: Increase workout intensity. Adding weight challenges your strength and endurance.
  • Punching Bag: Select a bag that matches your fitness level. Heavy bags improve power; lighter bags, speed.
  • Speed Bag Platform: If your stand allows, attach a speed bag. It sharpens reflexes and timing.
  • Floor Mats: Reduce noise and protect your floors. Mats offer stability for your stand.
  • Timer: Keep track of rounds and rest periods. A timer helps maintain workout structure.
  • Resistance Bands: Enhance your strength training. Attach them to the stand for various exercises.

Choosing these accessories thoughtfully will complement your punching bag stand. They help in building a more rounded fitness routine. Remember to check for compatibility with your stand model before purchasing any accessories.


Maximizing Workout Efficiency with a Punching Bag Stand

Choosing the Right Punching Bag Stand

Choosing the right punching bag with stand can be crucial for a safe and effective workout. Consider the material of the stand. Heavy-duty steel stands offer stability and durability. The weight limit is also essential. Ensure that the stand can support your punching bag’s weight. Look for adjustability features as well. A stand with adjustable height can cater to different training routines and user heights. Check for a compact design if you have limited space. Some stands are foldable, making them easy to store when not in use. Lastly, opt for stands with added features. Some come with anchor points for resistance bands, enhancing your training options. Keep these points in mind to maximize your workout efficiency.


Benefits of Using a Punching Bag Stand

Utilizing a punching bag with stand has several advantages for those looking to enhance their workouts. Here are some notable benefits:

Improves Stability and Safety

A robust stand provides a secure base, reducing the risk of the bag tipping over during vigorous sessions. This improves safety for the user.

Offers Versatile Workout Options

With a stand, you can perform a variety of exercises. It supports different punching techniques and power levels, offering a comprehensive workout.

Saves Space

A stand often occupies less space than hanging setups. It’s ideal for home gyms or smaller spaces where ceiling mounts are not feasible.

Allows for Indoor and Outdoor Use

Most stands are portable. You can set them up anywhere, indoors or outdoors, to suit your preference and available space.

Enhances Cardiovascular Health

Regularly working out with a punching bag can boost heart health. The intensity of the exercises increases your heart rate, promoting better cardiovascular function.

Builds Strength and Endurance

Punching against resistance builds muscle strength and endurance. A stand can support heavy bags that provide ample resistance for strength training.

Convenient and Easy to Use

A punching bag with stand is easy to set up and use. It often requires less installation effort than mounted bags, making it a convenient choice.

These benefits clearly show how using a punching bag stand can be a practical addition to your fitness routine. Keep these advantages in mind when considering adding a stand to your workout arsenal.

punching bag with stand

Types of Punching Bag Stands Available

When shopping for a punching bag with stand, you’ll find several types to choose from. Each type caters to different preferences and workout goals.

Free-Standing Punching Bag Stands

Free-standing stands are popular for their ease of installation and mobility. They have a base, often fillable with sand or water, to provide stability. These are great for movement-based workouts that require shifting around the bag.

Wall-Mounted Punching Bag Stands

Wall-mounted stands save floor space and are fixed to a wall. They’re a good choice if you prefer a stationary position and a consistent rebound from the bag.

Ceiling-Mounted Punching Bag Stands

These stands attach to the ceiling and offer a traditional boxing experience. They’re well-suited for high-impact workouts and are typically more stable than free-standing options.

Adjustable Punching Bag Stands

Adjustable stands allow you to change the bag’s height, accommodating users of different sizes. Ideal for families or gyms where multiple people use the same equipment.

Multi-Station Punching Bag Stands

Multi-station stands come with additional fixtures for speed bags or pull-up bars. They’re perfect for those who want a varied workout beyond just punching.

Choosing the right type of punching bag stand depends on your space, workout style, and personal preference. Be sure to consider these options as you look to maximize your workout efficiency.

punching bag with stand

Space Considerations for Your Punching Bag Stand

When choosing a punching bag with stand, space is a vital factor. Here’s how to assess your space:

Evaluate Your Available Space

Before purchasing, measure the area where you plan to place the stand. It should allow you to move freely around all sides of the bag. Remember to account for the stand’s footprint and the swing of the bag.

Consider Ceiling Height

Ensure the ceiling is high enough for the stand, especially when opting for adjustable or ceiling-mounted stands. There should be ample clearance above the bag for safe usage.

Think About Portability

If you’ll be moving the stand between indoor and outdoor spaces, opt for a design that’s easy to transport. Free-standing models with a fillable base are usually more portable.

Plan for Storage

If space is tight, look for a foldable stand that can be easily stored away when not in use. This is essential for maintaining a clutter-free environment.

Keep these factors in mind to ensure that your punching bag with stand fits comfortably and safely in your chosen workout space.

Essential Features for Quality Punching Bag Stands

When you’re in the market for a punching bag with stand, quality should be a top priority. Here are key features to look for to ensure that you get a robust and reliable product.

Durable Materials

Opt for stands made of solid steel or reinforced aluminum. These materials withstand heavy use and resist wear and tear.

Stable Base

A stand must have a strong base to prevent tipping or wobble during exercise. Look for wide-set legs or a weighted base.

High Weight Capacity

Ensure the stand can carry your punching bag’s weight. A higher weight capacity means more versatility in bag choice.

Adjustable Components

Choose a stand with adjustable height and bag positioning. This makes it usable for various workouts and user heights.

Easy Assembly

A stand that’s simple to put together saves time and hassle. Check for included tools and clear instructions.

Versatility

Some stands come with add-ons like pull-up bars or dip stations. This feature lets you diversify your routine.

Compact Design

If space is limited, select a stand that’s compact or foldable. It helps you save on space without compromising quality.

When your punching bag stand ticks all these boxes, you’re all set for an effective and safe workout experience. These features will contribute to maximizing workout efficiency by providing a reliable setup for your training needs.

punching bag with stand

How to Set Up Your Punching Bag Stand

Setting up your punching bag with stand is straightforward. Follow these steps for a hassle-free installation:

Choose the Right Location

Pick a spot that gives you ample room to move around. Ensure it’s flat and free of obstacles.

Assemble the Base

If you have a free-standing model, assemble the base first. This may involve filling with sand or water for stability.

Connect the Poles

Attach vertical poles to the base securely. Refer to the manual for the correct order of assembly.

Mount the Bag

Hook or attach your punching bag to the stand. Check that it’s firmly in place before use.

Test Stability

Give the bag a few light punches to test the stand’s stability. Make adjustments if needed.

Safety Check

Double-check all bolts and connections. Ensure they are tightened and secure to prevent accidents during workouts.

By following these simple steps, you can set up your punching bag with stand effectively. It provides a secure and stable platform for your training. Remember to refer to the product’s assembly instructions for specific details related to your model.

punching bag with stand

Maintenance Tips for Punching Bag Stands

To keep your punching bag with stand in top shape, regular maintenance is key. Here are some practical tips to ensure longevity and safety:

Inspect Regularly

Check your stand frequently for signs of wear or damage. Look for rust, loose bolts, and worn parts.

Tighten Bolts and Nuts

With each use, bolts can loosen. Tighten them periodically to maintain stability.

Clean the Stand

Wipe down the stand with a damp cloth to remove dust and sweat. This prevents corrosion.

Check the Weight Limit

Always use a bag that’s within the stand’s weight capacity. Overloading can cause damage.

Replace Worn Parts

If you spot any worn or broken components, replace them immediately. This keeps the stand safe.

Store Properly

If you’re not using it, store your stand in a dry, cool place. Avoid direct sunlight and moisture.

By following these tips, your punching bag with stand will remain a durable part of your fitness regimen. Regular attention prevents accidents and extends the life of your equipment.

punching bag with stand

Incorporating Punching Bag Workouts Into Your Routine

Incorporating a punching bag with stand into your fitness routine can lead to numerous benefits. Here’s how you can get started with effective punching bag workouts:

Determine Your Fitness Goals

First, outline your fitness goals. Is it to improve strength, enhance cardiovascular health, or increase endurance? Understanding your aims helps tailor the workout to your needs.

Start with the Basics

If you’re new, begin with basic punches. Learn the jab, cross, hook, and uppercut. This builds a solid foundation for your technique.

Create a Workout Schedule

Consistency is key. Schedule regular sessions with your punching bag. Aim for at least three times a week to see progress.

Vary Your Routines

Keep workouts exciting by varying your exercises. Mix in high-intensity intervals, combinations, and footwork drills. This prevents boredom and plateaus.

Use Proper Form

Maintain proper form to prevent injury and maximize efficiency. Stay on the balls of your feet, and keep your hands up. If unsure, seek guidance from a trainer.

Combine with Other Exercises

For a full-body workout, combine punching bag sessions with strength training or cardio. This approach works all muscle groups and boosts overall fitness.

Monitor Your Progress

Track your performance. Note improvements in speed, power, and endurance. Adjust your workouts as you progress to keep challenging yourself.

Stay Motivated

Set small, achievable targets to stay motivated. Celebrate these milestones to maintain your workout routine’s momentum.

Adding a punching bag with stand to your workouts refreshes your routine and can deliver impactful results. By following these tips, you’ll be sure to get the most out of your punching bag workouts. Remember to ease into the practice, maintain consistency, and always focus on proper technique for the best outcomes.


Boxing Punching Bag Essentials for Effective Training

Choosing the Right Punching Bag

When starting your boxing training, the choice of a boxing punching bag is crucial. It will influence not only your training quality but also your physical development as a boxer.


Types of Punching Bags

When it comes to boxing punching bags, variety abounds. Here are the common types:

  • Heavy Bags: Ideal for building strength and honing body punches.
  • Speed Bags: Improve rhythm, speed, and hand-eye coordination.
  • Double-End Bags: Enhance reaction time and adaptability.
  • Free-standing Bags: A versatile option when ceiling mounts are not feasible.
  • Maize Bags & Slip Bags: Focus on head movement and dodging skills.

Each type of punching bag targets specific skills. A mix can offer a well-rounded training experience. Choosing what fits your goals is essential.

Factors to Consider Before Buying

Several key factors will guide your purchase of the right boxing punching bag. Keep in mind:

  • Size and Weight: Heavier bags provide more resistance. They are better suited for strength training but require a stronger mounting system.
  • Material: Leather bags last longer but may be pricier. Synthetic options are cheaper and suitable for beginners.
  • Filling: Options include sand, water, or compressed cloth. Each has distinct impact feedback.
  • Space: Your training area must accommodate the bag size without hindrance.
  • Mounting: Consider if you can hang the bag or if you need a free-standing model.
  • Budget: Understand how much you are willing to spend without compromising on quality.

Selecting the right boxing punching bag involves weighing these factors carefully. It ensures that your investment supports your training regime effectively.

boxing punching bag

Proper Boxing Gear and Equipment

Besides the boxing punching bag, proper gear is a must for effective boxing training.

Gloves and Hand Wraps

Good gloves protect your hands and improve your performance. They should fit well and provide ample cushioning. Hand wraps are just as important. They support your wrists and help prevent injuries. For heavy bag work, choose gloves with sufficient padding. For speed bag training, lighter gloves may be better. Make sure you wrap your hands correctly every time.

Protective Gear

Safety comes first in boxing. Headgear, mouthguards, and groin protectors are essential. Headgear shields against head injuries and concussions. It must be comfortable and not restrict your vision. Mouthguards protect your teeth and reduce the risk of concussions. Always use a mouthguard that fits well. Groin protectors guard against low blows. They should not limit your movement. Shin guards offer additional protection, especially during sparring sessions.

Select gear that balances safety, comfort, and budget. Remember to replace gear when it shows signs of wear.boxing punching bag


Setting Up Your Punching Bag

Location and Space Requirements

Choosing the right space for your boxing punching bag is critical for effective training. First, measure the area. You need enough room to move around the bag comfortably. Consider space for footwork and dodging. Make sure the ceiling is high enough for overhead punches. A space with minimal distractions helps you focus on technique and form.

Mounting and Suspension Options

Your boxing punching bag setup must be secure. For heavy bags, a wall or ceiling mount works best. Ensure the mount is attached to studs or beams, not just drywall. For freestanding bags, select a stable base to prevent tipping. Suspended bags require a strong chain or strap. Check all hardware regularly for signs of wear. Always follow manufacturer instructions for safe installation.

boxing punching bag

Punching Bag Workouts

Engaging in effective punching bag workouts is key to leveraging your boxing punching bag to its fullest potential. The workouts discussed here will target different aspects of boxing, from mastering the basics to enhancing speed, power, and your ability to combine techniques skillfully.

Basic Punching Techniques

Begin with learning the fundamentals. Focus on the jab, cross, hook, and uppercut. Ensure each punch is sharp and accurate. A good stance and balance are critical. Practice with a relaxed rhythm, and gradually increase intensity. Good technique lays the foundation for all subsequent training.

Developing Speed and Power

Step up by focusing on exercises that foster speed and power. Short, fast bursts on the speed bag develop quick hands. For power, deliver forceful strikes to the heavy bag. Push your limits but maintain form. Consistency is key. Speed and power are crucial for outperforming an opponent.

Combo Drills for Advanced Training

Once you’ve got the basics down, move to combination drills. These drills sharpen your ability to throw punches in a seamless flow. Combine hooks, uppercuts, and body shots in quick succession. Advanced training keeps your skills sharp and prepares you for complex fighting scenarios.

Incorporating Strength and Conditioning

Adding strength and conditioning to your boxing routine is essential. It complements punching bag workouts and enhances overall performance. The combination ensures a dynamic and balanced approach to your training.

Core Workouts

Core strength is vital for boxers. It provides stability and power for punches. Incorporate exercises like planks, sit-ups, and Russian twists into your regimen. Aim for short, intense sets to build endurance. Core workouts help improve your balance and reduce the risk of injury. A strong core can make a noticeable difference in your punching power and resistance in the ring.

Leg Exercises and Footwork

Leg strength is just as important in boxing. It supports powerful punches and quick movements. Include squats, lunges, and calf raises in your workouts. Jump rope for agility and footwork. Practice moving in and out of range and side-to-side. These exercises will help you develop the ability to maintain a solid stance. Good footwork is essential for defensive maneuvers and effective attack strategies while using a boxing punching bag.

boxing punching bag

Safety Tips and Injury Prevention

Ensuring safety and preventing injuries are just as important as the workouts themselves in boxing.

Correct Form and Technique

Good form is key to safe boxing with your boxing punching bag. Start with correct stance; feet shoulder-width apart, knees slightly bent, and hands up to protect the face. Throw punches with proper alignment to avoid stressing your joints. Rotate your hips with each punch for power and protect your back. Always keep your head moving to simulate a real fight scenario. Practicing with a mirror can help you spot and correct mistakes.

For beginners, it’s wise to get instruction from a coach to learn these techniques. Even experienced boxers revisit the basics regularly. This focus on fundamentals will help avoid common injuries, such as wrist sprains or shoulder strains. Don’t hurry through punches, form comes before speed.

Importance of Rest and Recovery

Rest and recovery are vital to any boxing routine. Your body needs time to repair after intense workouts with a boxing punching bag. Get plenty of sleep; resting muscles grow stronger. Take at least one full day off per week to allow your body to recover.

Include active recovery in your routine. Light jogging, stretching, or yoga can help your muscles recover without overexertion. Hydration and a balanced diet fuel your body’s repair process. And listen to your body—if something hurts beyond normal soreness, give it time to heal. Pushing through pain can lead to more severe injuries.

Keep these safety tips in mind to ensure a long, productive boxing journey with minimal setbacks.

boxing punching bag

Cleaning and Maintenance of Your Punching Bag

To keep your boxing punching bag in top shape, regular cleaning and maintenance are key. Here’s how to care for your bag.

Routine Cleaning Steps

  1. Wipe Down After Use: Quickly wipe your bag with a damp cloth after every session to remove sweat and dirt.
  2. Disinfect Regularly: Use a disinfectant spray once a week to keep the bag hygienic and odor-free.
  3. Check For Wear and Tear: Inspect your bag for cuts or wear regularly. Early detection can prevent further damage.
  4. Keep Dry: Ensure your bag stays dry. If it gets wet, dry it thoroughly to prevent mold and bad smells.
  5. Avoid Sunlight: Store your bag in a place away from direct sunlight which can cause the material to deteriorate.

When to Replace Your Punching Bag

  1. Excessive Wear: If your bag shows significant wear such as tears or deformities, it’s time for a replacement.
  2. Faded Material: Material that’s faded or brittle can break easily and should be replaced.
  3. Loose Filling: If the filling feels uneven or has settled, creating hard and soft spots, consider a new bag.
  4. Bad Smell: A persistently bad odor could mean that it’s time to invest in a new boxing punching bag.

Regular maintenance prolongs your bag’s life and ensures safe, effective training.


Setting Up Your Hanging Punching Bag Safely

Choose the Right Location for Your Punching Bag

Choosing the right spot for your hanging punching bag is critical. The location impacts both your training effectiveness and safety. Start by looking for a space with enough room. You need space to move around the bag without hitting walls or other objects. Ideally, allow for at least a 10-foot diameter around the bag. High ceilings are also important. They give more room to hang the bag and ensure it can swing freely. Consider the floor type as well. A durable, non-slip surface is best. It prevents accidents during workouts. Make sure the location is not in a high-traffic area of your home or gym. This reduces the risk of others walking into your training zone. Finally, check that the location you choose can support the weight of a hanging punching bag. You may need a beam or sturdy support in the ceiling to attach the hardware. Keep these points in mind to set up a safe and practical punching bag space.

Hanging Punching Bag


Types of Punching Bags and Their Mounting Requirements

When setting up a hanging punching bag, it’s important to know the types available and their specific mounting needs. The most common punching bags include heavy bags, speed bags, and free-standing bags, each with distinct mounting requirements.

  • Heavy Bags are the traditional choice for strength and conditioning. They require a secure mounting system as they can be quite heavy, typically between 70 to 150 pounds. You must attach them to a beam, ceiling joist, or a specialized bag mount that can handle the weight and the dynamic forces when the bag is hit.
  • Speed Bags focus on improving reflexes and hand-eye coordination. They are smaller and lighter than heavy bags. Speed bags need a wall-mounted platform or a ceiling attachment that allows for the high-speed rebounds.
  • Free-Standing Bags are not hung, but they fall under this category as an alternative. They have a base typically filled with water or sand to keep them stable. No hanging installation is required, but ensure the surrounding area is clear to allow for movement. They are great for those who cannot install a traditional hanging punching bag.

Each type of punching bag comes with manufacturer instructions for installation. Follow these guidelines to ensure that your bag is secure. No matter the type, it’s crucial to use proper hardware designed for the weight and type of bag you choose. Make sure all components are rated for higher than the actual load for added safety.

Remember, the safety of your hanging punching bag setup is paramount. Always double check the strength of the mounting surface and the quality of the hardware before beginning your workout regime.

Essential Tools and Hardware for Installation

To install a hanging punching bag safely, you need the right tools and hardware. This equipment will ensure a secure and reliable setup. Here’s a list of essential items:

  • Heavy-Duty Drill: This tool is vital for making pilot holes in your ceiling joist or beam.
  • Drill Bits: Use drill bits suitable for the material of your support structure, such as wood or concrete.
  • Wrench and Screwdriver: These are for tightening bolts and screws.
  • Stud Finder: Locate ceiling joists or beams accurately with this device.
  • Heavy Bag Hanger or Mount: Choose a mount that’s designed for hanging punching bags and can handle the weight.
  • Chain or Durable Straps: These will hold the bag and allow for height adjustments.
  • S-Hooks or Carabiners: These provide a convenient attachment point and quick release.
  • Eyebolt and Nuts: An eyebolt is necessary for anchoring the chain or strap to the ceiling.
  • Spring Coil: To reduce noise and vibration, use a spring coil between the mount and the chain.

Make a checklist of these items before starting. Use tools and hardware that can support more weight than your punching bag weighs. This will add an extra level of security to your setup. Before you begin, review the manual for your specific hanging punching bag. Some bags may come with specific hardware or require additional tools for installation. Double-check that you have everything needed for a successful installation.

Hanging Punching Bag

Step-by-Step Guide to Safely Hang Your Punching Bag

Hanging a hanging punching bag requires careful attention to detail to ensure safety and stability. Follow this simple step-by-step guide to get your bag ready for use.

  1. Locate the Support Beam: Use a stud finder to find a beam or joist in your ceiling that can support the weight of your punching bag.
  2. Mark the Drill Points: Once you’ve located the beam, mark the drill points for the eyebolt or heavy bag hanger.
  3. Prepare to Drill: Equip your drill with the proper bit for your ceiling’s material, either wood, concrete, or metal.
  4. Drill Pilot Holes: Carefully drill pilot holes at the marked spots. Make sure they are the correct size for the bolts you will use.
  5. Install the Mount or Eyebolt: Screw in the eyebolt or mount into the pilot holes. Use a wrench to tighten securely.
  6. Attach the Spring Coil: If you’re using a spring coil to reduce noise and vibration, connect it to the mount now.
  7. Hang the Bag: Attach the chain or strapping to the bag. Use S-hooks or carabiners to connect the chain to the eyebolt or spring coil.
  8. Double-Check Everything: Make sure all connections are secure. Test that the setup can handle the weight and motion of the bag.
  9. Adjust the Height: With the bag hanging, check if it’s at the right height for your training routine. Adjust the chain or straps accordingly.
  10. Safety Inspection: Do a final check to ensure everything is safely installed, with no risk of the punching bag falling.

By following these steps, you’ll have a securely mounted hanging punching bag ready for your workouts. Remember to review the instructions that came with your bag and hardware, as there may be specific requirements or additional steps to follow.

Hanging Punching Bag

Safety Inspections and Maintenance Tips

Conducting regular safety inspections and maintenance is key for your hanging punching bag longevity and safety. Following a set of simple tips will help you ensure the safety and effectiveness of your training equipment. Here’s what you need to do:

  • Inspect the Mounting Hardware: Before each use, check all bolts, screws, and fastenings. Make sure they are tight and not worn or rusted.
  • Examine the Bag’s Surface: Look for any tears, rips, or signs of wear. A damaged surface can indicate interior wear, which could lead to bursting during use.
  • Verify the Chains and Straps: Ensure the chains or straps are not fraying or showing signs of stress. Replace them if necessary.
  • Check the Ceiling Attachment: Give attention to where the bag is mounted. Look for any damage or cracks in the ceiling or supporting beam.
  • Survey the Area Around the Bag: Keep the area clear of any obstructions. This minimizes the risk of injury and allows for proper movement.
  • Listen for Noises: During use, any unusual sounds can indicate a problem with the bag or its mounting. Investigate any strange noises immediately.

Perform these checks regularly, and do not neglect proper maintenance. Tighten loose parts, lubricate any moving components, and replace parts as needed. A well-maintained hanging punching bag will provide a safer workout environment and extend the life of your equipment. Never use the bag if you suspect it is not secure, as this could lead to injury or further damage.

Hanging Punching Bag

Common Mistakes to Avoid When Hanging a Punching Bag

When installing a hanging punching bag, it’s easy to make mistakes. Avoid these common issues to ensure a safe workout:

  • Ignoring the Weight Limit: Don’t exceed the weight limit of your mounting hardware. This can lead to failure and injury.
  • Using Improper Hardware: Always use the correct bolts and mounts. Improvised solutions risk your bag falling.
  • Skimping on Support: Use a stud finder to locate a beam that can hold your bag. Guessing can be dangerous.
  • Forgetting to Use a Pilot Hole: Drill pilot holes before screwing in bolts. This prevents structural damage.
  • Neglecting the Surrounding Space: Keep enough room around the bag for movement. Cramped spaces limit your workout and can cause accidents.
  • Overlooking Ceiling Strength: Make sure your ceiling can support the bag. A weak ceiling may collapse.
  • Failing to Do Regular Checks: Before use, always inspect the setup. Look for loose bolts or wear and tear.
  • Hanging Bag Too High or Low: The bottom of the bag should be at your waist level for proper form.
  • Ignoring the Need for a Spring Coil: This reduces noise and absorbs impact. Without it, your setup can wear out faster.

By avoiding these mistakes, you’ll create a safer and more effective training environment for your hanging punching bag.

Additional Equipment for Enhancing Your Training Setup

When you have your hanging punching bag installed, adding extra equipment can enhance your workout experience. Consider these items for your training area:

  • Gloves and Wraps: Protect your hands and wrists. Use quality boxing gloves and hand wraps.
  • Heavy Bag Stand: If ceiling mounting isn’t an option, a stand provides an alternative to hang your bag.
  • Punching Bag Cover: Keep your bag clean and undamaged with a protective cover.
  • Floor Mats: Place mats around the bag. This improves safety and comfort for your feet and joints.
  • Timer or Round Bell: Track your workout times. A timer or bell helps you manage rounds.
  • Punching Mitts: Train with a partner. Punching mitts are great for practicing accuracy and speed.
  • Resistance Bands: Increase your strength. Attach bands to your bag for added resistance in punches.
  • Mirror: Watch your form. Install a mirror to help you correct your stance and technique.

Using the right accessories can make your training sessions more effective. They allow for a variety of exercises. Mixed training keeps workouts fresh and challenging. Always ensure that any additional equipment is high quality and safe for use with your hanging punching bag.

Hanging Punching Bag


Finalizing Your Setup: Testing and Adjusting Your Punching Bag

After mounting your hanging punching bag, testing and adjusting are key. This final step ensures the bag works well for your workouts. Here’s how to do it:

  1. Gently Push the Bag: Start by lightly pushing the bag. See how it swings. Make sure it moves freely and the chain or strap isn’t binding.
  2. Check the Height: The bag’s bottom should be at waist level. This is the ideal height for most punches and kicks.
  3. Test the Strength: Give the bag a few solid punches. Watch for any unusual movement in the mount. The setup should hold firm.
  4. Listen for Noises: As you hit the bag, listen. Any out-of-place sounds may point to an issue with the installation.
  5. Adjust as Needed: If the height or tightness of the chains is off, adjust them. Make sure the bag hangs correctly before full use.
  6. Do a Full Workout: Finally, go through a typical workout. This is the best test for the setup’s strength and stability. If anything feels off, stop and re-check the installation.

By carefully testing and adjusting your hanging punching bag, you ensure a safe and effective training environment. Your setup is now complete, and you’re ready to start your boxing routine with confidence.


Choosing Your Free Standing Punching Bag in 2025

The Advantages of Free Standing Punching Bags

Free standing punching bags offer several benefits. First, they are versatile. You can place them anywhere in your home or gym. Best free standing punching bag: There is no need to hang them from the ceiling. This makes them ideal for spaces with limited setup options. They are also easy to move around. Whether you want to shift your workout space or store the bag after use, portability is a big plus.


Free standing bags are stable and sturdy. Their bases are often fillable with water or sand, ensuring they remain anchored during intense training sessions. Unlike hanging bags, they reduce noise and vibration. This is important in apartment living or shared workout spaces.

Moreover, they are suitable for various types of training. From boxing to martial arts, these bags can take punches, kicks, and even elbow strikes. Their versatility extends to users of all skill levels. Both beginners and seasoned athletes can benefit from a best free standing punching bag.

Lastly, they can improve your fitness regime. They allow for a full-body workout. Engaging multiple muscle groups, they enhance strength, balance, and coordination. Plus, they serve as excellent tools for stress relief.

In summary, free standing punching bags are convenient, stable, and versatile. They fit well into different workout environments and cater to a broad range of training needs. For those seeking the best free standing punching bag, considering these advantages is a smart step in making the right choice.

best free standing punching bag


Key Features to Look for in a Free Standing Punching Bag

When selecting the best free standing punching bag, key features are crucial. These characteristics ensure effectiveness, durability, and a good value for your investment. Here’s what to consider:

  • Material Quality: High-grade materials resist wear and tear. Look for heavy-duty synthetic leather or reinforced vinyl.
  • Base Stability: The base should be wide and capable of being filled with either sand or water. This prevents the bag from tipping over.
  • Size and Weight: Ensure the bag is the right size for your space and weight for your training level.
  • Adjustability: A bag with adjustable height accommodates users of different sizes and training styles.
  • Padding: Adequate padding absorbs impact, protecting your hands and feet during workouts.
  • Ease of Assembly: The simpler it is to set up, the sooner you can start training.
  • Brand Reputation: Trusted brands often provide quality and good customer service.
  • Price: Compare cost versus features to find a bag that meets your needs without breaking the bank.

Choosing the best free standing punching bag becomes easier when you know what features to look for. Balance these aspects with your personal training requirements for an optimal purchase decision.

best free standing punching bag

The Top Free Standing Punching Bags of 2025

As you set out to find the best free standing punching bag in 2025, it’s important to narrow down your choices. The market offers a variety of top-notch options that cater to diverse training needs. Here, we highlight reputed models that align with the key features mentioned earlier.

  • Model A: Known for high-grade synthetic leather, Model A withstands rigorous use. Its base fills with sand or water for unmatched stability.
  • Model B: Model B stands out with its impressive adjustability. Height changes cater to multiple users, making it a family favorite.
  • Model C: Boasting plush padding, Model C offers supreme comfort. It absorbs impact, safeguarding your hands and feet during intense sessions.
  • Model D: If space is a concern, Model D’s compact size fits perfectly. Despite its smaller footprint, it doesn’t compromise on sturdiness.
  • Model E: For those counting pennies, Model E provides good value. While affordable, it maintains quality through durable reinforced vinyl.

These models emerged as front-runners after rigorous assessments against the desirable features. Whether it’s for heavy-duty training or casual workouts, each bag has its strengths. Keep in mind your personal training needs when considering these top bags of 2025.

Factors to Consider When Buying a Punching Bag

When you are in the market for the best free standing punching bag, don’t just focus on the features. Consider these factors too:

  • Location: Think about where you’ll place the bag. Make sure your chosen space can accommodate the bag’s size.
  • Usage Frequency: If you’ll use the bag often, invest in a top-quality model that can take a beating.
  • Type of Training: Are you boxing or practicing martial arts? Pick a bag that suits your training style.
  • User Experience: Make sure the bag is suitable for your skill level, whether you’re a newbie or a pro.
  • Safety: A bag with a stable base is less likely to tip over and cause injury.
  • Portability: If you need to move the bag around, opt for one with wheels or easier handling.
  • Warranty: Look for a bag with a warranty for peace of mind in case of defects.
  • Reviews: Read up on user feedback. It helps to know how the bag holds up in real life.

Choosing the right punching bag involves balancing what you want with what you need. Keep these factors in mind and you’re sure to find a bag that punches above its weight.

best free standing punching bag

Setting Up Your Free Standing Punching Bag: Tips and Tricks

Proper setup is crucial for the safety and longevity of your best free standing punching bag. Here are some tips and tricks to guide you through the process:

  • Choose the Right Location: Find a clear area. Ensure ample room for movement around the bag.
  • Prepare the Base: Fill the base with sand or water. Sand makes the base heavier but can be messier. Water is easier to handle but may need more frequent refilling.
  • Check for Stability: After filling, push the bag slightly. It should not wobble or tilt.
  • Adjust the Height: Set the height according to your needs. The bag should align with your chest or chin for optimal striking.
  • Test the Padding: Before going full force, check the padding by hitting lightly. This ensures the bag absorbs impact correctly.
  • Verify Assembly: Double-check all components. Make sure they are tight and secure.

By following these simple steps, you’ll set up your best free standing punching bag properly. A well-set bag ensures a better workout and reduces the risk of injury or damage to your surroundings.

Maintenance and Care for Your Punching Bag

To ensure your best free standing punching bag lasts, regular maintenance and care are essential. Here are simple yet effective steps to follow:

  • Clean Regularly: Wipe down your bag with a damp cloth after each session to remove sweat and dirt. Use gentle cleaners that won’t degrade the material.
  • Inspect for Damage: Look for tears or loose parts frequently. Early detection of damage can prevent further wear and tear.
  • Avoid Sharp Objects: Keep the bag away from items that could pierce or cut it, like jewelry or sharp edges in your training area.
  • Store Properly: If you need to store the bag, empty the base and keep it in a cool, dry place to prevent mold and mildew.
  • Refresh the Base: Empty and refill the base with fresh water or sand periodically to maintain stability and prevent leaks.
  • Tighten Parts: Check and tighten any adjustable parts or fastenings to ensure the bag’s integrity during use.
  • Rotate Bag: Rotating the bag can help even out the wear, extending its life and keeping the surface consistent for training.

By following these tips, you’ll maximize the lifespan and performance of your free standing punching bag. Regular upkeep is not only good for the bag but also for the safety and effectiveness of your workouts.

best free standing punching bag

Best Practices for Training with a Free Standing Punching Bag

Maximizing the benefits of a best free standing punching bag involves consistent and proper training. Here are some best practices to enhance your workout:

  • Start with a Warm-Up: Begin each session with light cardio or stretches. This prepares your body and decreases injury risk.
  • Learn Proper Form: Focus on correct stance and technique. Proper form is crucial for effective punches and kicks.
  • Vary Your Routine: Include different moves and combinations. This keeps training interesting and works various muscle groups.
  • Work on Timing: Use a timer for round-based training. This helps simulate a real fight scenario and improves endurance.
  • Increase Intensity Gradually: Don’t rush to hit harder or faster. Build up your power and speed as you progress.
  • Use Protective Gear: Always wear hand wraps and gloves. They protect your hands and wrists during impact.
  • Take Breaks: Allow yourself short rest periods between rounds. Rest aids recovery and maintains performance.
  • Cool Down After: Finish with stretches or a slow walk. Cooling down helps your muscles recover.
  • Stay Hydrated: Drink water before, during, and after training. Hydration is key for peak performance.

By respecting these best practices, your sessions with the best free standing punching bag become more effective. Train smart and enjoy enhanced fitness and skill.

best free standing punching bag


Where to Buy Quality Free Standing Punching Bags

When seeking the best free standing punching bag, knowing where to shop is just as important as the features and factors you look for. Here is a straightforward guide to purchasing a top-quality bag:

  • Specialized Sports Stores: These stores tend to offer a range of high-quality sports equipment, including punching bags with various features that align with your needs.
  • Online Marketplaces: Websites like Amazon have a wide selection of bags. They provide customer reviews which can help inform your decision.
  • Fitness Equipment Retailers: Retailers that focus on fitness equipment often carry reputable brands you can trust for durability and performance.
  • Direct from Manufacturers: Buying directly from the brand can sometimes mean better customer service and potential access to warranties or replacements.
  • Second-hand Sites: Websites like eBay can offer great deals on used bags. Make sure to check for wear and tear to ensure the bag still meets your training needs.

To find the best free standing punching bag, compare prices and read reviews. Look out for details on material quality, base stability, and brand reputation. Always remember to check shipping policies and returns when buying online. With the right approach, you’ll land a punching bag that meets all your training requirements.


Weatherproof Outdoor Punching Bag Essentials

The Importance of Weather Resistant Materials for Outdoor Punching Bags

When choosing an outdoor punching bag, the material must withstand weather changes. Sun, rain, and wind can damage bags made from poor-quality materials. Weather-resistant materials prevent wear, tear, and molding. They ensure your bag lasts longer and remains safe to use.


High-quality synthetic leather and marine-grade vinyl are top choices. These materials resist UV damage and repel water efficiently. Their durability lets you train outdoors, no matter the weather. Look for bags with waterproof stitching and rust-proof chains as well. These added features further protect your outdoor punching bag from the elements.

Using weatherproof materials is also cost-efficient in the long run. They require less frequent replacements and reduce the need for extensive maintenance. Plus, they offer a consistent feel and performance each time you hit the bag. Invest in a bag with the right materials, and enjoy your training without worry about weather damage.

outdoor punching bag

Selecting the Right Size and Weight for Your Outdoor Punching Bag

Selecting the right size and weight for your outdoor punching bag is crucial. It affects your training quality and your safety. Here’s what to consider:

First, think about your own size and skill level. If you’re taller or heavier, you might need a larger bag to match your reach and power. Beginners should start with lighter bags. They’re easier to handle and help in learning proper technique.

The weight of the bag should challenge you without risking injury. Heavier bags provide more resistance. They are suitable for those looking to develop power. Lighter bags swing more, demanding better speed and timing skills.

Typically, adults choose bags weighing between 70 to 150 pounds. Teens and those focusing on speed might go for bags around 40 to 70 pounds. The size should allow the bag to swing freely, but not so much that it’s unpredictable.

Consider the space where you’ll install your outdoor punching bag. Ensure there’s enough room for the bag to move and for you to navigate around it. This ensures a safe and effective workout.

To wrap up, size and weight matter a lot. They should suit your body type, skill set, and training goals. Pick an outdoor punching bag that challenges you but also allows you to train safely and effectively.

outdoor punching bag

Essential Features to Look for in an Outdoor Punching Bag

When selecting an outdoor punching bag, certain essential features must not be overlooked. These features ensure durability, safety, and an enhanced training experience. Below are key attributes to consider:

  • Heavy-Duty Exterior: The bag needs a tough exterior to handle frequent strikes. Look for materials like reinforced synthetic leather or marine-grade vinyl.
  • Water-Resistant Filling: Your punching bag’s fill should resist water to prevent molding from within. Specialized foam or water-resistant fibers work well.
  • Stable Mounting System: A durable, weather-resistant mounting system is crucial. This may include rust-proof chains or outdoor-rated wall mounts.
  • UV Protection: UV-resistant coating will help the bag withstand sun exposure. This keeps the material from breaking down or fading.
  • Double Stitching: Double or reinforced stitching makes seams last longer. This is important in handling the bag’s constant movement and strikes.
  • Drain Holes: Small holes at the bottom allow water to drain out. This prevents water from accumulating inside the bag.
  • Quality Craftsmanship: Well-constructed bags have even weight distribution. This quality craftsmanship provides a uniform surface to train on.
  • Adaptability: Some bags come with adjustable features. These allow you to change the bag’s weight or height to suit different training needs.

Prioritizing these features when choosing your outdoor punching bag will contribute to a long-lasting and reliable training tool that withstands outdoor elements.

outdoor punching bag

Installation Tips for Outdoor Punching Bags

Installing an outdoor punching bag properly is key for safe and effective training. Here are essential tips to set up your bag:

  • Choose a Stable Surface: Pick a level and solid area. This keeps the bag from tilting during your workout.
  • Allow for Movement: Ensure there’s ample space around the punching bag. This lets the bag swing and you to move freely.
  • Secure Mounting: Use high-quality, weather-resistant hardware. This prevents rust and ensures stability over time.
  • Correct Height: The middle of the bag should align with your chest. Adjust as needed for your height and reach.
  • Sun Exposure: If possible, install the bag in a shaded area. This reduces damage from UV radiation.
  • Wind Protection: In windy areas, add a weight to the base. This helps keep the bag steady.
  • Ground Fixtures: If mounting to the ground, use concrete anchors. This makes certain your outdoor punching bag stays anchored.
  • Follow Instructions: Always follow the manufacturer’s guidelines. This makes sure the bag is installed as intended.
  • Inspect Regularly: Check hooks and chains often for wear and tear. Replace parts as necessary to maintain safety.

Getting your outdoor punching bag set up right means you can focus on your training, knowing you’re safe and your equipment is secure.

Maintenance Tips for Your Outdoor Punching Bag

To extend the life of your outdoor punching bag, regular maintenance is key. Here are tips to keep your bag in top shape:

  • Clean Regularly: Wipe down your bag with a damp cloth. Use a mild soap for tougher grime. Avoid harsh chemicals that can damage the material.
  • Check for Wear and Tear: Examine your bag often for rips or holes. Patch small tears early to prevent them from growing.
  • Protect from Elements: Cover your bag when not in use. A good cover shields it from rain, sun, and dirt.
  • Drain Excess Water: After rain, tip the bag to let water out of the drain holes. This prevents internal mold.
  • Tighten Fittings: Bolts and chains can loosen over time. Tighten them to avoid accidents and ensure stability.
  • Rotate the Bag: Turn your bag periodically. This spreads out the wear and makes the bag last longer.
  • Store During Harsh Weather: If you expect extreme weather, bring the bag inside if possible. This protects it from storms or heavy winds.
  • Inspect for Rust: Check metal parts for rust. Replace rusty chains or hardware to keep the bag safe.
  • Refresh the Filling: If your bag feels uneven or settles, add or replace the filling. This keeps the weight distribution consistent.

Following these tips, your outdoor punching bag will remain a durable and reliable partner in your fitness journey.

outdoor punching bag

The Best Fill Materials for Weatherproof Punching Bags

Choosing the right fill materials for your outdoor punching bag is crucial. These materials ensure consistent performance and longevity. Here are the best fill options for weatherproof bags:

  • Water-Resistant Foam: This foam repels moisture effectively. It keeps its shape and offers a solid hit surface.
  • Closed-Cell Foam: This type of foam does not absorb water. It’s perfect for outdoor bags.
  • Synthetic Fibers: High-quality synthetic fibers are less likely to retain moisture. They help prevent mold growth inside the bag.
  • Sand: Make sure to encase sand in a water-resistant inner bag. This prevents moisture from seeping in. Sand adds weight for resistance in your training.
  • Sawdust or Rice Hulls: Use these in combination with a water-resistant barrier. They are good for a softer feel and are eco-friendly.

Be sure your fill materials pair well with the bag’s exterior. Opt for fills that complement your outdoor punching bag’s weather-resistant features. Aim for fills that provide the resistance and texture you need for your training style. Regular checks on the condition of the fill are also important. Over time, all fills will settle and may need replacement to keep the weight and resistance level constant.

Invest in high-grade fill materials for your outdoor punching bag. They will withstand the elements and enhance your training experience.

Top Recommended Weatherproof Outdoor Punching Bags

When shopping for an outdoor punching bag, certain brands and models stand out. They offer the best in durability, weather-resistance, and quality. Here are top picks for weatherproof outdoor punching bags:

  • The Invincible Marine Puncher: Designed with marine-grade vinyl, this bag withstands harsh weather. It features UV protection and double stitching for extra durability.
  • The Sunny Health Power Bag: Made with high-quality synthetic leather, this bag has a water-resistant filling. Its heavy-duty design handles intense workouts.
  • The Storm-Proof Striker Bag: Equipped with closed-cell foam, it offers excellent weather resistance. The bag also includes reinforced seams to prevent wear.
  • The Everlast Weather Warrior: Known for its brand reliability, this model comes with waterproof features. It has a UV-protected exterior and rust-proof chains.
  • The Rugged Outdoor Trainer: This bag boasts adjustable weights and strong exterior fabric. It’s built to last and adapts to various training levels.

Each of these bags matches key features needed for outdoor use. They can handle UV rays, moisture, and are sturdily built. When choosing, consider your space, size, and workout intensity. Always opt for bags that match your training needs while offering the best weather protection.

outdoor punching bag

Enhancing Your Training: Accessories for Outdoor Punching Bags

To get the most from your outdoor punching bag, consider adding accessories. They can boost your workout and care for your bag. Here are some must-have accessories:

  • Protective Covers: Use covers to shield your bag from dirt, rain, and sun when not in use.
  • Gloves and Wraps: Gloves protect your hands, while wraps support your wrists during strikes.
  • Weighted Base: For freestanding bags, a weighted base keeps your bag grounded during heavy punches.
  • Anchor System: If your bag needs more stability, an anchor system can help. It prevents excessive swaying.
  • Hanging Bracket: A solid hanging bracket is essential for mounting. It ensures your bag stays secure.
  • Floor Mat: Place a mat under your bag to protect your feet and flooring.
  • Bag Stand: If you can’t hang your bag, a stand provides an alternative. It should be strong and weather-resistant.
  • Training Apps: Use apps to guide your workouts. They can track your progress and offer routine variety.

These accessories not only increase the life of your outdoor punching bag but also ensure a safer, more versatile training experience. Choose accessories that align with your fitness goals and weather conditions. They will make a significant difference in your training routine.


Choosing the Right Freestanding Punching Bag

What is a Freestanding Punching Bag?

A freestanding punching bag is a self-standing training tool for fighters, athletes, or fitness enthusiasts. Unlike hanging heavy bags, this type of punching bag has a base usually filled with water or sand to keep it upright. Its design allows for easy setup without the need for ceiling mounts or wall brackets. This makes it an ideal choice for those with limited space or who prefer a portable training option.


Freestanding punching bags are versatile. They suit a variety of training styles, including boxing, kickboxing, and MMA. They’re also useful for those simply looking to improve their fitness levels. With varying degrees of flexibility and rebound action, these bags provide realistic resistance and feedback for punches and kicks. Their adaptability makes them a popular choice in both home gyms and professional training facilities.

The unique structure of the freestanding punching bag is designed for convenience and practicality. It is composed of two main parts: the pillar and the base. The pillar is the part of the bag that you strike, which is typically made of foam or another soft, durable material. The base, when filled, provides stability so the bag can absorb and rebound from your hits.

In summary, a freestanding punching bag stands on its own, requires no hanging setup, and is suitable for a range of combat sports and fitness routines.

freestanding punching bag

Benefits of Using a Freestanding Punching Bag

Choosing a freestanding punching bag brings multiple advantages for both fitness enthusiasts and combat athletes. Firstly, it offers versatility unmatched by traditional hanging bags. You can use it for a variety of martial arts, including boxing, kickboxing, and MMA.

One major benefit is the ease of installation. Unlike hanging bags, there’s no need for complex mounting hardware. You simply fill the base with sand or water, and it’s ready for use. This ease of setup is perfect for those who rent their living space or have limited space at home.

Freestanding punching bags also excel in portability. You can move them as needed to create extra space. If you’re training outdoors, you can set them up with minimal effort.

Another key advantage is the bag’s ability to absorb strikes. The stable yet flexible base allows for a satisfying rebound effect. This gives a more dynamic and realistic training experience. It helps improve your reflexes as you react to the bag’s movement.

Safety is a crucial aspect when selecting training equipment. Freestanding punching bags reduce the risk of structural damage to your home. Since there’s no need to hang them, you avoid drilling into ceilings or walls.

Lastly, these punching bags can be a perfect fit for home gyms. Compact and easy to store, they don’t require permanent space and are less intrusive compared to larger gym equipment.

In summary, the freestanding punching bag offers convenience, portability, versatility, safety, and is suitable for a wide range of physical activities.

freestanding punching bag

Key Features to Consider

When selecting a freestanding punching bag, several key features are important to consider. Here’s what to pay attention to:

Stability of the Base

The foundation of a solid workout, the base stability is crucial. Look for a base that is wide and can be filled with sand or water. This keeps the bag steady during intense sessions.

Bag Height and Adjustability

Ensure the bag is the right height for your training. Adjustable models cater to users of different heights and are great for versatility.

Rebound Quality and Speed

A good rebound mimics a real opponent. Assess the speed and responsiveness of the bag to ensure it meets your training needs.

Shock Absorption

Your joints will thank you for a bag with great shock absorption. This feature reduces the impact on your hands and feet.

Ease of Assembly and Disassembly

You will want a bag that is easy to set up and take apart. This is important for storage or when moving it around.

Weight Capacity

The weight capacity affects how the bag moves with each hit. Make sure it can handle your power without toppling over.

Considering these features will help you find a freestanding punching bag that suits your workout needs. Each of these characteristics contributes to a safe, effective, and enjoyable training experience.

freestanding punching bag

Types of Freestanding Punching Bags

When exploring the market for a freestanding punching bag, you’ll find various types to choose from. Each type caters to specific needs and preferences, so understanding the differences is key to making the right selection.

Reflex Bags

Reflex bags feature a smaller, lighter bag mounted on a spring-loaded base. Their design is ideal for honing speed, timing, and accuracy. With their rapid rebound capabilities, they challenge your coordination and reflexes.

Traditional Freestanding Heavy Bags

These resemble the classic heavy bag but come with a freestanding base. They are great for building power and endurance. Their larger surface area is suitable for practicing different punches and kicks.

Multi-Layer Bags

For advanced impact absorption, multi-layer bags are the go-to. They typically have foam layers of varying densities. This design helps simulate the feel of striking a real opponent more closely.

Tower Bags

Tower bags stand tall with a slim profile, making them perfect for practicing straight punches and high kicks. Their height makes them a good option for taller individuals or those looking to practice high kicks.

Hybrid Bags

Hybrid bags combine features from different types, offering versatility. They may have adjustable height settings or a combination of materials for varied resistance.

Understanding the types of freestanding punching bags helps you narrow down options. Consider your training goals, the space you have, and your fighting style when choosing.

How to Choose According to Your Fighting Style

Choosing the right freestanding punching bag is crucial for your training effectiveness. Different fighting styles require different types of bags. Here’s how to align your choice with your style:

Boxing

If you’re a boxer, look for a bag that has a solid rebound and is able to take your hardest punches. Your freestanding punching bag should also have a high level of shock absorption to protect your joints.

Muay Thai and Kickboxing

For Muay Thai and kickboxing, you need a taller bag that allows for low kicks and knee strikes. A traditional freestanding heavy bag or a tower bag would be ideal options.

Mixed Martial Arts (MMA)

MMA fighters require a versatile bag that allows for a wide range of moves, including strikes, kicks, and even takedowns. A hybrid bag that offers variable resistance and durability might be the best fit.

Taekwondo and Karate

Martial artists focusing on high kicks and quick strikes could benefit from a reflex bag. It’s great for working on speed, accuracy, and agility.

Fitness Training

If you’re using the bag primarily for fitness, a traditional freestanding heavy bag should suffice. It provides resistance for building strength and improving cardiovascular health.

When choosing a freestanding punching bag that matches your fighting style, assess the bag’s height, stability, and rebound quality. A well-chosen bag enhances your training, making your workouts more effective and enjoyable.

freestanding punching bag

Materials and Durability

When shopping for a freestanding punching bag, materials and durability are key factors to consider. These affect the bag’s lifespan and how it will stand up to regular use. Look for bags made from high-quality, resilient materials that can endure the impact of strikes over time.

Outer Material

The outer covering of the bag should be tough and tear-resistant. Leather or synthetic leather often provides a solid, long-lasting surface. Some bags use reinforced vinyl, which is also durable and typically easier to clean.

Interior Filling

Inside the bag, the filling should be dense and able to absorb your hits without deforming. Layers of foam or a mixture of foam and other materials can offer a good balance between firmness and cushioning.

Base Construction

A stable, sturdy base is vital. It must withstand the force of your punches and kicks without cracking or leaking. High-density plastic bases are common; they resist wear and can be filled with either sand or water.

Stitching and Seams

Check the stitching and seams for quality. Strong seams prevent the bag from splitting and enhance durability. They should be well-sealed and reinforced where needed.

Overall Craftsmanship

Good craftsmanship goes hand in hand with material quality. Well-constructed bags with attention to detail will generally last longer.

By prioritizing materials and durability, you ensure that your freestanding punching bag stays in fighting shape, round after round.

Space and Portability Concerns

When considering a freestanding punching bag, space and portability are vital factors to keep in mind. Here’s a quick guide to help you understand their importance:

Space Requirements

Before purchasing, measure your available space. The bag should fit comfortably, allowing for free movement around it. Ensure there’s enough clearance for kicks and punches without hitting walls or furniture.

Portability for Flexibility

Freestanding bags can be moved easily. This is an advantage when rearranging a room or training in different locations.

Base Filling Impacts Weight

The choice of sand or water for the base affects weight and portability. Sand makes the base heavier but more stable; water is lighter and easier to move.

Size Matters

Choose a size that’s practical. Larger bags offer more surface but take up more space. Smaller bags save space but have less striking area.

Ease of Assembly

Look for a bag that assembles quickly. This simplifies the process of setting up or taking down when space is needed for other activities.

By considering these points, you ensure your freestanding punching bag meets your spatial and portability needs, making your workout routine more convenient and enjoyable.

freestanding punching bag


Top Brands and Recommendations

When it comes to selecting a freestanding punching bag, the brand can be a decisive factor. Below are top brands that are recognized for their quality and durability, along with product recommendations that cater to various training needs.

Century

Century is a renowned name in martial arts equipment. Their Wavemaster series is highly popular, with adjustable heights and a large striking surface, suitable for various martial arts disciplines.

Everlast

Everlast is synonymous with boxing equipment. Their Powercore Freestanding Heavy Bag provides an excellent blend of durability and shock absorption, ideal for intense boxing workouts.

Ringside

Ringside offers sturdy and resilient bags. The Elite Freestanding Bag stands out for its stability and is perfect for high-impact strikes.

Title Boxing

Title Boxing has a reputation for quality gear. Their Flex Freestanding Heavy Bag is designed for a great rebound and intense training sessions.

MaxxMMA

MaxxMMA manufactures bags with innovative designs. Their Adjustable Freestanding Reflex Bag Kit is terrific for improving speed and coordination.

Select a brand and model that align with your space, portability preferences, and fighting style. Ensure it’s made with high-quality materials to withstand your workouts. With the right freestanding punching bag, you can look forward to productive and enjoyable training sessions.


Water Punching Bag: A Boxer’s Training Secret

Introduction to Water Punching Bags

Water punching bags are a dynamic training tool for boxers. These bags use water to provide resistance. Unlike traditional bags filled with sand or fabric, water gives a unique feel. When you hit a water punching bag, it mimics the sensation of hitting a human body. This feature makes them popular among fighters.


The use of water also means adjustability in weight. By adding or removing water, you can control the bag’s heaviness. This allows for a customized training experience. Whether you are a beginner or a pro, you can set the bag’s weight to match your skill level.

Another key point is portability. Water punching bags are easier to transport when empty. This makes them a great option for those who may need to move their training space. Or for those who lack a permanent gym setup. Lastly, water punching bags are versatile. They can be used for various workout types, from boxing to mixed martial arts.

In summary, water punching bags offer a realistic training experience. They are adjustable, portable, and versatile. Throughout this article, we will explore the many advantages and types of these bags. We will also provide tips on setup, training, maintenance, and where to buy them.

Water Punching Bag

Benefits of Training with Water Punching Bags

Training with a water punching bag offers several benefits. Every boxer, from novices to experts, can find value in these versatile pieces of equipment. Below are some key advantages:

  1. Improved Striking Feedback – The water inside the bag mimics the density and resistance of the human body. This gives you more realistic feedback on your punches.
  2. Customizable Weight – You can adjust the bag’s resistance. Just add or remove water. This makes the bag suitable for all skill levels.
  3. Sparing on Joints – Water bags are softer on impact than traditional heavy bags. This leads to less strain on your joints and a reduced risk of injury.
  4. Enhanced Power and Technique – As you train, you’ll build punching power. You’ll also refine technique, thanks to the bag’s unique properties.
  5. Portability – They’re easy to move when empty. This is great if you need to change your training location.

Training with water punching bags can elevate your boxing routine. It provides a realistic feel and adaptability. It’s gentle on your body while toughening your blows. And it’s convenient, whether at home or on the go. Incorporate a water punching bag into your regimen. You will likely see significant improvements in your performance.

Water Punching Bag

Types of Water Punching Bags

When shopping for a water punching bag, you’ll find various types to suit different training needs. Understanding the different designs and their benefits can help you choose the right one for your boxing regimen.

  1. Traditional Hanging Bags – These are similar in shape to classic heavy bags but filled with water. They offer a high level of resistance and are excellent for building strength.
  2. Freestanding Bags – These have a base that can be filled with water or sand, providing stability. They’re great for spaces where you can’t hang a bag.
  3. Upper Cut Bags – These are smaller and shaped for practicing upper cuts and hooks. They replicate the head or upper body of an opponent.
  4. Human-shaped Bags – Designed to resemble the human body, these help fighters practice targeting and strike precision.
  5. Speed Bag Variants – While not filled with water, these are often paired with water bags. They help improve hand-eye coordination and speed.

Each type varies in weight, size, and shape to challenge different aspects of your boxing. Make sure to consider your space, the kind of training you’re focusing on, and your personal preference when selecting a water punching bag. Also, remember to check if additional equipment like gloves or a pump is required, as these may not come with the bag. By doing so, you can ensure an efficient and targeted training experience.

Water Punching Bag

How to Set Up Your Water Punching Bag

Setting up your water punching bag is a straightforward process. Here’s a guide to help you get started:

  1. Choose the Location – Pick a spot where you have enough room to move around. Ensure the ceiling can support a hanging bag if that’s the type you have.
  2. Prepare the Bag – Unpack your bag and lay it flat. Inspect it for any damages before filling it with water.
  3. Fill with Water – Using a hose or a pump, fill the bag until it reaches the desired weight. Avoid overfilling to prevent damage.
  4. Secure the Bag – For hanging bags, use a sturdy chain and secure it to the ceiling mount. For freestanding bags, ensure the base is stable.
  5. Check for Leaks – After filling, inspect the bag for any signs of leaks. If you find any, drain the water and patch up the hole before refilling.
  6. Ready for Use – Once securely installed, your water punching bag is ready for use. Start with light punches to test the setup.

Following these steps, you will have your water punching bag set up in no time. It’s important to read the manufacturer’s instructions as well. This ensures that you fill and hang your bag correctly. Proper setup is key to a safe and effective training session with your water punching bag.

Tips for Effective Training with Water Punching Bags

Once you’ve selected and set up your water punching bag, it’s time to focus on training effectively. Here are some tips to help you get the most out of your workouts:

  1. Start with a Warm-Up – Begin with light stretches and jumping rope. This prepares your body for intense activity.
  2. Wear Protective Gear – Always use hand wraps and boxing gloves. They protect your hands and wrists from injury.
  3. Focus on Technique – Work on your form before power. Ensure your punches are precise and controlled.
  4. Vary Your Routine – Mix punches, kicks, and footwork. This keeps your training diverse and challenging.
  5. Gradually Increase Intensity – As you improve, add more power and speed to your strikes. Do not rush; build up gradually.
  6. Use Correct Posture – Maintain a proper boxing stance. This improves your balance and power.
  7. Incorporate Defense Moves – Practice blocks and dodges with the bag. This enhances your defensive skills.
  8. Take Regular Breaks – Rest between rounds. It aids recovery and helps maintain focus.
  9. Track Your Progress – Note your performances. It encourages improvement and helps adjust goals.
  10. Stay Consistent – Train regularly with your water punching bag. Consistent practice leads to better results.

By following these tips, your training sessions with a water punching bag will be more impactful. Always remember to keep safety in mind and push yourself within reasonable limits. Good luck and train hard!

Water Punching Bag


Maintenance and Care for Water Punching Bags

To keep your water punching bag in top shape, regular maintenance is crucial. Here’s a simple routine to follow:

  1. Check for Leaks Often – Inspect your bag after each training session. Look for any signs of leaks or wear.
  2. Clean Regularly – Wipe down your bag with a mild disinfectant. This prevents the buildup of germs and odors.
  3. Store Properly – If you need to store it, drain the bag. Keep it in a cool, dry place away from sunlight.
  4. Avoid Sharp Objects – Keep the bag away from sharp or abrasive surfaces. These can cause tears or punctures.
  5. Handle with Care While Moving – When empty and moved, avoid dragging. This protects the bag’s exterior from damage.
  6. Use a Repair Kit for Punctures – If a leak does occur, use a repair kit. Follow the manufacturer’s instructions for the best results.
  7. Monitor Bag Pressure – Ensure the bag has the right amount of water for optimal resistance. Don’t overfill as it may stress the material.

By maintaining and caring for your water punching bag, you’ll extend its life. You’ll save time and money on repairs or replacements. With these simple steps, you can guarantee many effective training sessions. Plus, you can focus on perfecting your technique without any worry about your equipment.

Comparing Water Punching Bags to Traditional Heavy Bags

When choosing between water punching bags and traditional heavy bags, consider key differences. Here, we’ll compare both on several aspects important to boxers:

  1. Feel and Impact: Traditional bags, often filled with sand or rags, feel harder. They don’t mimic a human body as closely as water bags do. When you strike a water punching bag, the give and resistance are more body-like.
  2. Adjustability: Water bags excel in adjustability. Change their weight by simply adding or removing water. Traditional bags require emptying and refilling with material to adjust the weight, which is far less convenient.
  3. Durability: While high-quality heavy bags withstand wear and tear, water punching bags might need more care. However, advancements in materials make water bags increasingly durable.
  4. Impact on Joints: Water bags are friendlier on the joints due to their softer impact. Traditional heavy bags may contribute to joint stress over time.
  5. Setup and Portability: Traditional heavy bags are generally static and require a fixed spot. Water punching bags are easier to move and store when not filled, offering flexibility in training spaces.
  6. Training Outcomes: Both types of bags can improve strength and technique. However, due to the unique feedback from water bags, many boxers find their punch precision can improve more with water bags.

In conclusion, your choice will depend on your training requirements and preferences. If you value realism and versatility, a water punching bag could be the better choice. For those who prefer a traditional approach and fixed setup, a heavy bag might be more suitable. Assess your boxing goals to make an informed decision on the right equipment for your training.

Water Punching Bag

Where to Buy Water Punching Bags and Price Range

Finding the right water punching bag for your training needs is crucial. Secure your bag from reputable retailers specializing in sports and boxing equipment. Popular choices include sporting goods stores, online marketplaces like Amazon, and specialized online boxing gear shops. These providers offer a range of products from well-known brands to niche manufacturers.

When it comes to the price, water punching bags can vary significantly. Prices usually start around $50 for basic models. These are generally smaller and may be geared toward beginners. Mid-range options can cost between $100 to $200. They offer a better build and additional features for the more committed boxer. For professionals looking for high-grade equipment, prices can go as high as $300 or more. These top-tier bags are designed to last and provide the most realistic training experience.

Remember that the cost often reflects the quality and durability of the bag. Also, consider any extra expenses, such as shipping, installation kits, or repair materials. To ensure you get the best deal, compare prices and read customer reviews. Keep an eye out for discounts or promotions that may pop up throughout the year. Investing in a good quality water punching bag is an investment in your boxing training. Make sure to purchase one that suits both your level and your budget.


Back To Top
+