Master Stand Up Punching Bag Workouts: Full-Body Workout

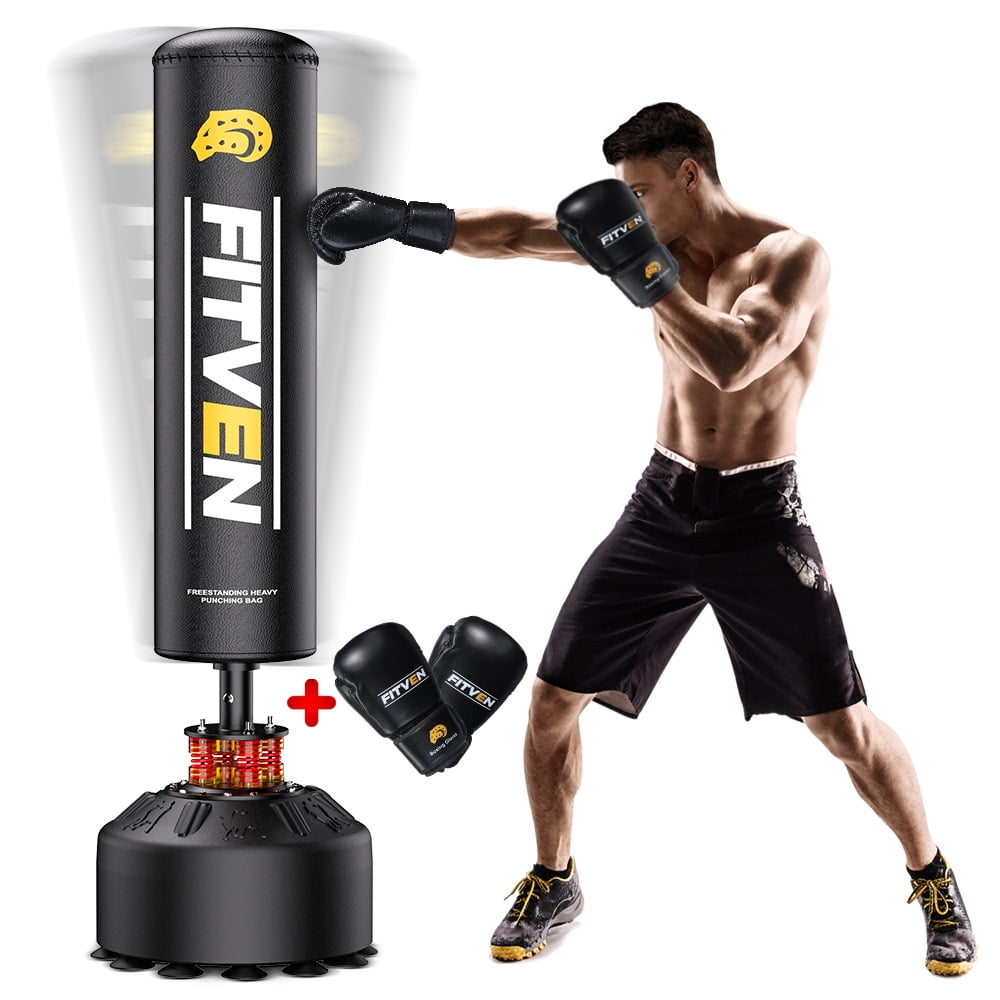
Benefits of Stand Up Punching Bag Training

Working out with a stand up punching bag offers a wealth of benefits for both body and mind. Here are some of the key advantages you can gain from incorporating this versatile equipment into your fitness routine:
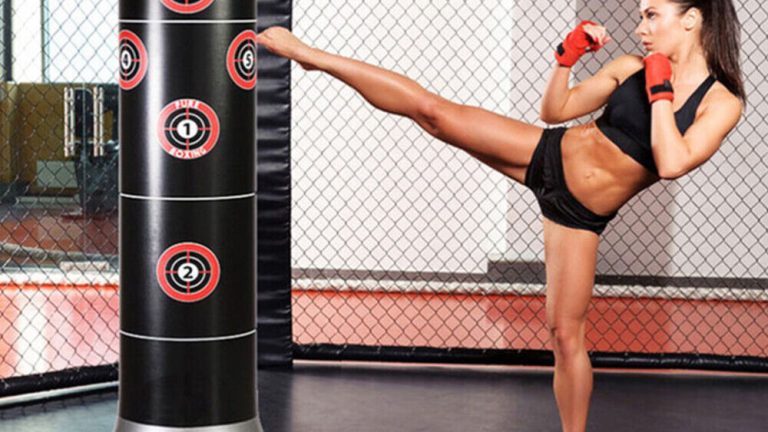
 

Full-Body Workout

A stand up punching bag engages various muscle groups, delivering a full-body workout. Thrusting punches and kicks requires effort from your arms, legs, core, and back. This helps in improving overall muscle tone and endurance.

Cardiovascular Health

Stand up punching bag sessions can be intense. They raise your heart rate, helping you burn calories and increase cardiovascular endurance. Regular training can lead to a healthier heart and lungs.

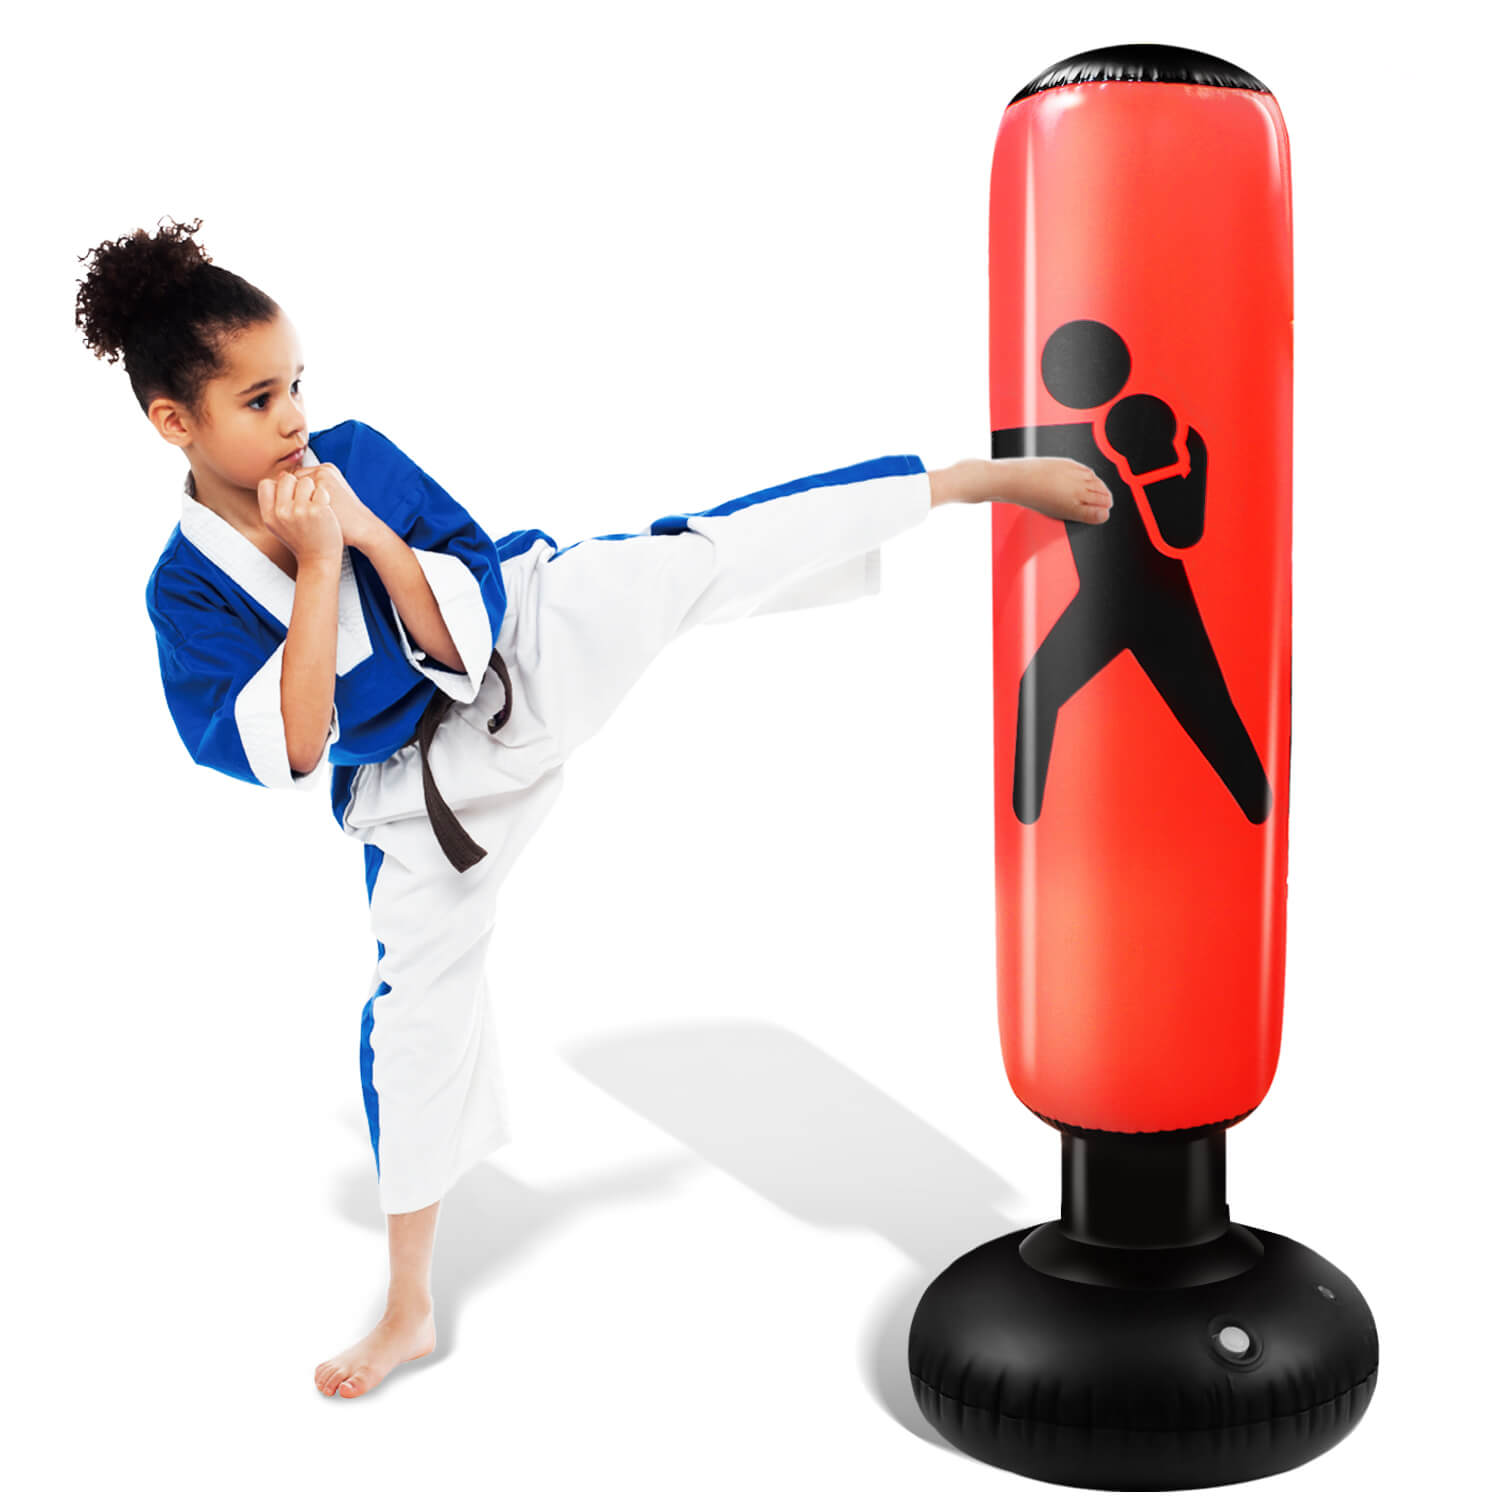
Coordination and Balance

Hitting a moving target requires coordination. Continual practice on a punching bag hones your reflexes and balance, making your movements more precise and agile.

Stress Relief

Punching a bag allows you to vent frustrations in a physical yet controlled environment. The exercise releases endorphins, which are natural mood lifters, thereby reducing stress and improving mental health.
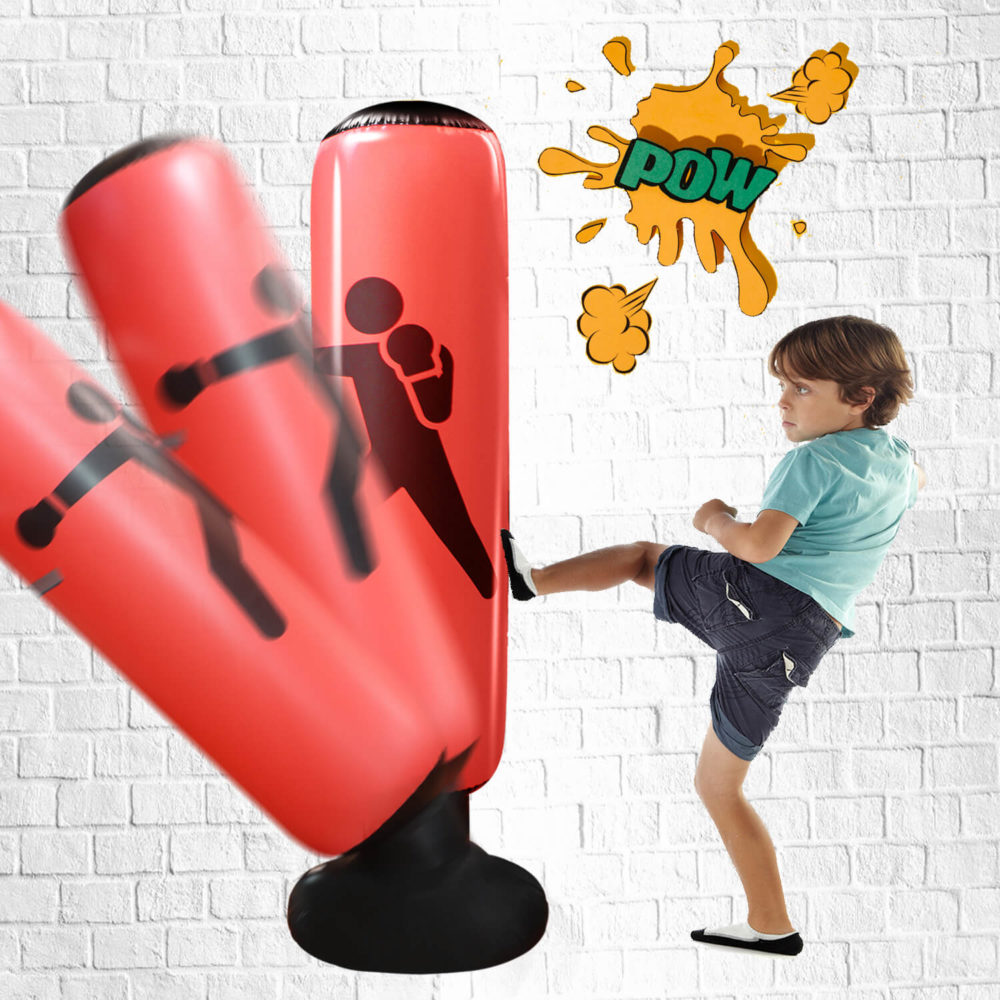
Self-Defense Skills

Training with a stand up punching bag can also enhance your self-defense capabilities. It enables you to practice punches and kicks that could be effective in a real-world scenario.

Incorporate a stand up punching bag into your routine to unlock these benefits. Always remember to follow a proper form and start with the basics to maximize the impacts of your workout.

stand up punching bag

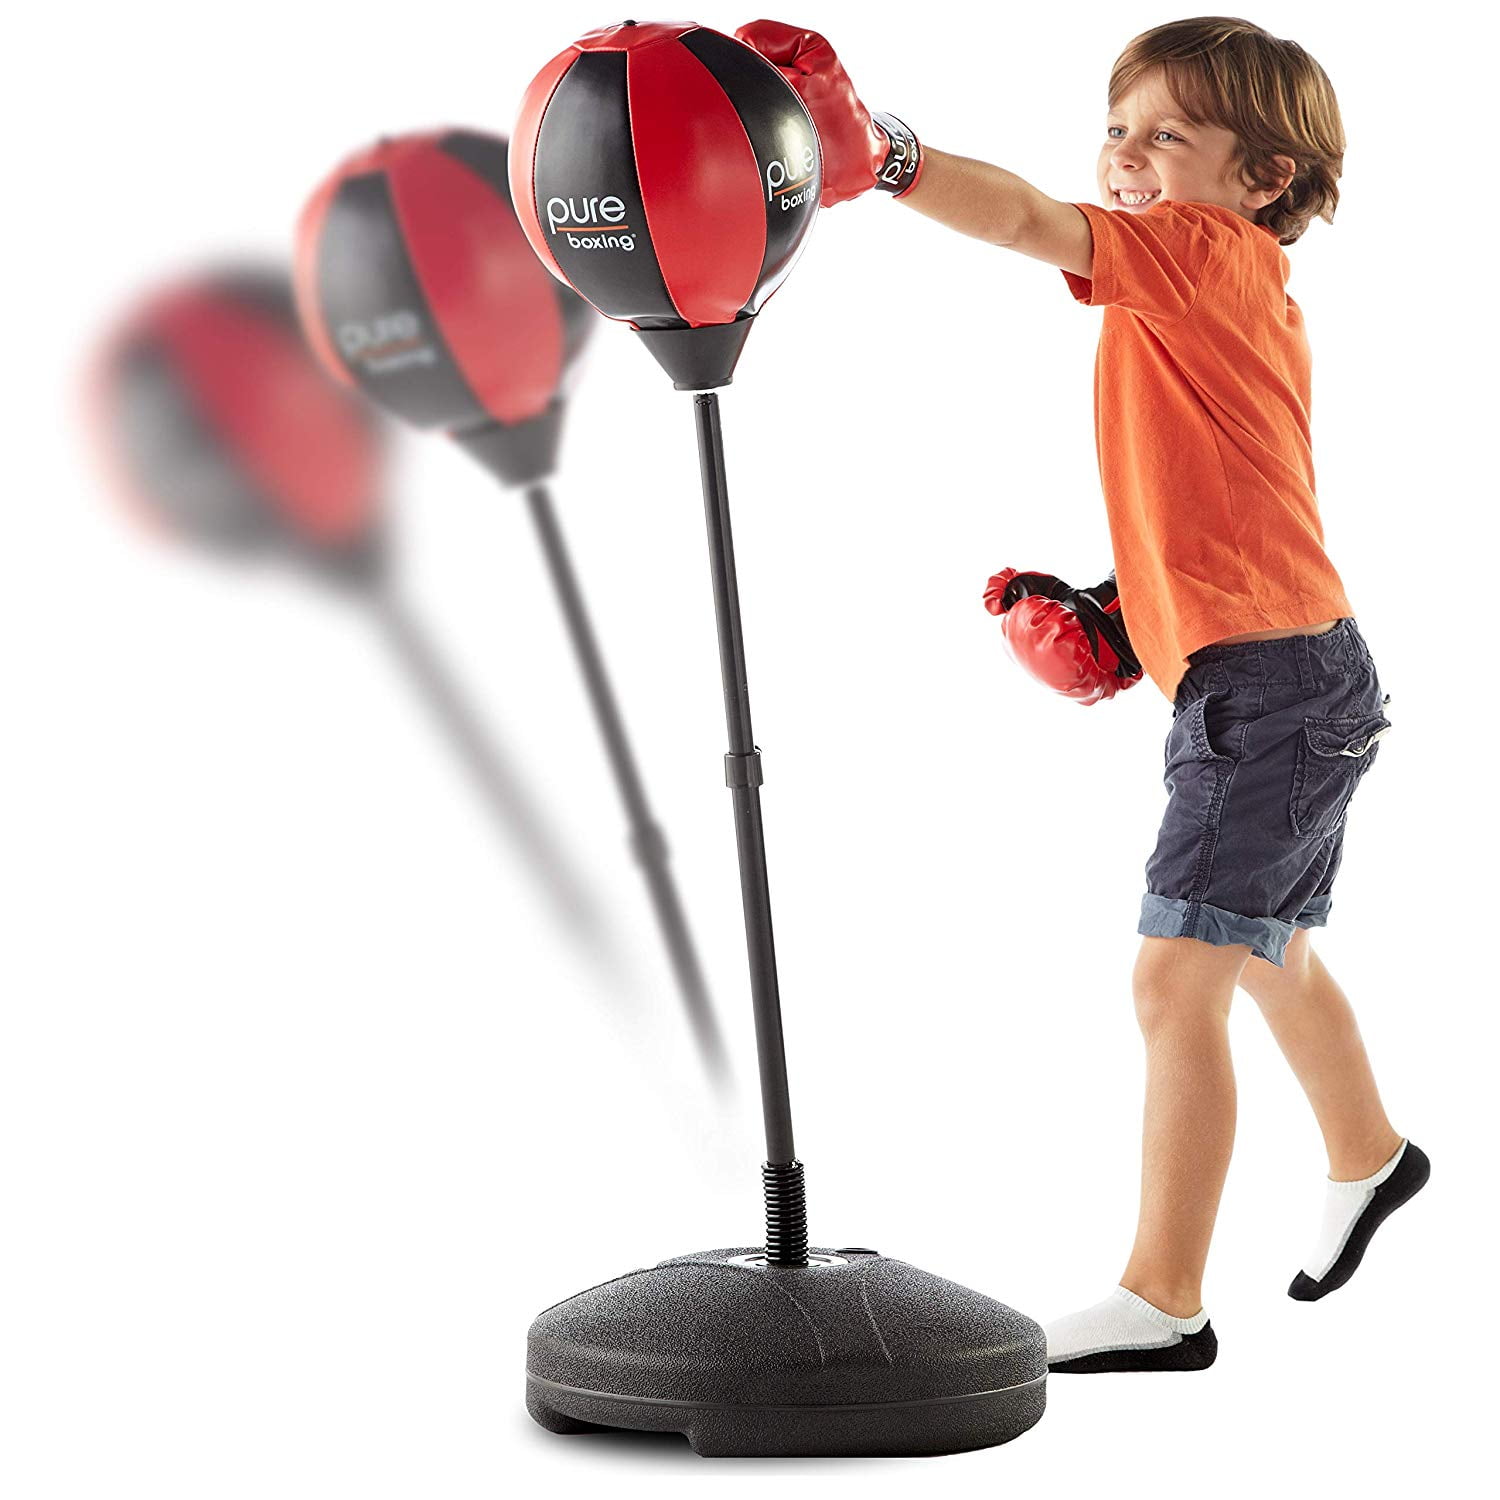
Choosing the Right Stand Up Punching Bag

Selecting the perfect stand up punching bag is crucial for effective training. Consider these pointers when making your choice:

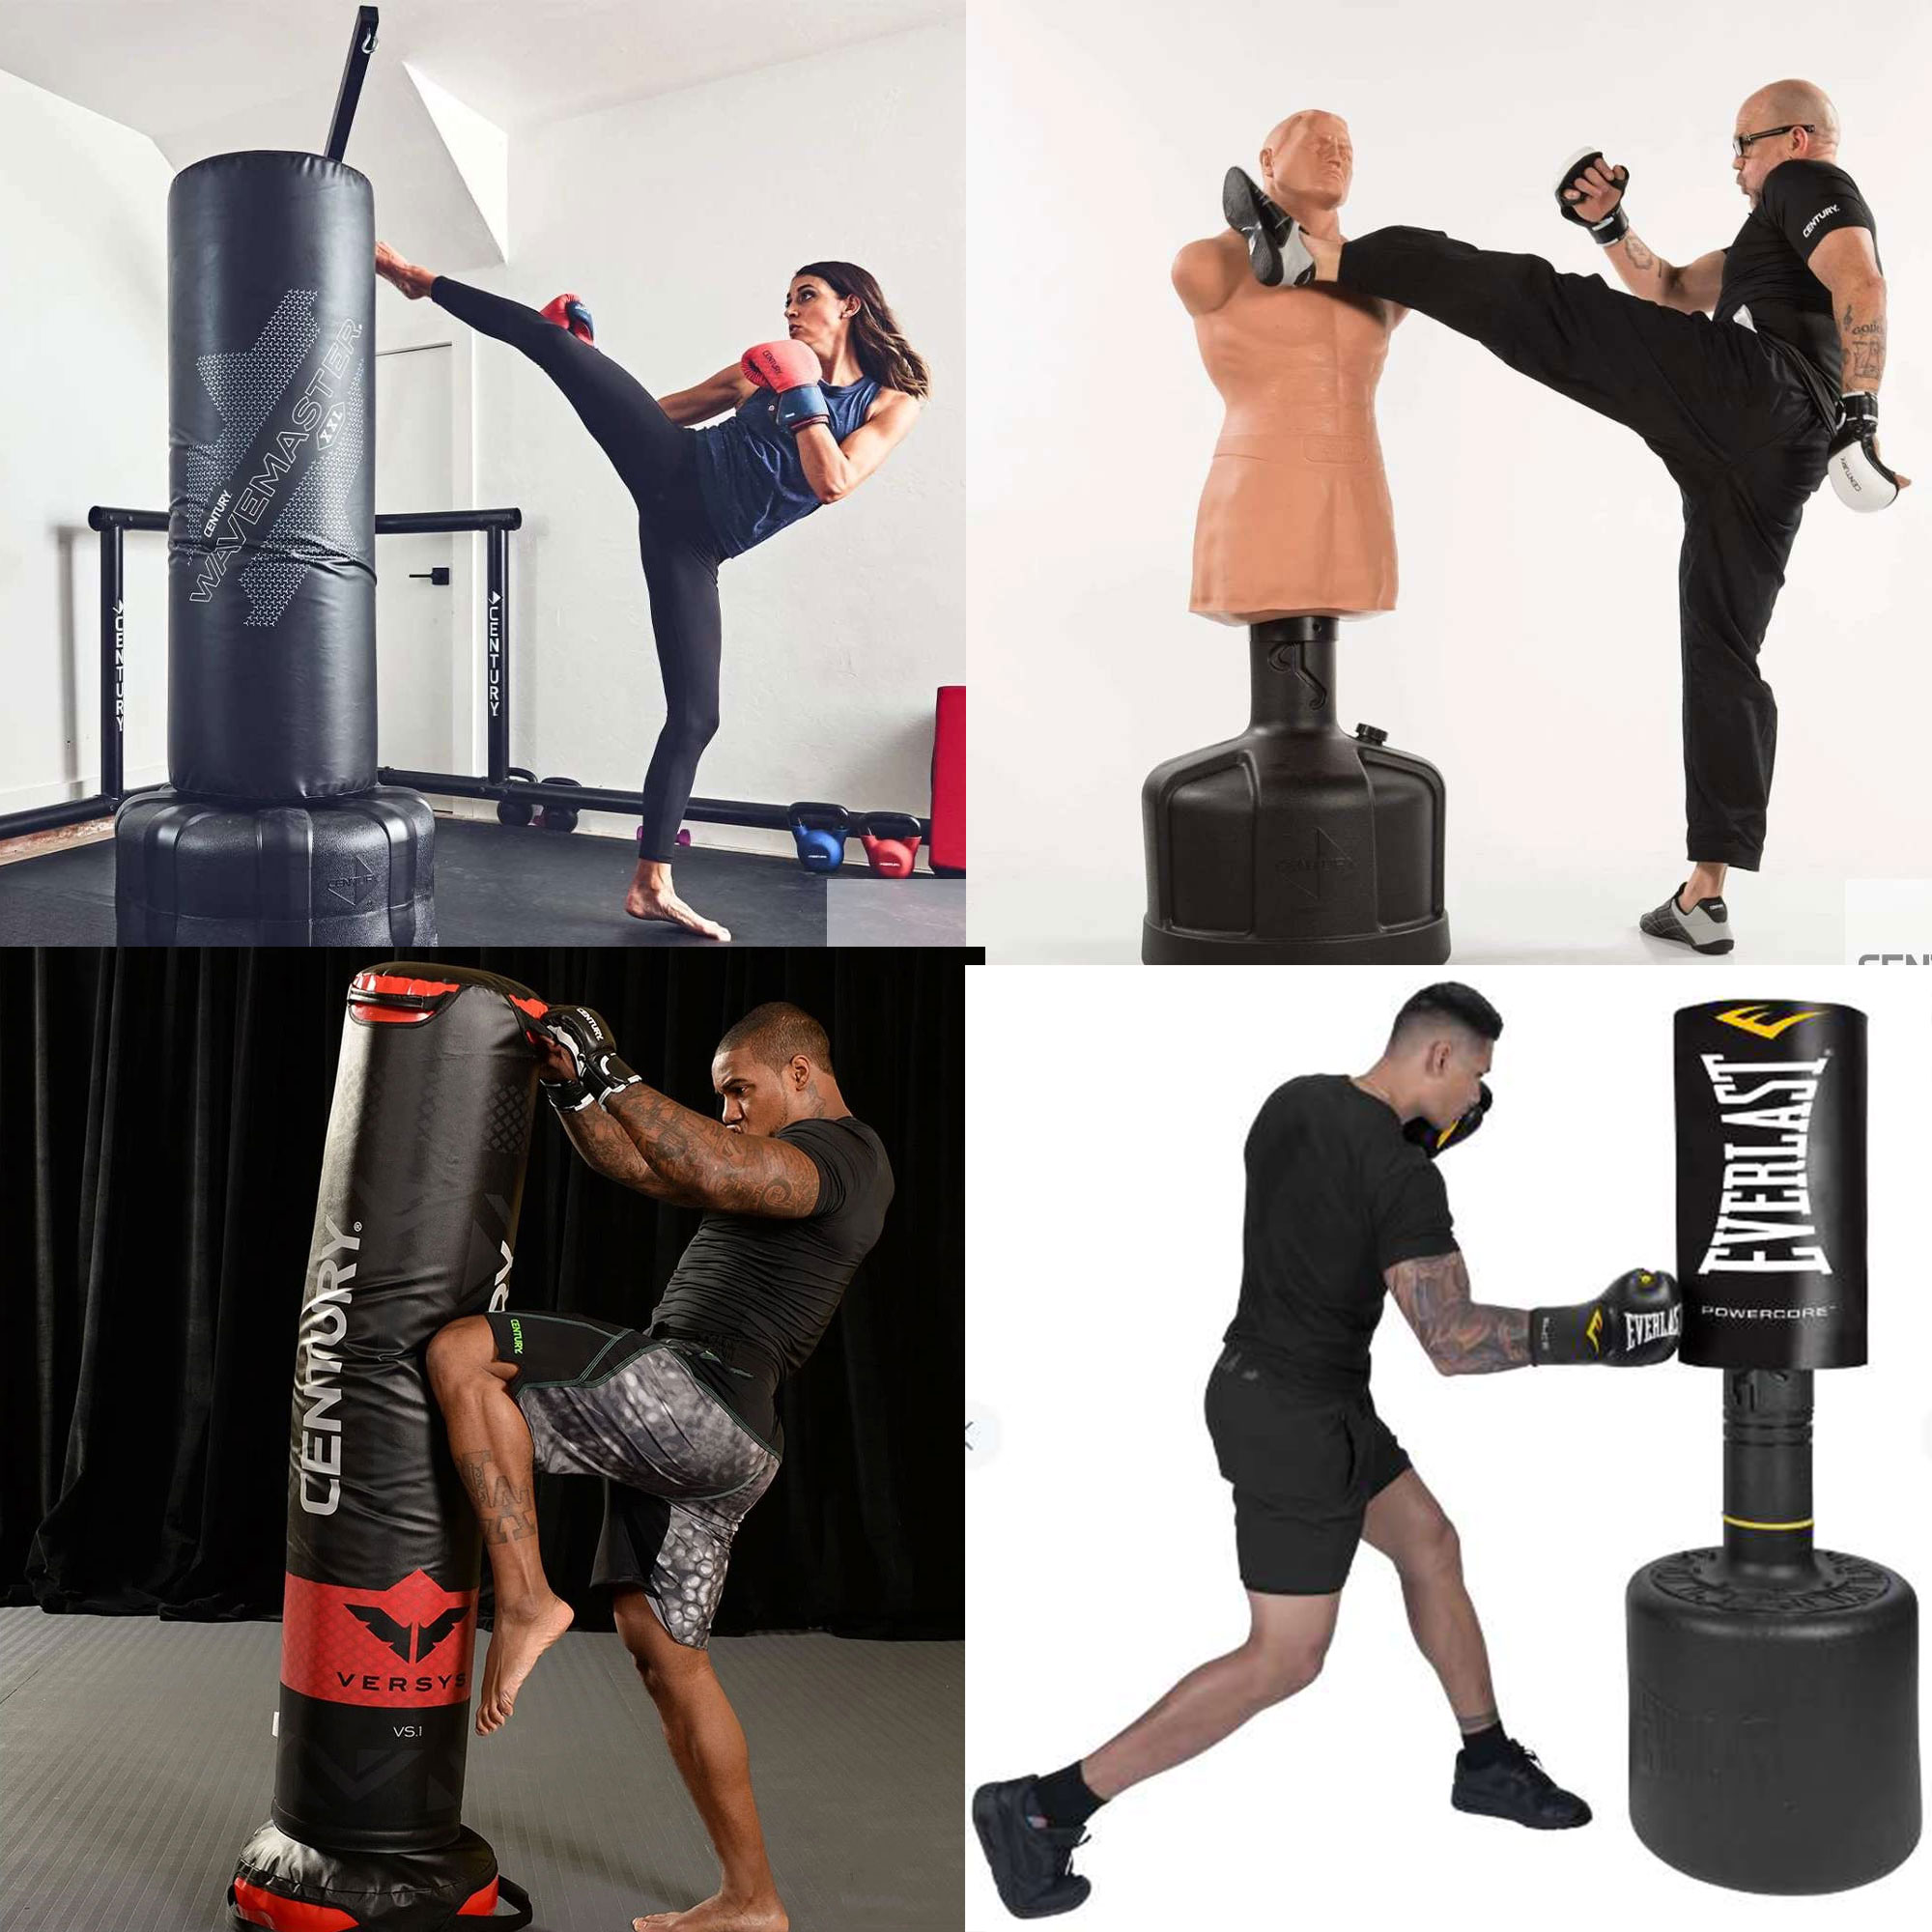
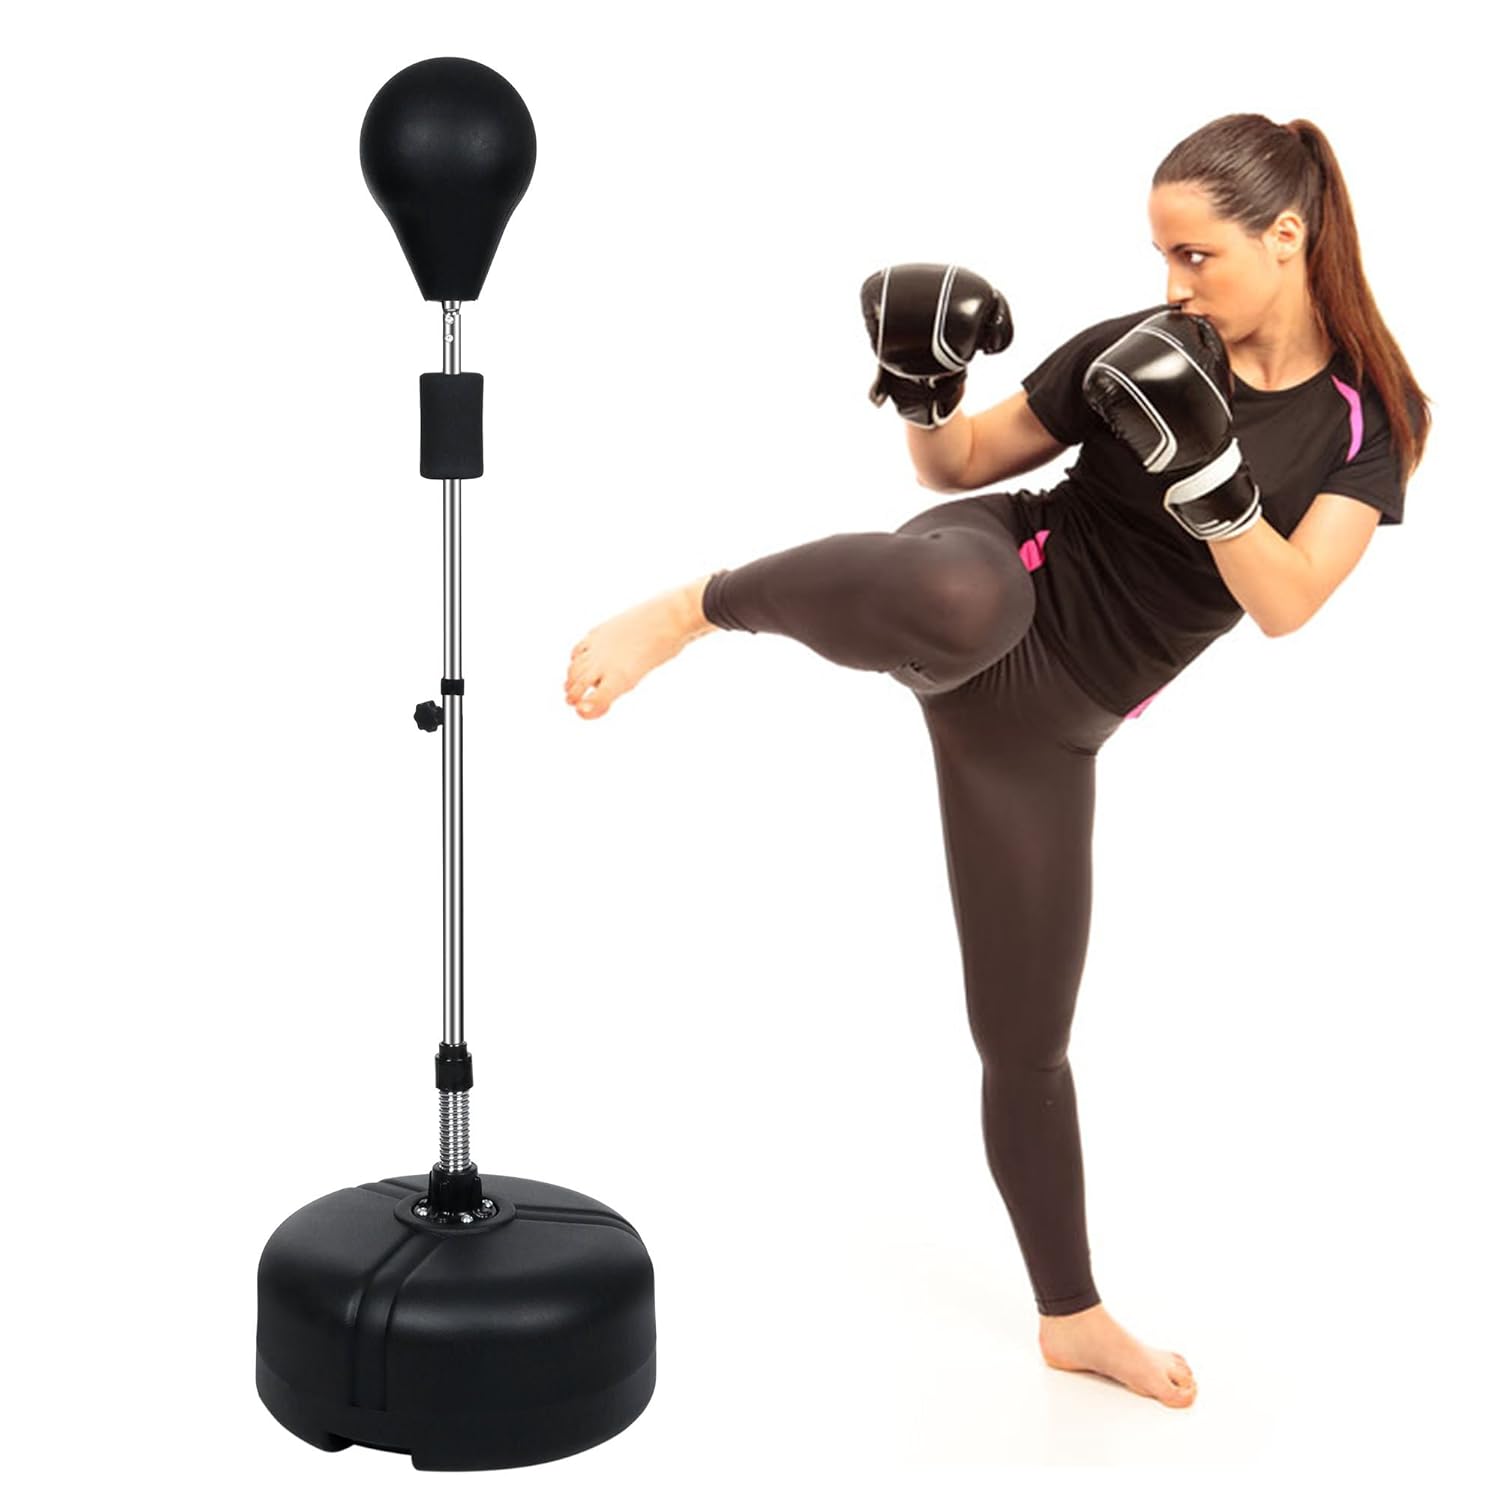
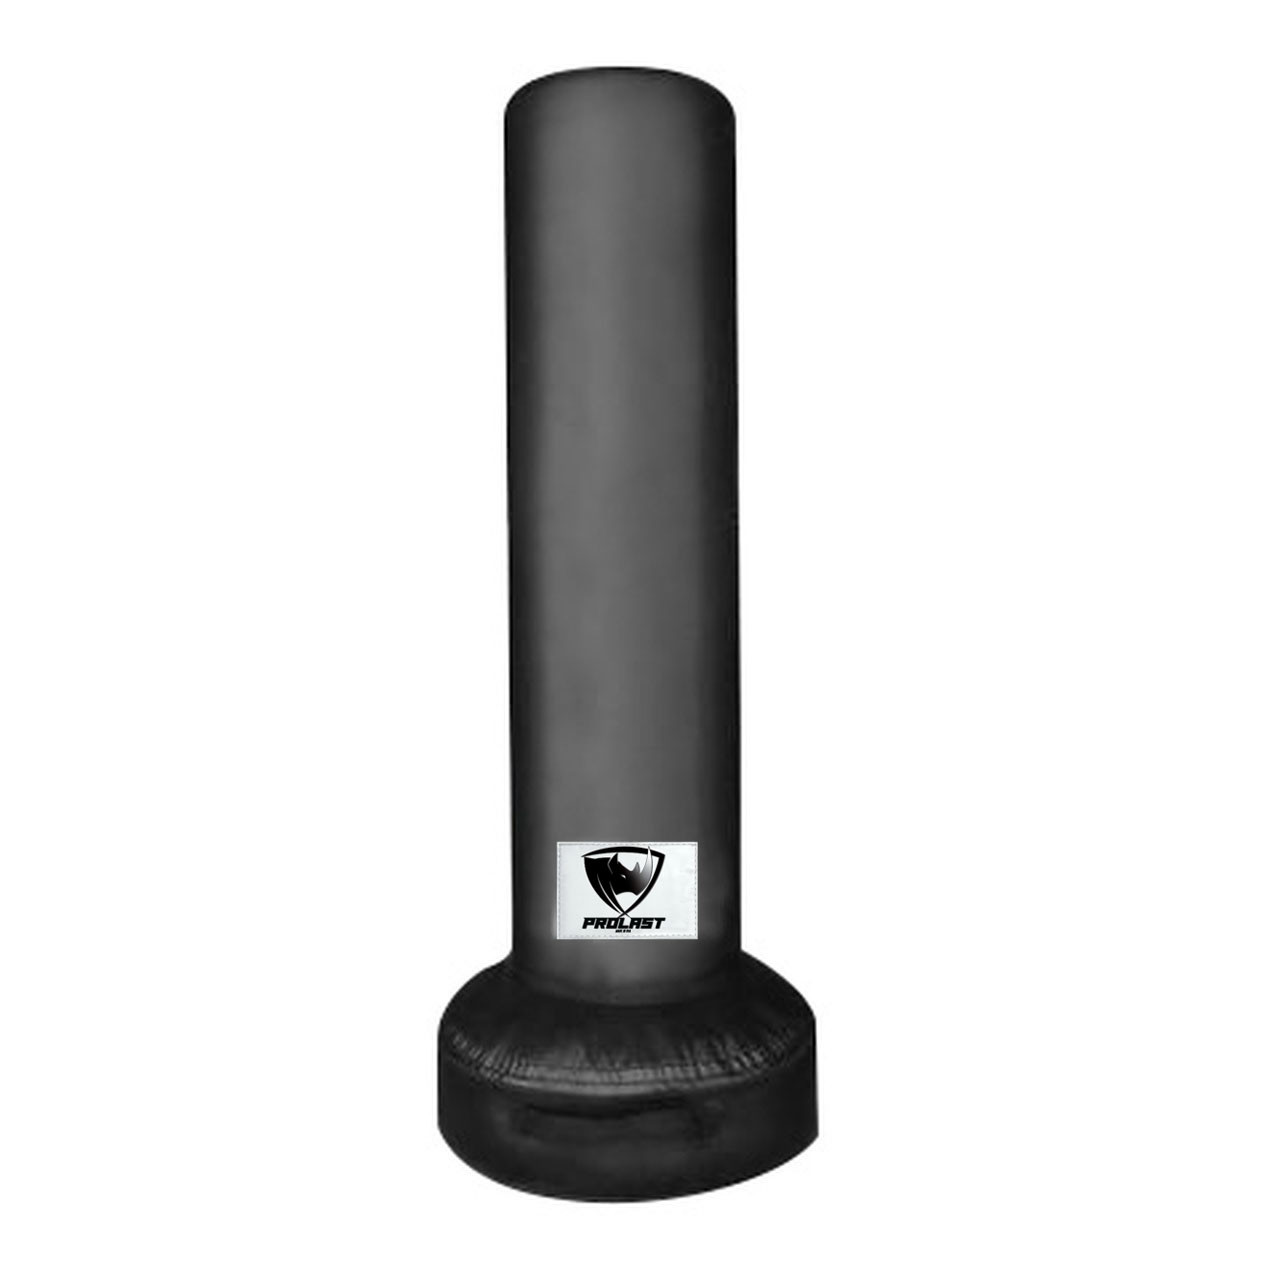
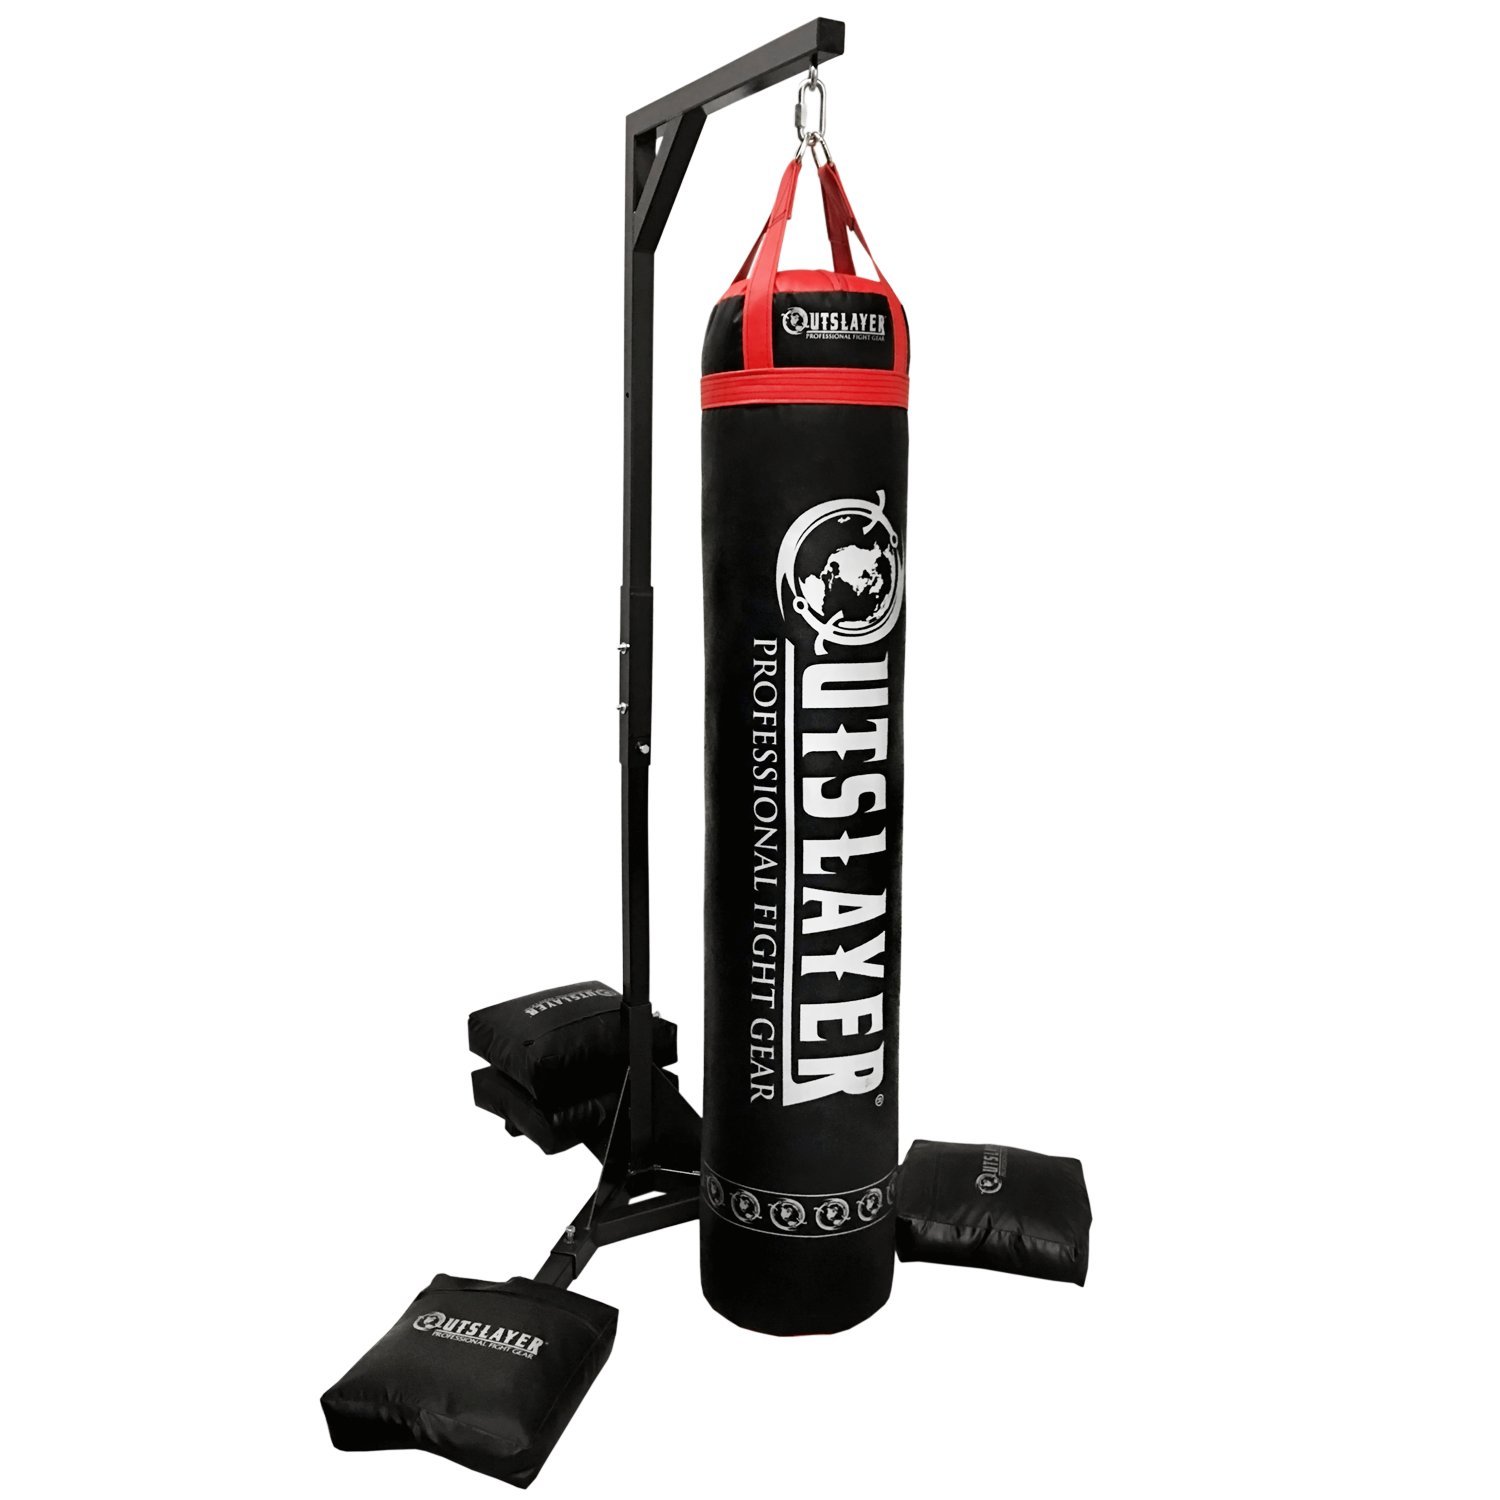
Size and Base Stability

First, assess the size that suits you best. Taller bags offer more surface for kicks and punches. Ensure the base is stable to withstand your workouts without tipping over.

Material and Durability

Opt for durable materials like leather or reinforced synthetic materials. They should handle repeated impacts without wearing out quickly.

Weight and Portability

The bag’s weight impacts portability and resistance. Heavier bags are less likely to move during training but harder to reposition. Lightweight bags are easier to move but may shift during use.

Adjustability and Comfort

Check if the bag height adjusts to match your level. An adjustable bag caters to different people’s needs, which is great for shared spaces.

Brand and Reviews

Research brands and read reviews from other users. It helps identify which stand up punching bags stand up to their promises.

Choosing the right punching bag is essential for a safe and effective workout. Consider size, materials, weight, adjustability, and user reviews when shopping. Select a bag that aligns with your goals and workout space requirements.

stand up punching bag

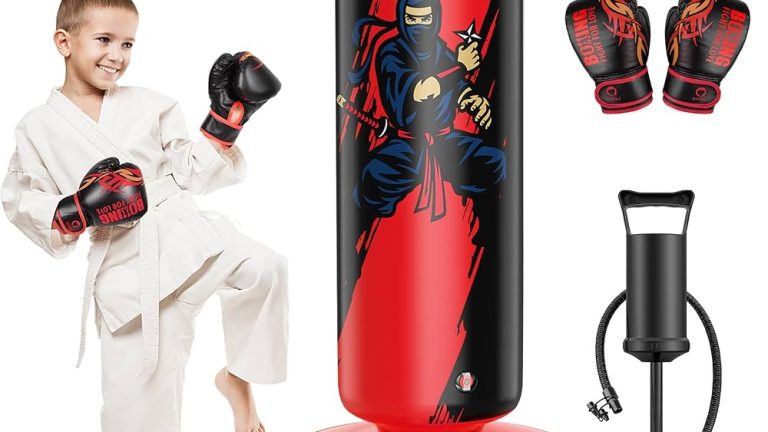
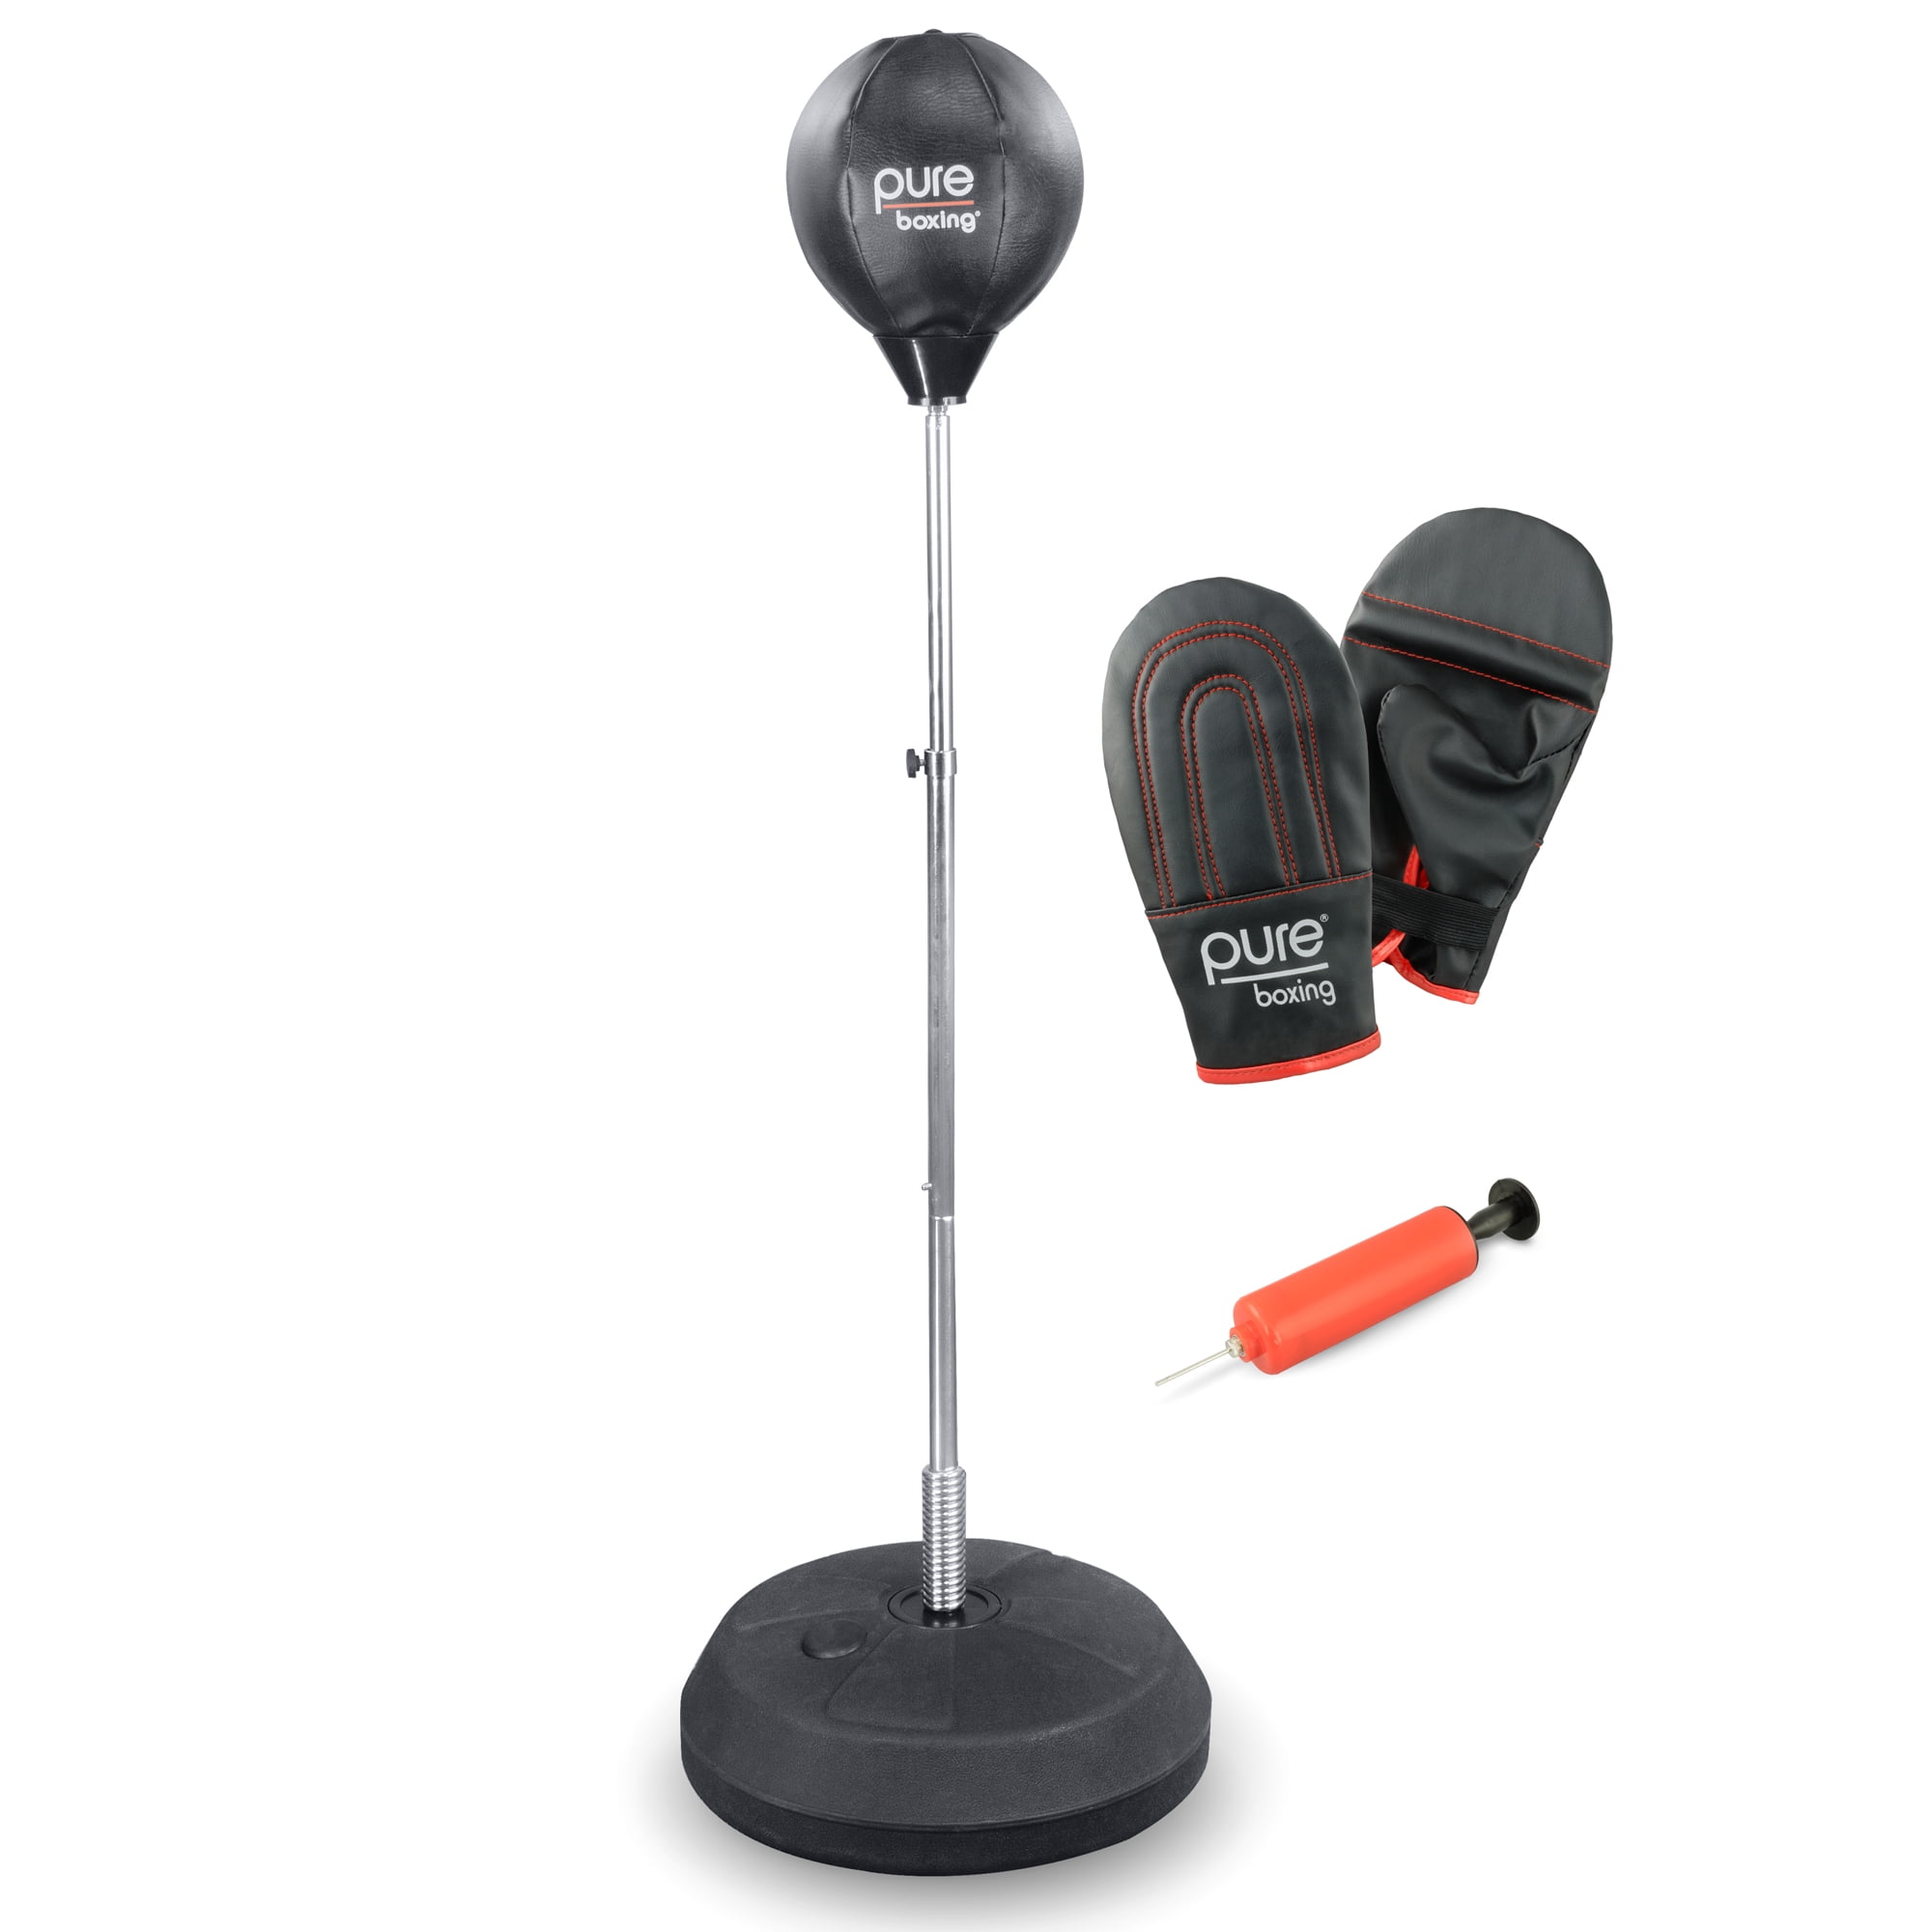
Essential Gear for Punching Bag Workouts

Before you start your stand up punching bag training, you need the right gear. Proper equipment protects you and enhances your workout efficiency. Here’s what you should have:
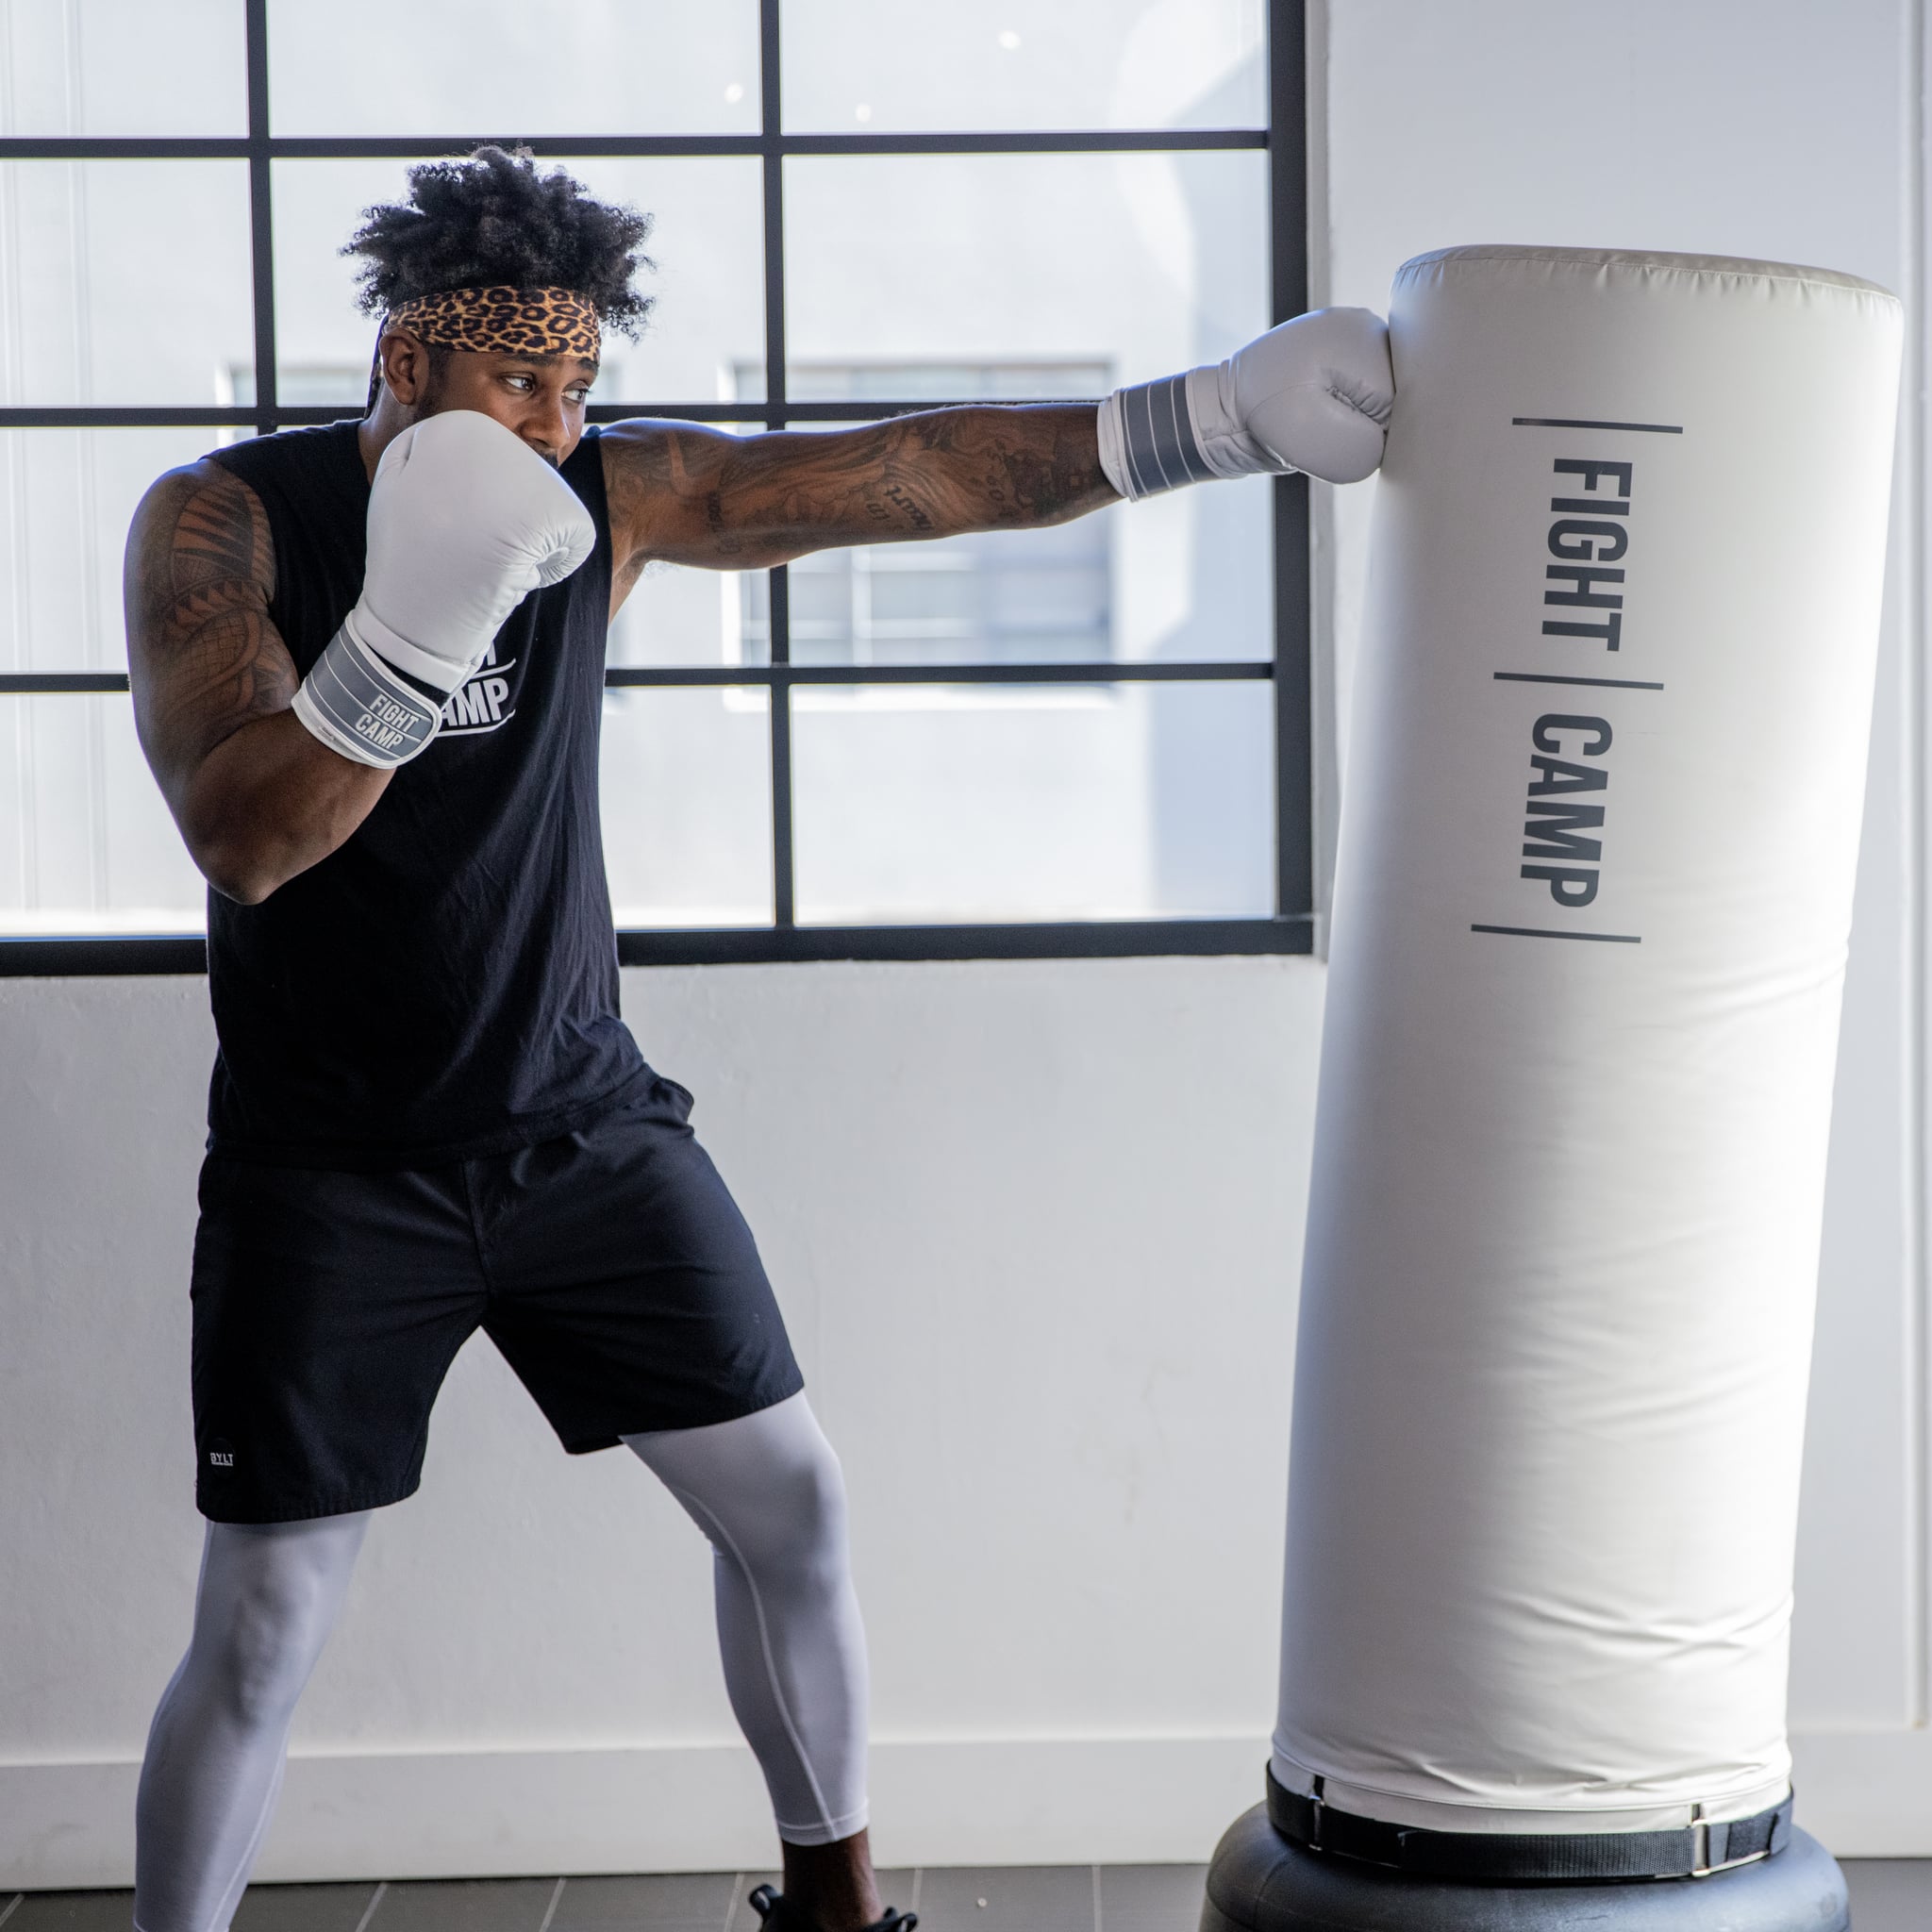
Gloves

Invest in a good pair of gloves. They shield your hands and wrists from injury. Look for gloves with ample padding and wrist support.

Hand Wraps

Hand wraps provide an extra layer of protection under your gloves. They secure the wrists and help to prevent sprains.

Comfortable Attire

Wear lightweight and breathable clothing. Comfortable attire allows for a full range of motion and helps manage sweat.

Protective Footwear

Choose shoes that offer grip and ankle support. They prevent slipping and protect your feet when you kick the bag.

Headgear (optional)

If you’re sparring or practicing with a partner, headgear can provide important protection.

Mouthguard (optional)

A mouthguard is essential for safeguarding your teeth during more intense or contact-based training sessions.

A Quick Recap on Gear:

Gather gloves, hand wraps, comfortable clothes, and supportive shoes before starting. Optional gear like headgear and a mouthguard are vital for partner training. With the right gear, you can focus on your stand up punching bag workout without worrying about injuries.

stand up punching bag

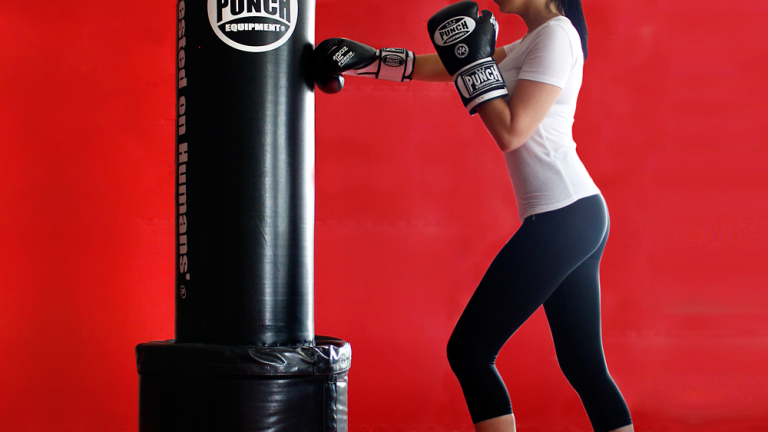
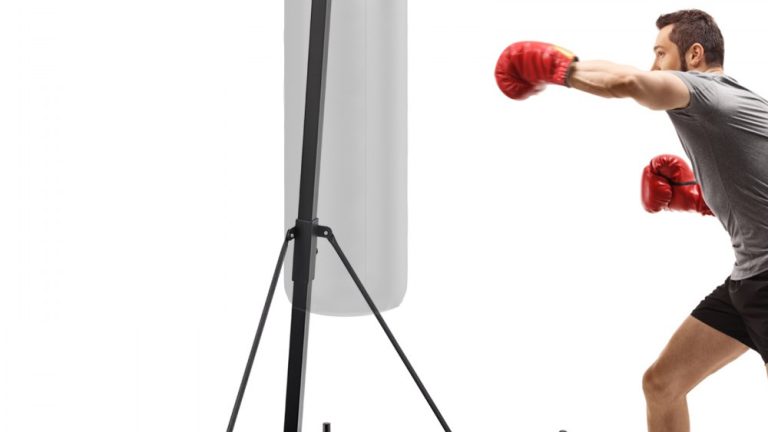
Fundamental Punching Techniques

To make the most of your stand up punching bag workouts, you need to master the basics. Here are the fundamental punching techniques you should practice regularly:
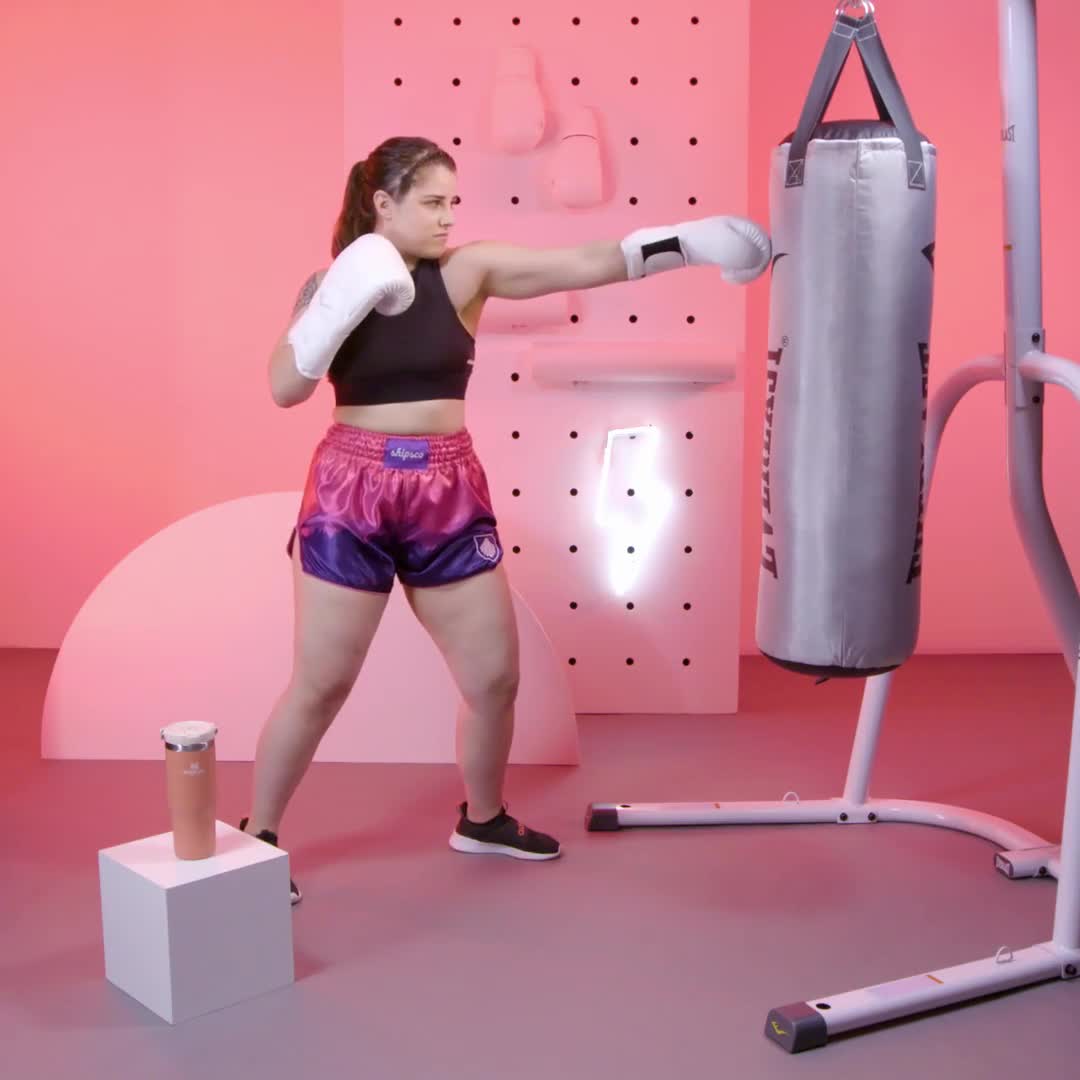
Jab

The jab is a quick, straight punch thrown with your lead hand. Keep your back hand up to protect your face while extending your lead arm quickly towards the bag. Snap it back immediately to guard.

Cross

A cross is a power punch with your rear hand. After throwing a jab, pivot your back foot and rotate your hip to add force to the cross. Keep your lead hand up for defense.

Hook

The hook is a semi-circular punch aimed at the side of the bag. Pivot on your lead foot and rotate your body to give the hook more power. Remember to keep your elbow bent at a right angle.

Uppercut

For an uppercut, drop your hand slightly and bend your knees before punching upwards towards the bottom of the bag. Use your legs to generate force.

Body Punch

Target the bag’s middle section with a body punch. Twist your torso and pivot your feet for more power, keeping your head safely behind your gloves.

Combo: Jab-Cross-Hook

Combine your punches into a basic combo. Use a quick jab, followed immediately by a cross, and finish with a powerful hook. This routine is great for practicing transition between punches.

Mastering these stand up punching bag techniques will enhance your workout’s effectiveness and safety. Practice each punch until it becomes natural and fluid. Control your breath with each strike, exhaling sharply on impact. Remember, consistency is key in perfecting your punching technique.

Developing a Stand Up Punching Bag Routine

Creating a well-structured routine is vital to get the most from your stand up punching bag workouts. Here’s what you need to know to develop an effective practice schedule that keeps you on track and motivated:

Set Clear Goals

First, decide what you want to achieve with your bag workouts. It may be improved strength, better coordination, or stress release. Having clear goals will help you stay focused and measure progress.

Plan Your Sessions

Design your sessions to include warm-up, technique practice, combinations, and a cool-down. Vary the intensity and duration of your workouts to avoid plateauing. You can do this by changing the number of rounds or their length.

Include Variety

Prevent boredom and enhance all-around fitness by mixing up your routine. Include interval training, power punching exercises, and footwork drills. Experiment with different punches and speeds to challenge yourself.

Gradual Progression

Increase the difficulty of your workouts gradually. Start with short rounds and simple punches, then build up to longer sessions and complex combinations. This approach helps to prevent injury and keeps you motivated.

Consistent Schedule

Stick to a consistent workout schedule. Whether it’s daily, every other day, or twice a week, consistency is crucial. Regular sessions will lead to better results and habit formation.

Track Your Progress

Keep a training log to track your progress. Note down the techniques you practiced, the duration of your workouts, and how you felt. Tracking helps in identifying areas that need improvement and celebrating achievements.

Rest and Recovery

Remember to allow time for rest and recovery. Muscles need time to repair after a workout, so incorporate rest days into your routine for optimal performance and health.

Planning your stand up punching bag routine with clear goals, variety, and consistent scheduling is key. Track your progress and give importance to rest for a balanced and effective training program.

stand up punching bag

Advanced Punching Combinations and Drills

Once you’ve honed the basic punches on your stand up punching bag, it’s time to elevate your skills with advanced combinations and drills. These elaborate punching sequences and exercises provide both mental and physical challenges, crucial for more seasoned practitioners. Here’s how you can step up your game:

Complex Punch Combinations

Start stringing together longer sequences of punches – think beyond the basic jab-cross-hook. Incorporate uppercuts, body shots, and rapid-fire flurries into your combos. A sequence like jab-cross-uppercut-hook-body punch can test your memory and coordination while giving you a rigorous workout.

Speed Drills

To develop quick hands and reaction times, speed drills are essential. Set a timer and see how many punches you can throw in 10 seconds. Then, try to beat your record. Consistent practice will lead to faster punch delivery.

Power Drills

Mix in drills that focus on delivering the most forceful blows possible. For these drills, the emphasis is on power, not speed. Throw one punch at a time with full force, rest briefly, and then repeat. Pay attention to your form to maximize the impact and reduce the risk of injury.

Endurance Rounds

Test your stamina with extended rounds. Go for three minutes of continuous punching, similar to a real boxing round. Keep your pace steady and your form intact to build endurance.

Defense and Counter-Drills

Add defensive moves like slipping and bobbing to your routine. Hit the bag, then practice your defense as if you’re avoiding a return strike. This can enhance your agility and ability to react under pressure.

These advanced drills will not only refine your technique but also take your stand up punching bag workouts to a higher intensity level. Keep your sessions diverse and challenging to continue progressing in your fitness journey. Remember to focus on form and control to prevent injuries while training at an advanced level.

Safety Measures and Injury Prevention

When engaging in stand up punching bag workouts, safety is paramount. Here are crucial steps to avoid injuries:

Start with a Warm-Up

A proper warm-up primes your muscles for the exertion ahead. Do light cardio and stretching for at least 5 minutes before punching.

Use Proper Technique

Incorrect form can lead to injuries. Focus on the correct stance and movement. Keep your wrists straight when punching.

Gradually Increase Intensity

Don’t start with the hardest punches. Gradually build up your workout’s intensity to prevent strain.

Protect Your Hands and Wrists

Always wear gloves and hand wraps. They support and cushion your hands and wrists.

Listen to Your Body

If you feel pain, stop immediately. Ignoring discomfort can lead to serious injuries.

Stay Hydrated

Drink water before, during, and after your workout. Good hydration helps prevent muscle cramps and fatigue.

Cool Down and Stretch

After your session, cool down with light activity. Then, stretch to help your muscles recover.

Rest When Needed

Allow time for rest and recovery. If you’re feeling worn out, take a break to prevent overuse injuries.

Clean and Inspect Equipment

Keep your punching bag and gear clean. Regularly check for wear and tear to ensure safety.

Following these tips will help you enjoy stand up punching bag workouts while minimizing the risk of injury. Remember that safety should always come first in your training regimen.

stand up punching bag

Tips for Maintaining Your Stand Up Punching Bag

Proper maintenance of your stand up punching bag ensures it lasts longer and stays safe for use. Here are some practical tips to keep your equipment in top condition:

Keep It Clean

Wipe down your punching bag after each session. Use a cloth with mild soap and water to remove sweat and dirt. Dry it off to prevent mold and odors.

Inspect Regularly

Check your bag often for tears or damage. Small issues can turn into costly problems if ignored. Fix minor rips promptly to avoid further wear.

Proper Storage

Store your bag in a cool, dry place. Avoid direct sunlight and damp areas. Extreme temperatures can damage the material.
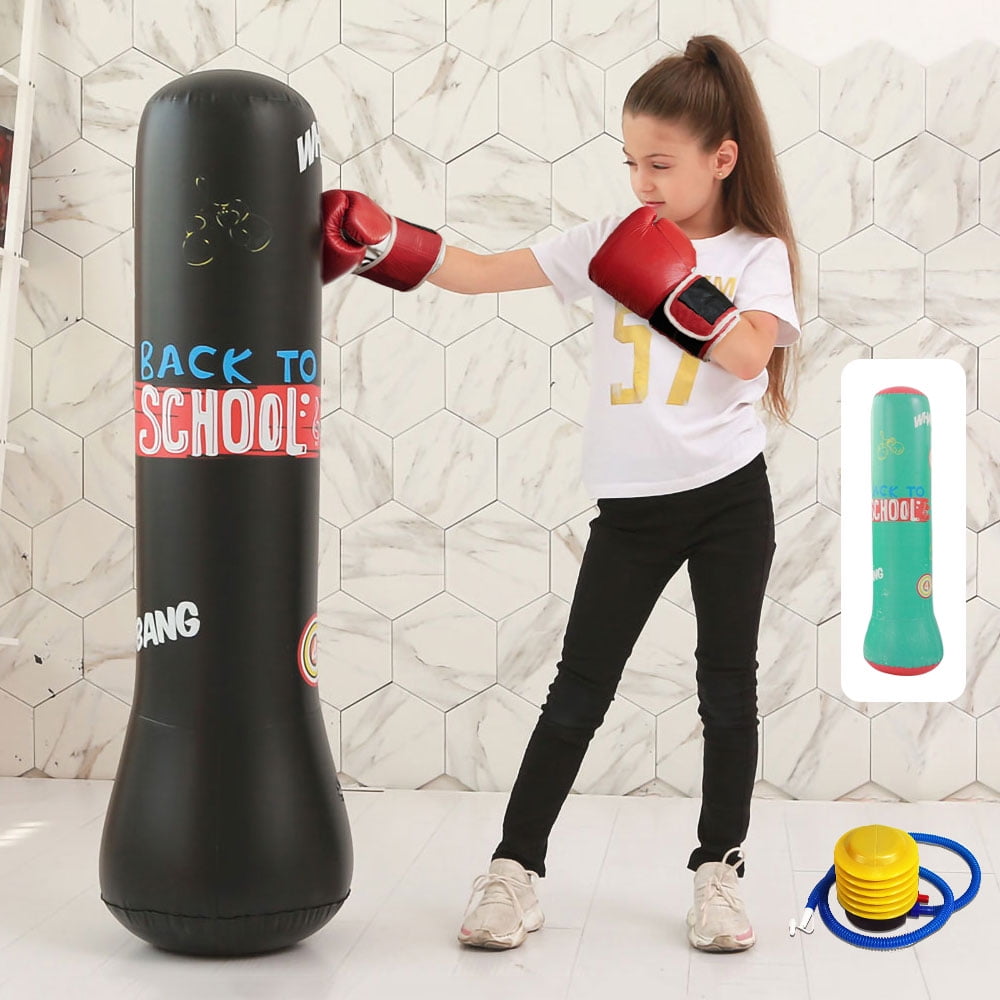
Secure the Base

Make sure the base is always filled properly. Whether it’s sand or water, a secure base keeps the bag stable during your workouts.

Rotate the Bag

Rotate your punching bag from time to time. This ensures even wear and tear. It helps to prevent one side from getting more damaged than the other.

Avoid Harsh Chemicals

Don’t use strong cleaners on your punching bag. Harsh chemicals can break down the materials. Stick to mild, non-abrasive cleaners.

Tighten Any Bolts

If your punching bag has bolts or attachments, tighten them as needed. Loose parts can lead to instability and increase injury risk.

Air It Out

Let your bag air out if it gets wet. Moisture trapped inside can cause mildew and weaken the bag.

Follow Manufacturer’s Guidelines

Always refer to the care instructions provided by the manufacturer. Each stand up punching bag may have its maintenance requirements.

Maintaining your stand up punching bag with regular cleaning, inspection, and proper storage will prolong its life and provide a reliable workout experience. Don’t overlook any signs of damage and repair any issues immediately to ensure your safety and the longevity of your equipment.


Choosing the Right Punching Bag for Your Home Gym

Types of Punching Bags

When setting up a home gym, choosing the best punching bag is critical to fitness success. Different types of bags suit different training needs. Here are the common types.


Hanging Heavy Bags

These are the traditional bags that hang from the ceiling. They offer a high level of resistance and are great for building power and strength. They can sway, which helps improve your timing and coordination.

Freestanding Bags

Freestanding punching bags are more portable. They have a base that you can fill with sand or water. This type is excellent for flexibility and is easier to set up in places where hanging a bag is not possible.

Speed Bags

Speed bags are small, air-filled bags anchored at the top to a rebound platform. They help improve hand speed, rhythm, and coordination. These are essential for honing your reflexes and accuracy.

Double-end Bags

Connected at both top and bottom, double-end bags bounce back at you after being hit. They are good for practicing movement and developing quick, reactive punches.

Grappling Dummy Bags

These are designed for martial artists who practice throws, grapples, and ground-and-pound techniques. They mimic the human body, which allows for a more realistic training experience.

Body Opponent Bags (BOB)

A BOB is a life-sized mannequin mounted on a base. They are ideal for target practice and simulating a real opponent for more accurate striking.

Each type of bag serves a specific purpose in training and can help enhance different skills. When selecting the best punching bag, consider what fits best with your training regimen and the available space you have in your home gym.

best punching bag

Factors to Consider Before Buying a Punching Bag

When shopping for the best punching bag, weigh several factors to ensure you find the right fit for your home gym. Here’s what to consider:

Training Goals

Identify your primary objectives. Are you training for strength, speed, technique, or a combination? Different bags cater to different goals.

Space Availability

Measure the area in your gym designated for the bag. Make sure it can accommodate the bag you want.

Budget

Prices vary widely depend on quality and type. Set a budget that aligns with your needs and stick to it.

User Experience

Think about the users. Are they beginners or experienced fighters? Pick a bag that matches the skill level.

Versatility

Some bags offer more than just punching. If you need a multipurpose bag for kicks and throws, note that in your criteria.

Bag Type

Refer back to the types of bags discussed. Match the type to your space and training needs for optimal results.

By considering these factors, you can narrow down the choices and select the best punching bag that will serve you well in your fitness journey.

best punching bag

Punching Bag Materials and Durability

When choosing the best punching bag for your home gym, materials and durability play a pivotal role. The longevity and feel of a punching bag directly impact your training quality. Here’s what you need to consider regarding materials and durability.

Outer Material

Most bags feature leather, synthetic leather, or canvas outer layers. Leather bags are robust and long-lasting, but they come at a higher cost. Synthetic leather offers a good balance between durability and affordability. Canvas bags are the most economical, but they’re less durable and have a rougher texture.

Filling Material

The inside of the bag can be filled with various materials like foam, fabric, or sand. Foam-filled bags provide consistent resistance and are gentle on the hands. Sand makes the bag heavier and harder, which is suitable for strength training. Fabric-filled bags can settle over time, creating hard and soft spots, so they require occasional maintenance.

Reinforcement and Stitching

Check the stitching and reinforced areas of the bag. Strong stitching prevents tearing, and reinforced seams can drastically increase life span. High-quality bags often have riveted straps or reinforced loops for hanging.

Durability Features

Some bags come with durability features, such as waterproof or sweat-resistant coatings. These additional treatments help the bag withstand tough workouts and the elements, especially if placed in an area prone to moisture.

Choosing a bag with the right materials and built-to-last features will ensure it stands up to your rigorous workouts for years to come. It’s an investment that pays off in durability, enhancing your training experience in your home gym.

best punching bag

Size and Weight of the Bag

Choosing the best punching bag involves considering its size and weight. The right choice depends on your training style and physical space. Here’s how these factors come into play:

Training Intensity and Skill Level

Heavy bags are crucial for power punching drills. A heavier bag provides more resistance. It suits those who focus on strength. Lighter bags are good for quick-speed boxing and skill finesse. They move more with each hit, adding a level of difficulty in timing your punches.

Physical Space

Your home gym’s physical space limits your options. Larger and heavier bags need strong support structures. They may not fit in smaller areas. Measure your available space before deciding on the bag size. Ensure it provides enough room to train safely and effectively.

Fitness Level

If you are a beginner, start with a lighter bag. It is less intimidating and helps build basic skills. As you progress, you can move to heavier bags. They will challenge your growing strength and technique.

Size for Specific Training

Bag size can affect the type of training. Long, heavy bags are better for low kicks and overall power. Shorter bags work well for high punches and improving upper body strikes.

Considering the size and weight of your punching bag is critical. Make sure it aligns with your training needs, space, and fitness level. The best punching bag will accommodate your regimen and adapt as you grow in skill.

best punching bag

Mounting Options for Home Gyms

When it comes to setting up the best punching bag in your home gym, you need to consider the mounting options. The type of mount you choose will depend on the bag type and your gym’s layout. Let’s look into the two primary ways you can secure your punching bag:

Ceiling Mounts

Most hanging heavy bags require a ceiling mount. They need a secure attachment point to handle the weight and motion of the bag. Check the ceiling’s strength before installation. Use a heavy-duty mount and ensure it’s anchored into a beam. Ceiling mounts offer great stability, but make sure you have enough clearance from walls to avoid damage.

Wall Mounts

If ceiling mounting isn’t feasible, wall mounts are an alternative. They attach directly to wall studs and come in various designs. Some allow the bag to pivot, giving you more room to move around it. Wall mounts can save floor space but check the wall’s capacity to take on stress. Proper installation ensures safety and functionality.

Freestanding Bag Bases

Freestanding bags are much easier to set up. They have a base that you fill with sand or water. This option offers great portability and does not require drilling into walls or ceilings. It’s ideal for spaces where temporary setups are needed. However, these can move during intense workouts.

Doorway Mounts

For really tight spaces, a doorway mount can be a solution. These are less common and mainly used for speed bags. Ensure the doorway is strong enough to support the equipment. They are convenient and save space but offer limited training options.

Floor Anchors for Double-end Bags

Double-end bags need an anchor point on the floor as well as the ceiling. Use a sturdy floor mount that can handle the bag’s rebounding force. This setup helps in enhancing speed and coordination during workouts.

Choosing the right mounting option will keep your bag secure and your training sessions productive. Ensure you follow the manufacturer’s guidelines for installation. A well-mounted bag leads to a safer and more effective workout environment.

Best Punching Bag Brands and Models

When it comes to choosing the best punching bag, brand and model matter. A few brands stand out for their quality, durability, and user satisfaction. Here are some top contenders:

Everlast

Everlast is a trusted name in boxing equipment. Their heavy bags are known for durability and quality. Models like the Everlast PowerCore offer a mix of sand and natural fibers for a realistic feel.

Century

Century bags come in various types, including freestanding models like the Wavemaster. These are great for convenience and adjustability to suit different heights and training sessions.

Outslayer

Renowned for high-quality craftsmanship, Outslayer bags are filled with fabric and come with a warranty. Their heavy bags have a reputation for enduring countless workouts.

Title Boxing

Title Boxing offers a wide range of options. Their leather heavy bags are highly regarded for boxers at all levels. The brand also excels in providing sturdy mounts and accessories.

Ringside

Ringside punching bags are a favorite among professionals. They’re built to take a beating and come in various sizes, catering to different training regimes.

RDX

RDX features cutting-edge designs with their bags, providing durability and versatility. Their bags are often filled with shredded textiles, giving a consistent feel and resistance.

When deciding on the best punching bag, consider reviews, warranty, and post-sale support offered by these brands. High-quality models tend to pay off, improving your training experience without frequent replacement costs. Always align your choice with your training goals and the space available in your home gym.

best punching bag

Maintenance and Care for Your Punching Bag

To keep your best punching bag in top shape, follow a simple maintenance routine. Here’s a guide.

Clean Regularly

Wipe the surface with a damp cloth to remove sweat and dirt. Use mild soap if needed. Don’t let moisture sit; it can cause damage over time.

Check for Wear and Tear

Inspect your bag often for signs of wear. Look for splits in the material or loose stitches. Address these issues promptly to prevent further damage.

Properly Fill the Bag

Make sure the bag’s filling remains even and firm. Adjust the filling as needed. Uneven weight distribution can affect your training.

Protect from Extreme Temperatures

Store your bag in a space with a stable temperature. Extreme heat or cold can affect the bag’s materials. Avoid placement near heaters or in direct sunlight.

Ensure Secure Mounting

Regularly check the bag’s mountings. Tighten screws and bolts as necessary. A secure bag is safe and better for training.

Rotate the Bag

Turn the bag periodically to prevent uneven wear. This simple step helps keep the bag balanced and extends its life.

By following these maintenance tips, you’ll ensure your punching bag stays durable for years of home gym workouts. Regular care makes a difference.

Accessories and Additional Training Equipment

To enhance your training with the best punching bag, consider accompanying accessories and additional equipment. These items can elevate your workout routine and provide a more comprehensive training experience.

Gloves and Hand Wraps

Protect your hands with the right gloves and hand wraps. They cushion impact, support your wrists, and minimize injury.

Heavy Bag Stand

If you can’t mount your bag, invest in a heavy bag stand. It’s essential for stability and can be moved as needed.

Punching Bag Cover

A cover shields your bag from dust and wear when not in use, prolonging its lifespan.

Bag Gloves

Bag gloves are lighter than sparring gloves and designed specifically for bag work. They offer protection while allowing more feel and control.

Timer

A timer can help structure your workouts into rounds, ensuring disciplined training and rest periods.

Floor Mats

Mats protect your floor and provide cushioning for footwork. They also reduce noise from intense workouts.

By integrating these accessories and equipment with your best punching bag, your home gym will be well-equipped for a variety of workouts. Remember to keep your training balanced and to regularly maintain your equipment for the best performance.


Choosing the Right Punching Bag for Kids: Factors to Consider

Types of Punching Bags Suitable for Children

When picking a punching bag for kids, the right type is crucial for their enjoyment and safety. Here are types suitable for young users:


  • Freestanding Bags: These bags are easy to set up and move around. They are great for kids as they can adjust to various heights, accommodating growth.
  • Hanging Bags: These traditional bags offer a real boxing experience. Ensure they are securely mounted and at the right height for the child.
  • Inflatable Punching Bags: Lightweight and less likely to cause injury, these bags are ideal for smaller children. They also help improve coordination.
  • Speed Bags: Though challenging, speed bags can help kids enhance their hand-eye coordination and timing. However, they may require closer supervision.
  • Heavy Bags: Suitable for older kids, heavy bags build strength and stamina. They should be lighter in weight specific for children’s use.

Each type of punching bag for kids serves different purposes, from improving coordination to building physical strength. Match the bag to your child’s age, ability, and interests for the best fit.

Punching Bag for Kids

Factors to Consider When Selecting a Punching Bag

When shopping for a punching bag for kids, several factors can guide your decision to ensure the best choice. Consider the age and size of the child, the type of material suitable for their safety, along with the bag’s weight and durability. Moreover, think about the available space in your home for the punching bag setup and whether you’re looking for a temporary or permanent fixture.

  • Child’s Age and Size: Select a bag that fits the child’s age group and body size. This helps avoid injury and ensures they can use it comfortably.
  • Material Safety: Opt for softer materials that reduce the chance of injury while giving a realistic feel. Look for child-friendly materials like vinyl or soft leather.
  • Bag Weight: Choose a punching bag’s weight according to the child’s strength. It should be heavy enough to provide some resistance but light enough for them to handle safely.
  • Durability: Kids will be giving the bag a good workout, so pick one that can withstand repeated use.
  • Space Requirements: Assess your space to decide if a hanging or standing bag is more suitable.
  • Purpose of Training: Reflect on whether the punching bag is for general play, fitness, or serious boxing training.
  • Adjustability: A feature to look for is height adjustability, which allows the bag to grow with your child.
  • Ease of Setup: If you’re not handy with tools, a freestanding bag may be the best choice due to easy setup and no need for drilling.

The right punching bag for kids provides a safe outlet for energy and a fun way to exercise. Keep these factors in mind and you will find the perfect match for your little champ.

Recommended Materials for Kids’ Punching Bags

Selecting the right materials for a punching bag for kids is crucial for their safety and enjoyment. Materials should be soft yet durable, to minimize the risk of injury while withstanding the wear and tear of regular use.

  • Soft Outer Shell: Look for punching bags with a plush, cushioned outer layer. Materials like vinyl or soft leather are ideal, offering a realistic feel without being too harsh on little hands.
  • Padded Foam Layer: Beneath the outer shell, a thick foam layer provides additional protection. This layer absorbs impacts, protecting kids from hard hits.
  • Reinforced Seams: Durable stitching is important to ensure the bag can handle repeated punches. Reinforced seams prevent tearing and increase the bag’s lifespan.
  • Child-Safe Fillers: Inside the bag, opt for fillers that are safe for kids. Sand can be too dense and hard, while materials like fabric or foam offer resistance without the danger.
  • Water or Air Base for Freestanding Bags: When choosing freestanding bags, a base filled with water or air keeps the bag upright and is less likely to cause harm if tipped over.

By choosing the right materials, you’ll ensure the punching bag is safe, engaging, and durable for your child’s use.

Punching Bag for Kids

Safety Tips for Punching Bag Use in Kids

Ensuring safety is paramount when it comes to children using punching bags. Below are essential safety tips that should be followed:

  • Supervision is Key: Always have an adult present when kids are using the punching bag. This helps prevent accidents and improper use.
  • Proper Gear: Make sure kids wear appropriate gear such as gloves and wraps to protect their hands and wrists from injury.
  • Clear Space: Keep the area around the punching bag clear. This gives kids plenty of room to move and prevents tripping hazards.
  • Bag Inspection: Regularly check the bag for any tears or damage. Ensure it’s securely attached to its base or hanger.
  • Gradual Progression: Let kids slowly build up their strength and technique. Don’t let them hit the bag too hard before they are ready.
  • Instruction First: Teach children the correct way to punch. Starting with proper technique reduces the risk of injury.
  • Weight and Size: Use a punching bag that is suitable for the child’s size and weight to avoid it swinging too much.
  • Hydration: Encourage kids to stay hydrated during their workout. It’s important for their overall health and safety.

By following these safety tips, children can enjoy the benefits of a punching bag for kids while minimizing risks of injury.

Size and Weight Guidelines for Children’s Punching Bags

Selecting the ideal punching bag for kids requires careful attention to size and weight. These guidelines help ensure the bag promotes safety and a positive training experience.

  • Match Bag Size to Child’s Height: For stance and reach, the bag should align with the child’s own size. Choose one that allows them to punch without reaching up or crouching down.
  • Appropriate Weight is Crucial: The weight affects stability and resistance. A bag too heavy may be immovable for a child, while one too light could swing excessively and cause injury. Aim for a punching bag that is roughly half the child’s weight.
  • Light Bags for Beginners: Beginners should start with lighter bags that are easy to move. This helps them focus on technique and avoids overwhelming them with resistance.
  • Increase Weight Gradually: As children grow and gain strength, you can select heavier bags that offer more resistance and challenge them further.

By observing these size and weight guidelines, your child can safely enjoy their punching bag and reap the full benefits of their training.

Punching Bag for Kids

Setting Up the Punching Bag at Home

When you select a punching bag for kids, setting it up properly at home is key for ensuring both safety and usability. Here are some steps and considerations for installing a kids’ punching bag:

  • Choose the Right Location: First, find a spot that has enough space for the child to move around the bag safely. Make sure this area is free of obstacles that could cause injury.
  • Floor Protection: If you go for a freestanding bag, consider placing a protective mat underneath. This will help to prevent floor damage and stabilize the base.
  • Ceiling Mount for Hanging Bags: If you’re installing a hanging bag, use a strong ceiling mount. Ensure it’s fixed into a beam or joist for secure support.
  • Height Adjustment: The bag’s height should be adjustable. A child should be able to hit the middle of the bag without straining.
  • Test Stability: After setting up the bag, give it a test to check its stability. It shouldn’t wobble or tip over easily.
  • Instruction Reminder: Show the child how to use the bag correctly. A quick recap of proper technique can prevent misuse and injuries.

Setting up the punching bag correctly can greatly enhance a child’s boxing experience. It provides them with a stable and secure environment to develop their skills safely.

Punching Bag for Kids

Maintenance and Cleaning of Kids’ Punching Bags

Once your child’s punching bag is all set up, regular maintenance and cleaning are important to keep it in good condition and ensure hygiene. Here’s how you can take care of the punching bag for kids:

  • Wipe Down Regularly: Clean the bag’s surface with a damp cloth to remove sweat and dirt after each session.
  • Inspect for Damage: Look over the bag often for any signs of wear or tear. Fix small rips before they get worse.
  • Sanitize the Bag: Use a gentle cleaner to disinfect the bag, especially if multiple kids use it.
  • Keep Dry: Ensure the punching bag is dry at all times. Moisture can lead to mildew and wear out the material faster.
  • Store Properly: If the punching bag is not in use for a while, store it in a cool, dry place.

By following these simple maintenance and cleaning tips, the punching bag for kids will last longer and provide many hours of safe and fun exercise.

Punching Bag for Kids

Popular Brands and Price Range for Kids’ Punching Bags

Identifying popular brands and a reasonable price range is essential when shopping for a punching bag for kids. Here are some reputable brands to consider:

  • Century: Known for their high-quality materials, Century offers a range of punching bags for kids, with prices typically starting from $50 and up.
  • Everlast: A staple in boxing gear, Everlast provides durable punching bags suitable for children, with prices often ranging between $30 and $100.
  • Ringside: Catering to budding boxers, Ringside’s kids’ punching bags offer great quality and are priced from about $40 to $120.
  • Title Boxing: Title Boxing delivers good value with reliable and sturdy bags for kids, with prices generally between $35 and $100.

When setting a budget, most punching bags for kids fall within the $20 to $150 price range. Factors such as size, materials, and brand reputation will influence the price. Keep an eye out for sales or discounts to grab a good deal. Remember to factor in additional costs for gloves and mounting equipment if not included. By selecting a trusted brand within your budget, you ensure a safe and enjoyable experience for your child.


Maximize Your Workout with a Standing Punching Bag

Benefits of Using a Standing Punching Bag

A standing punching bag offers several advantages for individuals aiming to enhance their fitness routine. Here are some of the benefits:


Versatility: Unlike hanging bags, a standing punching bag requires no ceiling support. It allows you to place it anywhere, making it ideal for home gyms or limited spaces.

Stability: Good quality standing punching bags come with a base that can be filled with sand or water, providing a sturdy and reliable hit surface. This feature ensures the bag stays put during vigorous workouts.

Mobility: If you need to free up space or adjust your workout area, standing punching bags can be easily moved. This flexibility is perfect for dynamic workout sessions.

Full-Body Engagement: Engaging with a standing punching bag involves your entire body. It helps in improving coordination, balance, and core strength, as you pivot, punch, and dodge.

Safety: With a standing punching bag, there’s less risk of the bag swinging back and causing injury. They are designed to absorb impact effectively, protecting your joints from unnecessary stress.

Adjustability: Many standing punching bags come with adjustable height settings. This feature accommodates various training levels and user heights, ensuring a comfortable workout for everyone.

Incorporating a standing punching bag into your workout regime can greatly enhance your physical conditioning. As you develop your technique, you will see an improvement in your speed, power, and overall fitness. Whether you are a beginner or a seasoned athlete, the standing punching bag is a valuable piece of equipment for a comprehensive workout.

standing punching bag


Choosing the Right Standing Punching Bag

Choosing the right standing punching bag is crucial for effective training. Here are essential factors to consider:

Size and Weight: Match the bag’s size and weight to your training needs. Heavier bags offer more resistance, suitable for strength training. Lighter bags are better for speed and technique work.

Material Quality: Look for durable materials that can withstand frequent punches and kicks. Leather or high-grade synthetic materials are top choices.

Base Stability: Ensure the base is wide and can be filled with sand or water for maximum stability. A stable bag won’t topple over during intense workouts.

Height Adjustability: To accommodate different workout routines, choose a bag with adjustable height settings. This allows for versatile training sessions.

Brand and Price: Consider reputable brands that offer warranty and customer support. Quality matters, but balance it with your budget to make a cost-effective choice.

User Reviews: Read reviews from other users to gauge the bag’s performance and longevity. First-hand experiences provide valuable insights when making a decision.

Remember, investing in the right standing punching bag will augment your training experience. It’s important to align your selection with your fitness goals for the best outcome.

Setting Up Your Standing Punching Bag for Optimal Training

To get the most out of your standing punching bag, proper setup is key. Here’s how to ensure your punching bag is ready for the ultimate workout experience:

Choose the Right Location

Pick a space that is free from obstructions and gives you room to move around. For safety and ease of movement, ensure there’s enough space for at least a full arm’s reach in all directions around the bag.

Secure the Base

Fill the base with sand or water to keep the bag stable. Sand makes the base heavier and more stable, while water is easier to manage and quicker to fill or empty if needed.

Adjust the Height

Set the bag at an appropriate height that matches your own. The top of the punching bag should align with your head or just slightly above to simulate a realistic training opponent.

Test the Stability

Give the bag a few light punches and kicks. Make sure it does not wobble or tip over. If it moves too much, adjust the base filling until it feels solid and secure.

Clear the Area

Remove any nearby objects that could cause injury. This includes furniture, sharp corners, or anything else that might be a hazard as you move around.

By setting up your standing punching bag correctly, you will enhance your training efficiency and safety. With these simple steps, you’re now ready to launch into a full workout that maximizes the benefits of your standing punching bag.

standing punching bag

Core Workouts with a Standing Punching Bag

Enhancing your core strength is vital for overall fitness. A standing punching bag can be an effective tool for core workouts. Here’s how you can use it to target your core muscles:

Engage in Jab-Cross Drills

Start with basic jab-cross combos. Focus on rotating your torso with each punch. This rotation works your obliques and abdominal muscles.

Add Hooks and Uppercuts

Incorporate hooks and uppercuts into your routine. These moves require significant core engagement, as you must pivot and twist your body.

Practice Knee Strikes

Knee strikes are great for engaging your lower abs. Stand close to the bag and drive your knee upward with force. Remember to squeeze your core on impact.

Include Front Kicks

Front kicks work both your core and lower body. Keep your abs tight as you kick. This stabilizes your torso and enhances the workout intensity.

Do Roundhouse Kicks

Roundhouse kicks target your entire core. They demand balance, coordination, and core strength to perform correctly. Keep your movements controlled.

Utilize the Bag for Planks

Place your hands on the bag and hold a plank position. The slight instability of the bag adds intensity to this core-strengthening exercise.

Integrating these exercises into your workout can significantly improve core stability and power. Remember to maintain proper form to prevent injury and maximize benefits. To enhance the challenge, increase the speed or duration of each exercise as your strength improves. Use the standing punching bag as a versatile tool for a well-rounded core workout.

standing punching bag

Advanced Techniques and Combinations on a Standing Punching Bag

Once you’ve mastered basic punches and kicks, you’re ready to explore advanced techniques. A standing punching bag is perfect for practicing combinations that mimic real-life encounters. Here’s how to challenge your skills:

Master the Footwork

Good footwork provides the foundation for advanced moves. Practice moving in and out, side to side, while maintaining your balance.

Power Punches

Mix power punches into your combos. Throw jabs, crosses, and hooks with more force to build strength.

Speed Drills

Work on your quickness with speed drills. Hit the bag with fast punches in succession to enhance reaction times.

Duck and Weave

Include body movement. Duck and weave around the bag as you strike, improving agility.

High-Low Strikes

Combine high and low punches. Target above and below the belt to work different muscle groups.

Blocking and Parrying Techniques

Use the bag to practice defense. Simulate blocking and parrying to prepare for counterattacks.

Create Complex Combos

Develop your own complex combos. Chain different punches and kicks in fluid motions.

Focus on form and precision to benefit the most from advanced techniques. With dedication, these combinations will improve your fitness, coordination, and boxing skills. Use the standing punching bag to push your limits and enjoy a vigorous workout.

Incorporating Cardio and Strength Training with Punching Workouts

To get a balanced workout, combining cardio and strength training with your standing punching bag is key. Here’s how to integrate both for a full fitness regimen:

Intensify with Cardio Punching Drills

Start with rounds of high-paced punching drills. Increase your heart rate and maintain it with consistent movement. This works as great cardio.

Circuit Training

Alternate between fast punching combinations and body-weight exercises. Include push-ups, squats, and lunges for strength. This keeps the heart pumping while building muscle.

Interval Training

Mix intense bursts of activity with shorter rest periods. Use timed rounds to punch hard, then recover. This method improves both cardio fitness and muscular endurance.

Power Training

Focus on throwing each punch with maximum power. This not only builds strength but also adds a cardio element as your heart rate increases with effort.

Endurance Sets

Prolong your punching sessions. Aim for longer rounds to build stamina. This combined approach ensures you’re working on both cardio and strength.

By blending these exercises into your routine, you’ll reap the benefits of a diversified workout. Use the standing punching bag to create a regime that enhances endurance, builds strength, and keeps your heart healthy.

standing punching bag

Maintenance and Care for Your Standing Punching Bag

Taking good care of your standing punching bag will ensure its longevity and performance. Here are some tips to keep your bag in top condition:

Inspect the Bag Regularly

Check for tears or wear and tear before and after workouts. Catching issues early can prevent further damage.

Clean the Surface

Wipe the bag down with a damp cloth. Use mild disinfectant or soap to remove sweat and dirt.

Tighten any Loose Parts

Post-training, make sure to tighten the base and any adjustable parts. This ensures safety and stability during your workouts.

Keep it Indoors

If possible, store your standing punching bag indoors. It prevents weather damage and sun exposure.

Avoid Harsh Chemicals

Steer clear of harsh cleaning agents. They can break down the material of your bag.

Refresh the Base

Every few months, empty and refill the base with fresh sand or water. This maintains the bag’s stability.

Rotate Training Areas

Occasionally move your bag to even out the wear. This can prevent imbalances in the bag’s shape.By following these care steps, you can maintain your standing punching bag for years. Routine checks and cleanings will keep it looking new and functioning well. Remember, a well-maintained bag is key for a safe and effective workout.

standing punching bag

Making the Most of Your Workout Space with a Standing Punching Bag

When space is limited, a standing punching bag becomes especially useful. Here’s how to optimize your workout area:

Position Your Bag Strategically

Place your bag in a corner or against a wall. This saves space and allows for full movement around three sides.

Use Multipurpose Equipment

Choose equipment that serves multiple functions. This reduces clutter and maximizes your training area.

Keep the Area Organized

Store your gloves, wraps, and other gear neatly. A tidy space promotes a better workout environment.

Foldable Mats for Floor Work

Use foldable mats for stretching or ground exercises. Tuck them away after use to free up the floor.

Utilize Vertical Storage

Install shelves or hooks to hold your fitness accessories. This keeps the floor clear and easy to navigate.

Mirror Installation

Place mirrors on the wall to monitor your form. This also makes the space seem larger.

Every training session with your standing punching bag can be effective with a well-organized space. Use these tips to ensure your workout area is efficient and motivating. Keeping in mind you don’t need a large area, just a well-thought-out one.


Kids Punching Bag Essentials: Choosing the Right One

Importance of a Kids Punching Bag

Children need physical activity. It boosts their health and teaches discipline. A kids punching bag serves this purpose well. It allows children to channel energy in a positive way. They learn motor skills and build confidence. With a kids punching bag, fun combines with fitness. Kids develop coordination and strength too. It’s also a safe outlet for stress and frustration. Having such a bag at home encourages a healthy lifestyle early. Plus, it introduces kids to sportsmanship and goal setting. A kids punching bag can be a fun part of childhood. It’s more than just a toy; it’s a tool for growth.

kids punching bag

Factors to Consider When Buying a Punching Bag for Kids

When shopping for a kids punching bag, several factors come into play. These factors ensure the bag suits your child’s age, size, and skill level. Let’s explore these considerations to make an informed purchase.

Size and Weight

The size and weight of the punching bag should match your child’s size and strength. A bag that’s too heavy may discourage them or lead to injuries. Usually, bags for kids weigh less than those for adults. A good rule of thumb is choosing a bag that is half your child’s weight. This provides enough resistance without being overwhelming.

Material and Durability

Kids can be tough on their toys, and punching bags are no exception. Look for bags made from high-quality, durable materials like leather or reinforced vinyl. These materials can withstand repeated use and are easy to clean. Bags with double-stitched seams offer extra endurance. A durable bag ensures it lasts as your child grows and their skills improve.

Type of Filling

The filling in a kids punching bag affects the impact and experience. Common fillings include foam, fiber, or sand. Foam provides a soft impact, making it ideal for younger children. Fiber and sand make the bag denser and more suitable for older kids. Some bags also come with adjustable filling, allowing you to change the weight as your child progresses.

Safety First: Ensuring the Punching Bag is Safe for Children

When picking a kids punching bag, safety tops the list. Kids should have fun without risks. Choose bags with safety features that protect them while they play and exercise.

Stable Mounting

The bag must stay in place during use. A stable mount prevents tipping and accidents. Check that the base or support is strong. For hanging bags, secure attachments to the ceiling or stand are vital. Always follow manufacturer guidelines for installation to ensure the mount can hold the bag’s weight.

Appropriate Padding

Padding absorbs shock and guards against injury. The outer shell of the bag should be soft yet durable. It should not have any hard surfaces or sharp edges. A bag with the right padding reduces the risk of bruises or strains. Make sure the padding is consistent all around the bag for complete protection.

kids punching bag

Different Types of Kids Punching Bags

When selecting a kids punching bag, the variety in types offers different benefits and drawbacks. Choosing the right type ensures the bag fits your child’s skill level and play area.

Freestanding vs Hanging Bags

Freestanding and hanging bags are the main types for kids.They’re ideal for limited spaces. They sit on a base, usually filled with water or sand. Hanging bags need a strong support beam or stand. They provide a more authentic boxing experience. However, they need more space and a secure installation.

Hanging bags can swing, which helps in training reflexes. They require a little more work to install compared to freestanding ones. Choose hanging bags if you have a dedicated space and want to emulate a gym environment.

Freestanding bags are better for younger children or beginners. They might not give the exact boxing feel but are safer and more convenient. Consider these when space and adjustability are prime concerns.

Inflatable Punching Bags

Inflatable punching bags are another option, especially for younger kids or toddlers. They’re lightweight and pose the least risk for injury. These bags are inflated with air, making them easy to store when not in use. They are less durable than other types but can be a good starting point for introducing kids to punching bags.

Remember, inflatable bags won’t satisfy the needs of older kids or those with higher skill levels. But they’re perfect for safe play and introducing basic punching techniques to toddlers.

In summary, each type of kids punching bag offers unique features. Freestanding bags offer convenience and safety, hanging bags deliver a more realistic training experience, and inflatable bags provide an introductory level for toddlers. Consider the age and skill level of your child, as well as the space available at home, when making your choice.

kids punching bag

Features to Look For

When scouting for the perfect kids punching bag, certain features stand out. These features ensure longevity and enhance the overall experience for the child. Here we’ll discuss the key traits to seek out.

Adjustability and Growth Potential

A good kids punching bag grows with your child. It should adapt to their increasing skill and strength. Look for bags with adjustable height. This way, you can tweak it to fit your kid as they shoot up. Some bags also come with variable weight options. You can add or remove filling to match the child’s development. A versatile bag caters to a wide age range, making it a smart investment for the future.

Vibrant Designs to Engage Kids

The look of a punching bag can be just as important as its function. Bright colors and cool patterns grab a child’s attention. They turn the punching bag into an inviting play item. Some come adorned with favorite cartoon characters or superheroes. Choose a design that sparks joy and motivation in your child. A visually appealing bag encourages regular use, aiding in consistent physical activity.

kids punching bag

Installing Your Kids Punching Bag

Once you’ve selected the perfect kids punching bag, it’s time to set it up safely. Proper installation is essential for the bag to function properly and for your child to use it safely. Here’s what to keep in mind along with a step-by-step guide.

Step-by-Step Installation Guide

  1. Identify the Location: Choose a spot that is free of obstructions and on a stable surface.
  2. Gather Your Tools: Depending on the bag type, you may need tools like screws, a pump, or a wrench.
  3. Assemble the Base: For freestanding bags, fill the base with water or sand for stability.
  4. Secure the Bag: If using a hanging bag, attach it firmly to a ceiling mount or stand.
  5. Adjust the Height: Make sure the bag is at the right height according to your child’s reach.
  6. Test Stability: Gently push the bag to ensure it’s stable and won’t tip over easily.

By following these steps, you can ensure the kids punching bag is ready for action.

Maintenance and Care Tips

To keep the kids punching bag in top shape, regular maintenance is important. Here are tips to help:

  • Wipe the Surface: After each use, clean the bag with a wet cloth to remove dirt and sweat.
  • Check for Wear: Periodically inspect the bag for tears or loose seams and repair if necessary.
  • Stability Check: Regularly ensure the base is filled and the mounting remains secure.
  • Air Check: For inflatable bags, maintain the appropriate air pressure to avoid deflation.

With proper care, your kids punching bag will provide your child with endless hours of fun and fitness.

kids punching bag

Where to Buy Kids Punching Bags

Finding the right kids punching bag can be a snap. Many options are available to fit any preference or budget. So, where should you start your search? Explore these popular choices below.

Online Retailers

Online shopping offers convenience and variety when buying a kids punching bag. Most major online stores, like Amazon, Walmart, and Target, have a range of options. You can compare prices, read reviews, and check ratings with ease. Look for online retailers that provide detailed product descriptions and clear images. This helps in making an informed decision. Also, watch for deals and discounts, especially during holidays or back-to-school sales. Remember to factor in shipping costs and delivery times. Amazon Prime members, for instance, can benefit from free, fast shipping.

Specialty Sports Stores

If you prefer to shop in person, specialty sports stores are your go-to. Stores like Dick’s Sporting Goods or Academy Sports + Outdoors have punching bags on display. You can see and touch the products before buying. This allows for a hands-on assessment of size, material, and build quality. Staff at these stores can also provide expert advice tailored to your child’s needs. They may even have in-store promotions or discounts unavailable online. Before you visit, call ahead to ensure they have kids punching bags in stock. This saves time and ensures you don’t make a trip for nothing.


Maximize Workout Efficiency with a Free Standing Punching Bag

The Benefits of a Free Standing Punching Bag

Incorporating a free standing punching bag into your workout regimen offers a multitude of benefits. Not only does it stand as a testament to convenience, but it also endows users with enhanced training opportunities. This section delves into the advantages of using a free standing punching bag, with a focus on stability, flexibility, and the practicality for home gym setups.

Improved Stability and Flexibility

Training with a free standing punching bag can greatly improve your stability and flexibility. Here are some key points:

  • Stability: The base of a free standing punching bag is typically weighted, which provides a solid anchor for the bag, allowing you to strike with force without the bag toppling over.
  • Flexibility: Unlike fixed heavy bags, a free standing punching bag can be moved easily. This allows you to train from different angles and positions, enhancing your overall body flexibility.
  • Consistent Resistance: Each strike against the bag offers consistent resistance, which helps in developing core strength, balance, and coordination.

Space-Saving Solution for Home Gyms

A free standing punching bag is an ideal choice for those with limited space:

  • Compact Design: The streamlined design takes up less room than hanging bags, making it perfect for smaller areas.
  • Portability: Being free standing and often featuring a lighter overall weight, these bags can be relocated with ease, allowing one to transform any room into a training space.
  • Ease of Setup: Without the need for ceiling mounts or wall brackets, setting up is straightforward, which means you can start your workout without complex installations.

By considering these factors, it’s clear that a free standing punching bag not only optimizes your training but also offers practical solutions for home fitness enthusiasts.

free standing punching bag

Choosing the Right Free Standing Punching Bag

Selecting the ideal free standing punching bag is crucial for your workout’s success and longevity. Two key aspects to focus on are the bag’s material and its dimensions, which dictate its durability and suitability for your training style. Let’s explore these in detail.

Material Quality and Durability

When assessing a free standing punching bag, consider the material used. A durable outer layer ensures the bag withstands repeated strikes without tearing. Bags covered in quality synthetic leather or reinforced vinyl offer longevity. Look for thick padding that retains its shape over time for consistent performance.

A robust internal structure is also vital. It should resist wear and tear from powerful punches and kicks. Scan for reviews or product specifications that highlight the bag’s endurance against frequent use. High-quality materials may cost more upfront, but they prevent frequent replacements, saving money in the long run.

Height and Weight Considerations

The right height of a free standing punching bag ensures comfortable training for users of all sizes. Adjustable height bags cater to varied body types and are ideal for multiple users.

The weight of the bag is another essential factor. A heavier base offers stability and prevents the bag from tipping during intensive workouts. However, too much weight undermines its portability. Striking a balance is key. Select a weight that anchors the bag firmly yet allows for easy movement when needed.

By paying attention to material quality and careful height and weight analysis, you can find a free standing punching bag that enhances your workout experience while providing a lasting piece of training equipment.

free standing punching bag

How to Set Up Your Free Standing Punching Bag

Setting up your free standing punching bags correctly is key to ensuring a safe and effective workout. With the right setup, you can maximize the bag’s benefits and enjoy your training sessions without interruptions.

Choosing the Ideal Location

Selecting the perfect spot for your free standing punching bag is the first step:

  • Space: Choose an area that provides enough room for movement around the bag. A minimum of 4-5 feet of free space around it is ideal.
  • Floor Surface: Opt for a flat, non-slip surface to prevent the bag from moving while you train. Avoid placing it on uneven floors which may cause instability.
  • Away from Breakables: Ensure the location is away from windows, mirrors, and anything that might break with a stray punch.
  • Visibility: Place your bag where you can see it easily. It helps you stay motivated and reminds you to train regularly.
  • Accessibility: Easy access to your bag without moving furniture every time encourages consistent workouts.

Proper Filling Technique for Stability

A solid base is crucial for your bag’s stability:

  • Material Choice: Sand is a popular choice for base filling due to its weight and density. Alternatively, water can be used but tends to provide less stability.
  • Even Distribution: While filling, ensure the weight is evenly distributed to prevent the bag from leaning or tipping over during use.
  • Check for Leaks: If using water, check the base regularly for leaks. Water on your training surface can lead to slips and injuries.
  • Fill Level: Don’t overfill. Leave some space for the material to move which helps absorb shocks and reduce the risk of the base cracking.

By taking care to choose an adequate location and using the proper filling technique, your free standing punching bag will be set up for optimal stability, paving the way for an efficient and safe workout experience.

Techniques and Workouts for Your Free Standing Punching Bag

Once you’ve selected and set up your free standing punching bags, mastering various techniques and structured workouts is pivotal. Here’s a guide to begin harnessing the full potential of your free standing punching bag.

Basic Punches and Combinations

Developing your boxing skill set starts with the fundamentals. To kick off, try these simple strikes:

  • Jab: A quick, straight punch with your lead hand. It sets up combinations and gauges distance.
  • Cross: A powerful straight punch with your rear hand. It follows the jab for a basic one-two combo.
  • Hook: A semi-circular punch aimed at the side of the bag. It targets the opponent’s head or body in a real fight.
  • Uppercut: A vertical punch that comes from below. It is potent when delivered to the underside of the bag, simulating an opponent’s chin.

Pair these punches into combinations for a more dynamic workout. For instance, a jab-cross-hook sequence engages various muscle groups and enhances coordination.

Incorporating Movement and Defense

Your free standing punching bags isn’t just for striking. Use it to improve footwork and defense as well.

  • Circle the Bag: Practice moving around the bag while maintaining a fighter’s stance. This builds agility and simulates a moving opponent.
  • Duck and Weave: Incorporate body movement to dodge imagined hits. This sharpens reflexes and defensive skills.
  • Block and Counter: Pretend to block an incoming punch, then counter-attack the bag. It drills reaction times and counter-striking.

By adding movement and defensive tactics to your workout, you transform a static punching session into a full-fledged boxing experience. The free standing punching bag serves as a silent sparring partner, enhancing your abilities with every session.

free standing punching bag

Maintaining Your Free Standing Punching Bags

Regular maintenance ensures your free standing punching bag stays in top condition. Here are easy ways to keep your bags like new.

Cleaning and Care Tips

Keep your bag clean and odor-free with these tips:

  • Wipe Down Regularly: Use a damp cloth to clean the bag after each workout. This removes sweat and prevents bacteria build-up.
  • Air Out: If possible, place your bag in a well-ventilated area to air out.
  • Avoid Harsh Chemicals: Use gentle cleaning solutions to prevent damaging the material.
  • Check for Wear and Tear: Inspect the bag often for small rips or loose seams.
  • Keep Dry: Ensure the bag is dry before storing to avoid mold or mildew.

When to Replace or Repair

Sometimes, a bags may need more than a quick clean. Look for these signs:

  • Surface Damage: Large tears or punctures in the bag mean it’s time to replace or repair.
  • Base Issues: If the base leaks or doesn’t hold its fill material, consider a replacement.
  • Shifting Form: Padding that doesn’t return to shape affects your workout and needs fixing.
  • Inconsistent Resistance: When strikes feel different or the bag wobbles, it’s time for a check-up.

By following these simple cleaning and care instructions, your free standing punching bag should remain a reliable partner for your workouts. Watch for key signs to know when maintenance is due or if it’s time to invest in a new bag.

free standing punching bag

Advanced Training Tips

To truly excel in your workouts with a free standing punching bag, you’ll need to push beyond the basics. Advanced training tips can help you increase power, speed, and refine your reflexes. These techniques challenge not only your physical capabilities but also your mental resilience.

Power Training Routines

Power training routines involve exercises that develop explosive strength. Here’s how to enhance your power:

  • Plyometric Push-ups: These increase upper body power. Perform them by pushing up with enough force to lift your hands off the ground.
  • Heavy Bag Throws: Lift the bag slightly and thrust it forward with force. Return to your stance quickly.
  • Power Strikes: Use maximum force to deliver heavy punches or kicks. Focus on form to prevent injury.
  • Resistance Bands: Attach resistance bands to your bag. Punch against the tension to elevate your power.

Power training should be intense but brief. Take adequate rest between sets to recover fully.

Speed and Reflex Drills

For better speed and reflexes, incorporate these drills:

  • Rapid-Fire Punches: Throw quick, consecutive punches for short bursts. Aim for speed over power.
  • Combo Switches: Change your punch combination at random intervals. This sharpens your mind and reflexes.
  • Slip Bag Drills: Hang a slip bag nearby. Use it to practice head movement and dodging.
  • Reaction Balls: Bounce a small ball off the wall. Catch it with alternate hands to boost hand-eye coordination.

Always warm up before starting speed drills to prevent muscle strains. Quick reflexes come from consistent, focused practice.

Regular training with power and speed drills will take your free standing punching bag workouts to new heights, reinforcing your technique and improving overall fitness.

free standing punching bag

Free Standing Punching Bag vs Hanging Heavy Bags

Deciding between a free standing punching bag and a hanging heavy bags is important for your workout needs.

Pros and Cons of Each Type

Free Standing Punching Bag Pros:

  • Portability: You can move it easily, which is great for changing workout spaces.
  • Easy Setup: No need for drilling or mounting, so you start training faster.
  • Space-Efficient: Takes up less room, making it a good choice for small spaces.

Free Standing Punching Bag Cons:

  • Stability: May tip over if the base isn’t heavy enough, unlike hanging bags.
  • Impact Absorption: Less capable of absorbing heavy strikes compared to heavier hanging bags.
  • Limited Movement: Strikes can cause excessive swaying, unlike fixed hanging bags.

Hanging Heavy Bag Pros:

  • Sturdy: Offers more resistance due to its fixed nature, which is good for power training.
  • Diverse Training: Allows for a wider range of movements and techniques.
  • Better Rebound: Gives a more realistic rebound effect, enhancing timing and reflex skills.

Hanging Heavy Bag Cons:

  • Installation: Requires secure mounting, which might be a challenge in some homes.
  • Space Requirement: Needs more room to swing, which can limit placement options.
  • Immobility: Once set up, it’s not easy to move or adjust.

Your choice between a free standing punching bags and a hanging heavy bag should depend on your training goals, space availability, and workout preference. Both have unique benefits, so consider what fits best into your fitness routine.


Back To Top
+